

🔥个人主页:@草莓熊Lotso
🎬作者简介:C++研发方向学习者
📖个人专栏: 《C语言》 《数据结构与算法》《C语言刷题集》《Leetcode刷题指南》
⭐️人生格言:生活是默默的坚持,毅力是永久的享受。
前言:在上篇博客中我们进行了双向链表概念的理解以及哨兵位头节点的初始化,那么我们这次将会继续来实现双向链表中的其它接口,还是一样,分布实现后再把所有的代码展示出来
目录
一.双向链表的尾插
二.双向链表的头插
三. 双向链表的尾删
四.双向链表的头删
五.双向链表查找
六.双向链表在指定位置之后插入
七.双向链表指定位置删除
八.双向链表的销毁以及初始化部分的优化
九.代码展现
List.h:
List.c:
test.c:
一.双向链表的尾插
--实现尾插之前,我们需要先实现一个申请新节点的操作,方便后续的使用,具体操作如下:
ListNode* LTBuyNode(LTDataType x)
{ListNode* newcode = (ListNode*)malloc(sizeof(ListNode));newcode->data = x;newcode->next = newcode;newcode->prev = newcode;return newcode;
}
--利用这个我们还可以优化前面的头节点初始化,大家可以自己先尝试一下,接下来我们还是回到尾插的实现
List.c:
//尾插
void LTPushBack(ListNode* phead, LTDataType x)
{assert(phead);//申请一个新节点ListNode* newcode = LTBuyNode(x);//phead->prev newcode phead//先连newcodenewcode->prev = phead->prev;newcode->next = phead;//再把phead->prev的先处理掉phead->prev->next = newcode;phead->prev = newcode;
}
重点提示:
我们先申请一个新节点,再把新节点的前驱指针和后继指针先对应的连上,再处理受到影戏的两个节点,因为要通过头节点找d3,所以我们先处理phead->prev,最后再处理phead

--在测试之前,我们还需要定义一个打印的接口,便于我们观察
//打印
void LTPrint(ListNode* phead)
{ListNode* pcur = phead->next;while (pcur != phead){printf("%d -> ", pcur->data);pcur = pcur->next;}printf("\n");
}
--这里的pucr是从第一个节点开始的,也就是哨兵位的下一个节点,直达回到哨兵位结束,哨兵位不打印出来
test.c:
#include"List.h"void test1()
{//初始化,明天优化ListNode* plist = NULL;LTInit(&plist);//尾插LTPushBack(plist, 1);LTPushBack(plist, 2);LTPushBack(plist, 3);LTPushBack(plist, 4);LTPrint(plist);
}
int main()
{test1();return 0;
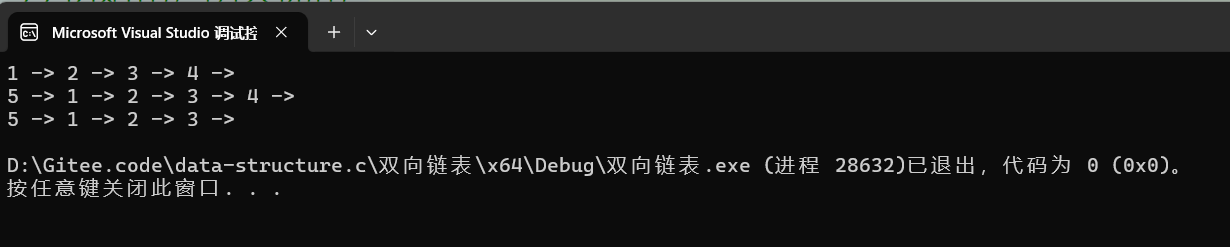
}--测试完成,打印没有问题,退出码为0

二.双向链表的头插
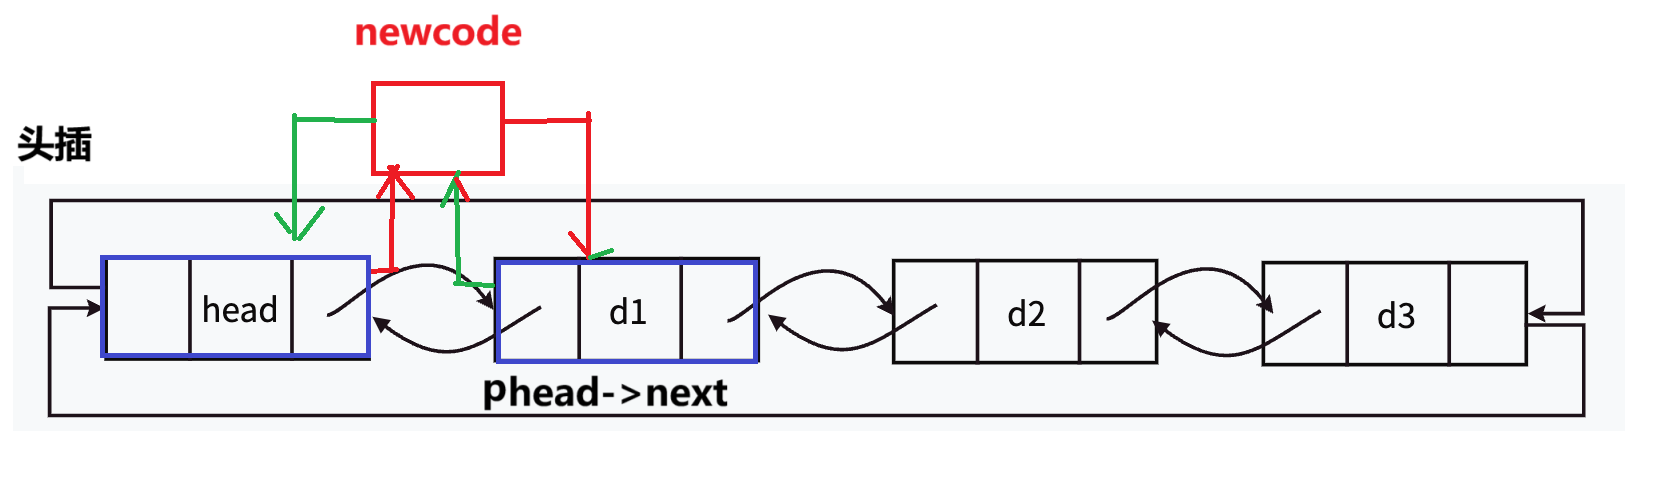
--双向链表的头插实现起来也不会很难,但注意这里的头插可不是插入在哨兵位节点的前面哈,而是第一个节点的前面,一定不要搞错了
List.c:
//头插
void LTPushFront(ListNode* phead, LTDataType x)
{assert(phead);ListNode* newcode = LTBuyNode(x);//phead newcode phead->nextnewcode->prev = phead;newcode->next = phead->next;phead->next->prev = newcode;phead->next = newcode;
}
重点提示:
这里的大体思路和尾插一样,找到和申请的新节点有关的两个节点,先把newcode的前驱指针和后继指针指向对应位置,再处理需要用phead寻找的phead->next,最后再把phead需要处理的连上就可以了
test.c:
#include"List.h"void test1()
{//初始化,明天优化ListNode* plist = NULL;LTInit(&plist);//尾插LTPushBack(plist, 1);LTPushBack(plist, 2);LTPushBack(plist, 3);LTPushBack(plist, 4);LTPrint(plist);//头插LTPushFront(plist, 5);LTPrint(plist);
}
int main()
{test1();return 0;
}
--测试完成,打印没有问题,头插了一个5,退出码为0

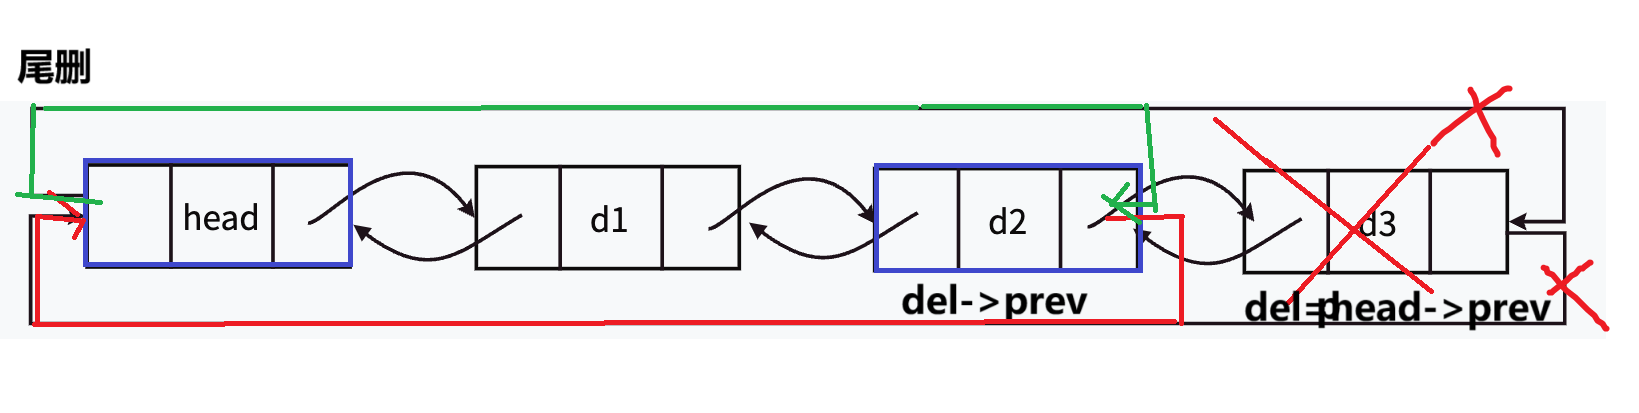
三. 双向链表的尾删
--实现尾删之前,我们需要先实现一个判空的接口,如果链表为空则不能继续删除了,具体操作如下:
//判空
bool LTEmpty(ListNode* phead)
{assert(phead);return phead->next == NULL;
}
List.c:
//尾删
void LTPopBack(ListNode* phead)
{assert(!LTEmpty(phead));ListNode* del = phead->prev;//del->prev del pheaddel->prev->next = phead;phead->prev = del->prev;free(del);del = NULL;
}
重点提示:
我们先进行一下判空,如果链表不为空继续后面的操作,首先我们需要删除的节点通过phead->prev找到,我们定义一个del,然后尾删操作受到影响的其它两个节点一个为del->prev,一个为head,把它们两个需要连的连上,再释放掉del指针就可以了
test.c:
#include"List.h"void test1()
{//初始化,明天优化ListNode* plist = NULL;LTInit(&plist);//尾插LTPushBack(plist, 1);LTPushBack(plist, 2);LTPushBack(plist, 3);LTPushBack(plist, 4);LTPrint(plist);//头插LTPushFront(plist, 5);LTPrint(plist);//尾删LTPopBack(plist);LTPrint(plist);
}
int main()
{test1();return 0;
}
--测试完成,打印没有问题,删掉了尾部的4,退出码为0
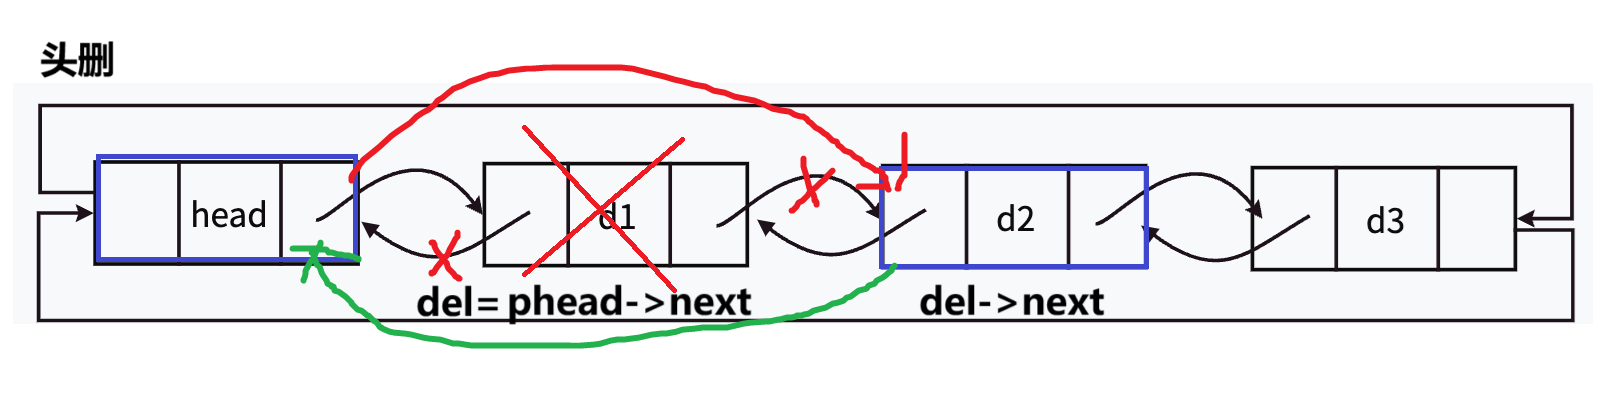
四.双向链表的头删
List.c:
//头删
void LTPopFront(ListNode* phead)
{assert(!LTEmpty(phead));ListNode* del = phead->next;//phead del del->nextphead->next = del->next;del->next->prev = phead;free(del);del = NULL;
}
重点提示:
头删操作的思路和尾删相似,先还是判空,然后后续需要通过del记录下phead->next这个我们要删除的节点,再找到两个受到影响的节点,对应连上,最后释放掉del就可以了
test.c:
#include"List.h"void test1()
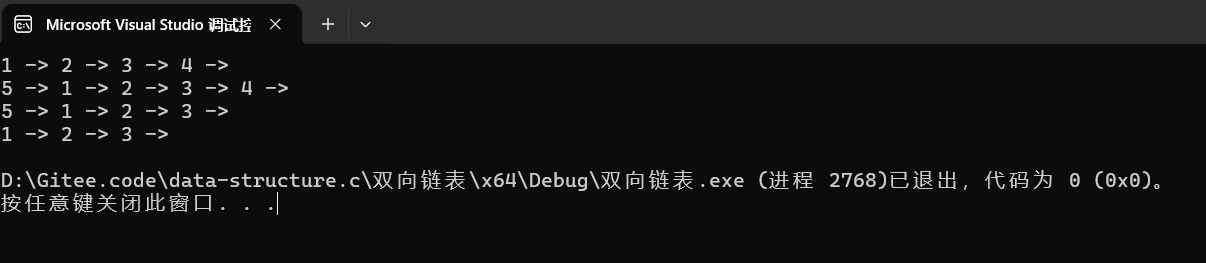
{//初始化,明天优化ListNode* plist = NULL;LTInit(&plist);//尾插LTPushBack(plist, 1);LTPushBack(plist, 2);LTPushBack(plist, 3);LTPushBack(plist, 4);LTPrint(plist);//头插LTPushFront(plist, 5);LTPrint(plist);//尾删LTPopBack(plist);LTPrint(plist);//头删LTPopFront(plist);LTPrint(plist);
}
int main()
{test1();return 0;
}--测试完成,打印没有问题,头删掉了5,退出码为0
五.双向链表查找
--在实现指定位置之前插入以及删除之前,我们需要实现一个查找的接口
List.c:
//查找
ListNode* LTFind(ListNode* phead,LTDataType x)
{assert(!LTEmpty(phead));ListNode* pcur = phead->next;while (pcur != phead){if (pcur->data == x)return pcur;pcur = pcur->next;}return NULL;
}
重点提示:
遍历的方法和打印是一样的,如果在遍历过程中找到了我们需要查找的数据就返回当前位置的节点,没有就返回空
test.c:
#include"List.h"void test1()
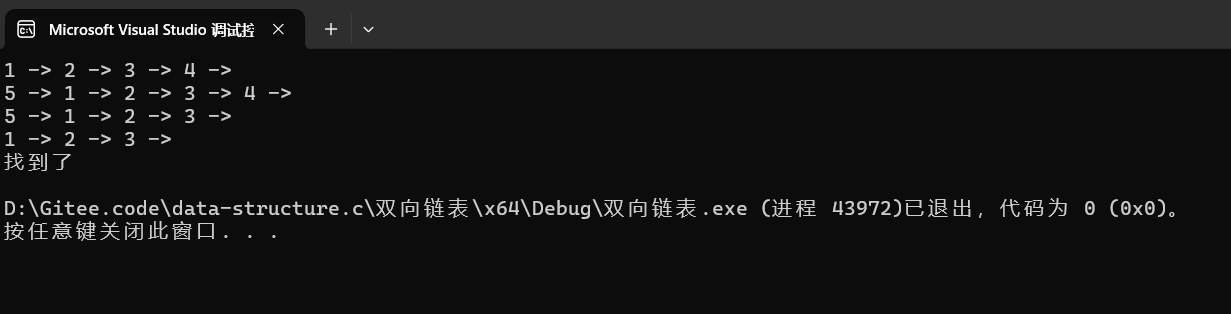
{//初始化,明天优化ListNode* plist = NULL;LTInit(&plist);//尾插LTPushBack(plist, 1);LTPushBack(plist, 2);LTPushBack(plist, 3);LTPushBack(plist, 4);LTPrint(plist);//头插LTPushFront(plist, 5);LTPrint(plist);//尾删LTPopBack(plist);LTPrint(plist);//头删LTPopFront(plist);LTPrint(plist);//查找ListNode*pos=LTFind(plist, 2);if (pos)printf("找到了\n");elseprintf("没找到\n");
}
int main()
{test1();return 0;
}--测试完成,能够找到,退出码为0
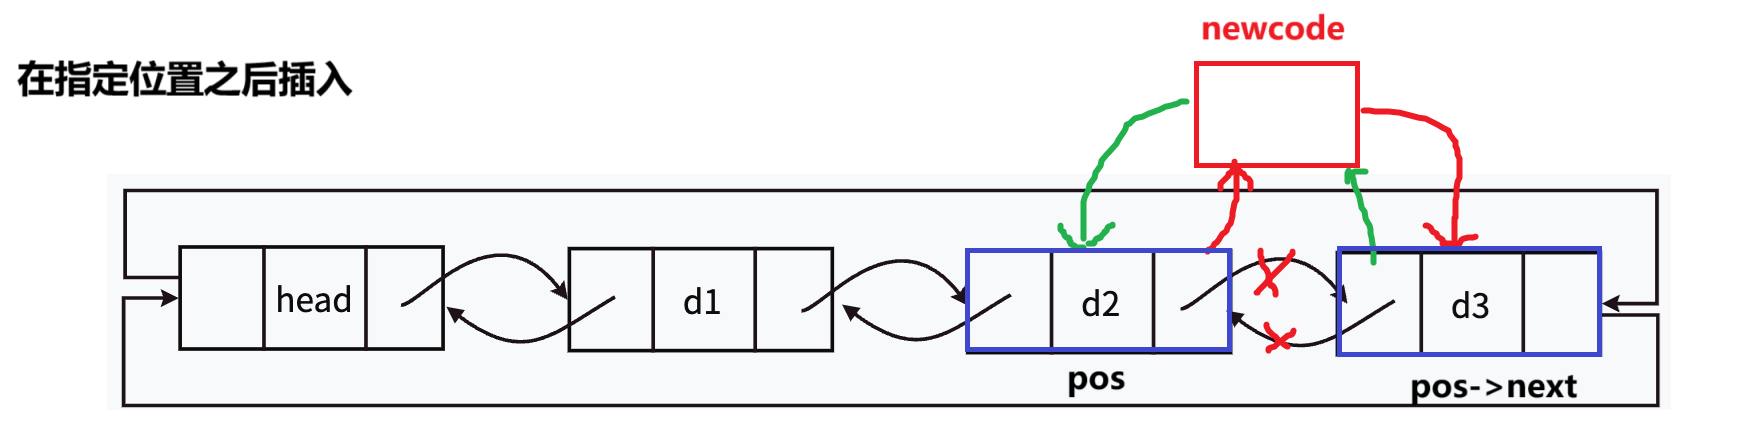
六.双向链表在指定位置之后插入
--我们在这里先实现一下在指定位置之后的插入操作,大家后续可以自己再尝试一下在指定位置之前插入
List.c:
//指定位置之后插入
void LTInsert(ListNode* pos, LTDataType x)
{assert(pos);ListNode* newcode = LTBuyNode(x);//pos newcode pos->nextnewcode->prev = pos;newcode->next = pos->next;pos->next->prev = newcode;pos->next = newcode;}
重点提示:
--在指定位置之后的插入操作其实也没有很难,还是先断言,后续就是先申请一个新节点,跟头插尾插一样,先处理newcode的前驱指针和后继指针,然后再是受到影响的两个节点里面先处理需要通过pos节点找到的pos->next节点,最后再处理pos
test.c:
#include"List.h"void test1()
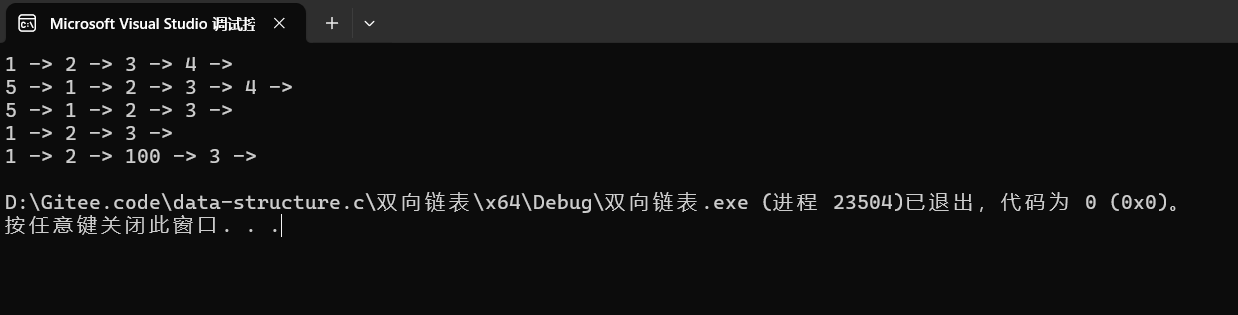
{//初始化,明天优化ListNode* plist = NULL;LTInit(&plist);//尾插LTPushBack(plist, 1);LTPushBack(plist, 2);LTPushBack(plist, 3);LTPushBack(plist, 4);LTPrint(plist);//头插LTPushFront(plist, 5);LTPrint(plist);//尾删LTPopBack(plist);LTPrint(plist);//头删LTPopFront(plist);LTPrint(plist);//查找ListNode* pos = LTFind(plist, 2);//指定位置之后插入LTInsert(pos, 100);LTPrint(plist);}
int main()
{test1();return 0;
}--测试完成,打印没有问题,在2后插入了100,退出码为0
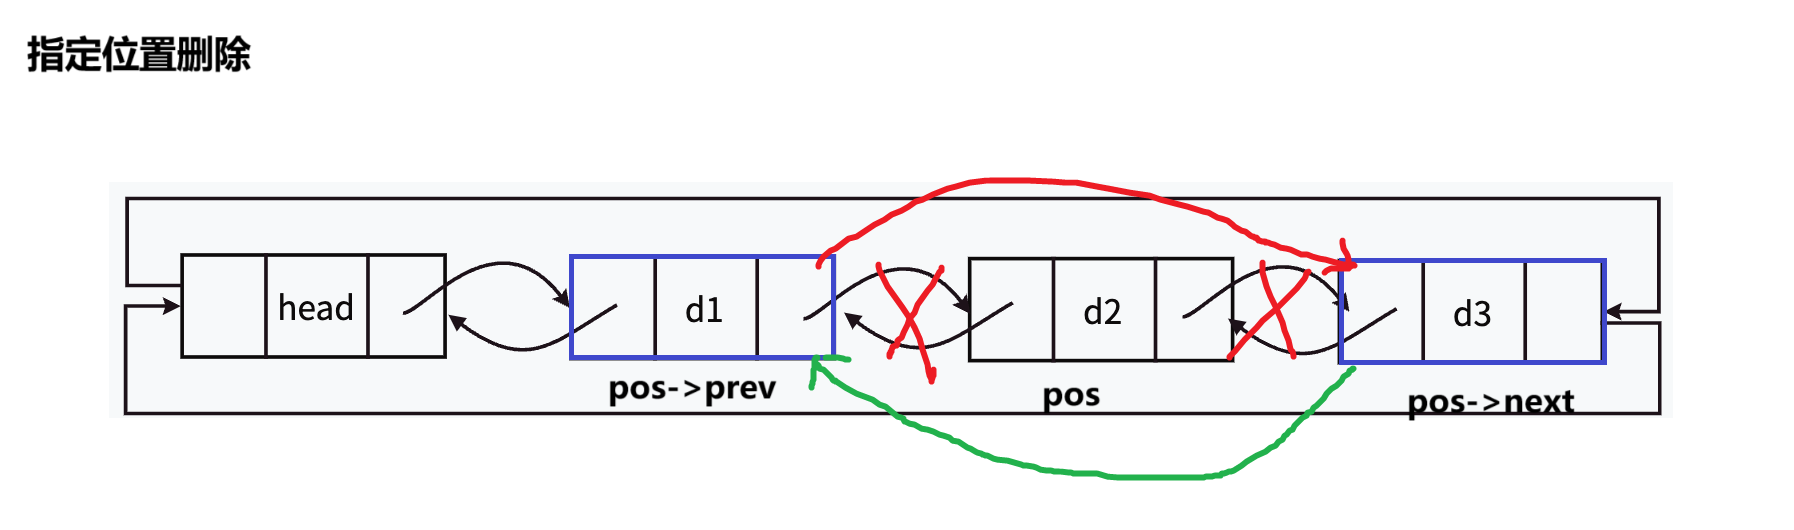
七.双向链表指定位置删除
List.c:
//指定位置删除
void LTErase(ListNode* pos)
{assert(pos);//pos->prev pos pos->nextpos->prev->next = pos->next;pos->next->prev = pos->prev;free(pos);pos = NULL;
}
重点提示:
先断言,后续操作思路和头删尾删也很像,这里是通过pos指针找到两个受到影响的节点,我们直接处理好这两个节点之前的关系就可以了,最后再直接释放掉pos
test.c:
#include"List.h"void test1()
{//初始化,明天优化ListNode* plist = NULL;LTInit(&plist);//尾插LTPushBack(plist, 1);LTPushBack(plist, 2);LTPushBack(plist, 3);LTPushBack(plist, 4);LTPrint(plist);//头插LTPushFront(plist, 5);LTPrint(plist);//尾删LTPopBack(plist);LTPrint(plist);//头删LTPopFront(plist);LTPrint(plist);//查找ListNode* pos = LTFind(plist, 2);//指定位置之后插入LTInsert(pos, 100);LTPrint(plist);//指定位置删除LTErase(pos);LTPrint(plist);
}
int main()
{test1();return 0;
}
--测试完成,打印没有问题,退出码为0
八.双向链表的销毁以及初始化部分的优化
--在这里我们先来实现一下双向链表的销毁,具体的遍历操作和之前一样,我们在遍历过程中每次销毁一个节点之前先把它的下一个节点存下来,最后销毁完后利用存下来的使它来到下一个位置,具体操作代码如下
//销毁
void LTDestory(ListNode* phead)
{ListNode* pcur = phead->next;while (pcur != phead){ListNode* next = pcur->next;free(pcur);pcur = next;}free(phead);phead = NULL;
}
--大家需要注意的是我们这里其实按道理来说是要用二级指针的,但是前面其它接口都用的一级,这里和初始化部分也需要统一比较好点,我们可以在测试文件中最后销毁完手动将头节点置为空,那么我们的初始化操作的优化我也直接给大家展示为代码了,其实就是改变了一下函数的返回类型,测试文件中也有所修改,在最后的代码展现的时候大家可以看看
//头节点初始化的优化
ListNode* LTInit()
{ListNode* phead = LTBuyNode(-1);return phead;
}
九.代码展现
List.h:
#pragma once
#include<stdio.h>
#include<stdlib.h>
#include<assert.h>
#include<stdbool.h>typedef int LTDataType;
typedef struct ListNode
{LTDataType data;//前驱指针,指向前一个指针struct ListNode* prev;//后继指针,指向后一个指针struct ListNode* next;
}ListNode;//初始化头节点
void LTInit(ListNode** pphead);
//ListNode* LTInit();
//打印
void LTPrint(ListNode* phead);
//销毁
void LTDestory(ListNode* phead);
//尾插
void LTPushBack(ListNode* phead, LTDataType x);
//头插
void LTPushFront(ListNode* phead, LTDataType x);
//尾删
void LTPopBack(ListNode* phead);
//头删
void LTPopFront(ListNode* phead);
//查找
ListNode* LTFind(ListNode* phead,LTDataType x);
//判空
bool LTEmpty(ListNode* phead);
//指定位置之后插入
void LTInsert(ListNode* pos, LTDataType x);
//指定位置删除
void LTErase(ListNode* pos);
List.c:
#include"List.h"//头节点初始化
void LTInit(ListNode** pphead)
{ListNode* ph = (ListNode*)malloc(sizeof(ListNode));if (ph==NULL){perror("malloc fail!");exit(1);}*pphead = ph;(*pphead)->data = -1;//随便给个不用的就行(*pphead)->prev = *pphead;(*pphead)->next = *pphead;
}//头节点初始化的优化
//ListNode* LTInit()
//{
//	ListNode* phead = LTBuyNode(-1);
//	phead->prev = phead;
//	phead->next = phead;
//	return phead;
//}//打印
void LTPrint(ListNode* phead)
{ListNode* pcur = phead->next;while (pcur != phead){printf("%d -> ", pcur->data);pcur = pcur->next;}printf("\n");
}//销毁
void LTDestory(ListNode* phead)
{ListNode* pcur = phead->next;while (pcur != phead){ListNode* next = pcur->next;free(pcur);pcur = next;}free(phead);phead =NULL;
}
//判空
bool LTEmpty(ListNode* phead)
{assert(phead);return phead->next == NULL;
}ListNode* LTBuyNode(LTDataType x)
{ListNode* newcode = (ListNode*)malloc(sizeof(ListNode));newcode->data = x;newcode->next =newcode;newcode->prev =newcode;return newcode;
}
//尾插
void LTPushBack(ListNode* phead, LTDataType x)
{assert(phead);//申请一个新节点ListNode* newcode = LTBuyNode(x);//phead->prev newcode phead//先连newcodenewcode->prev = phead->prev;newcode->next = phead;//再把phead->prev的先处理掉phead->prev->next = newcode;phead->prev = newcode;
}//头插
void LTPushFront(ListNode* phead, LTDataType x)
{assert(phead);ListNode* newcode = LTBuyNode(x);//phead newcode phead->nextnewcode->prev = phead;newcode->next = phead->next;phead->next->prev = newcode;phead->next = newcode;
}//尾删
void LTPopBack(ListNode* phead)
{assert(!LTEmpty(phead));ListNode* del = phead->prev;//del->prev del pheaddel->prev->next = phead;phead->prev = del->prev;free(del);del = NULL;
}//头删
void LTPopFront(ListNode* phead)
{assert(!LTEmpty(phead));ListNode* del = phead->next;//phead del del->nextphead->next = del->next;del->next->prev = phead;free(del);del = NULL;
}//查找
ListNode* LTFind(ListNode* phead,LTDataType x)
{assert(!LTEmpty(phead));ListNode* pcur = phead->next;while (pcur != phead){if (pcur->data == x)return pcur;pcur = pcur->next;}return NULL;
}//指定位置之后插入
void LTInsert(ListNode* pos, LTDataType x)
{assert(pos);ListNode* newcode = LTBuyNode(x);//pos newcode pos->nextnewcode->prev = pos;newcode->next = pos->next;pos->next->prev = newcode;pos->next = newcode;}//指定位置删除
void LTErase(ListNode* pos)
{assert(pos);//pos->prev pos pos->nextpos->prev->next = pos->next;pos->next->prev = pos->prev;free(pos);pos = NULL;
}
test.c:
#include"List.h"void test1()
{//初始化ListNode* plist = NULL;LTInit(&plist);////优化//ListNode* plist = LTInit();//尾插LTPushBack(plist, 1);LTPushBack(plist, 2);LTPushBack(plist, 3);LTPushBack(plist, 4);LTPrint(plist);//头插LTPushFront(plist, 5);LTPrint(plist);//尾删LTPopBack(plist);LTPrint(plist);//头删LTPopFront(plist);LTPrint(plist);//查找ListNode* pos = LTFind(plist, 2);/*if (pos)printf("找到了\n");elseprintf("没找到\n");*///指定位置之后插入LTInsert(pos, 100);LTPrint(plist);//指定位置删除LTErase(pos);LTPrint(plist);//销毁LTDestory(plist);plist == NULL;
}
int main()
{test1();return 0;
}
特别补充--顺序表和单链表的对比

往期回顾:
【数据结构初阶】--单链表(一)
【数据结构初阶】--单链表(二)
【数据结构初阶】--双向链表(一)
结语: 在这篇博客中我们实现了双向链表的所有接口,大家下来也可以自己去尝试实现以下,可以通过画图辅助,如果文章对你有帮助的话,欢迎评论,点赞,收藏加关注,感谢大家的支持。


 安装)

-requests库)


)


)

