文章目录
- 简介
- VirtualBox
- Ubuntu Server 简介
- Ubuntu Server 下载
- 安装 Ubuntu Server
- 首选项配置
- 导入系统镜像
- 配置系统用户
- 配置内存 CPU 虚拟硬盘
- 开始安装 Ubuntu
- 安装完成
- 登录系统
- 配置网络
- Ubuntu 系统配置
- 安装常用工具
- 安装 SSH
- 设置 root 密码
- 配置 IP 地址(推荐自动分配IP)
- 共享文件夹
- 安装 Oh My Zsh
- 同步系统时间
- 防火墙
- 重启系统
- Ubuntu Server 系统安装 Docker
简介
本文详细讲解了在VirtualBox中安装Ubuntu Server系统的全过程,并覆盖了从系统初始配置到日常开发环境优化的关键步骤。内容包括SSH远程连接配置、Zsh及Oh My Zsh安装与美化、静态IP与网络设置、防火墙管理,以及VirtualBox共享文件夹的挂载方法。无论你是Linux新手还是想在虚拟机中快速搭建开发环境的开发者,都能从本文获得实用指导。
VirtualBox
- https://www.virtualbox.org/
Ubuntu Server 简介
- Ubuntu Server 是 Ubuntu 的服务器版本,没有图形界面(GUI),主要用于服务器环境。
- Web 服务(Nginx、Apache)
- 数据库(MySQL、PostgreSQL)
- 容器平台(Docker、Kubernetes)
- 文件/存储服务(Samba、NFS)
- 版本通常每两年发布一个 LTS(长期支持)版本,例如 Ubuntu 24.04 LTS。
Ubuntu Server 下载
- https://ubuntu.com/download/server
| 系统版本 | 文件大小 |
|---|---|
| ubuntu-24.04.3-live-server-amd64 | 3.3GB |
安装 Ubuntu Server
首选项配置

导入系统镜像

配置系统用户

配置内存 CPU 虚拟硬盘


开始安装 Ubuntu

安装完成

登录系统

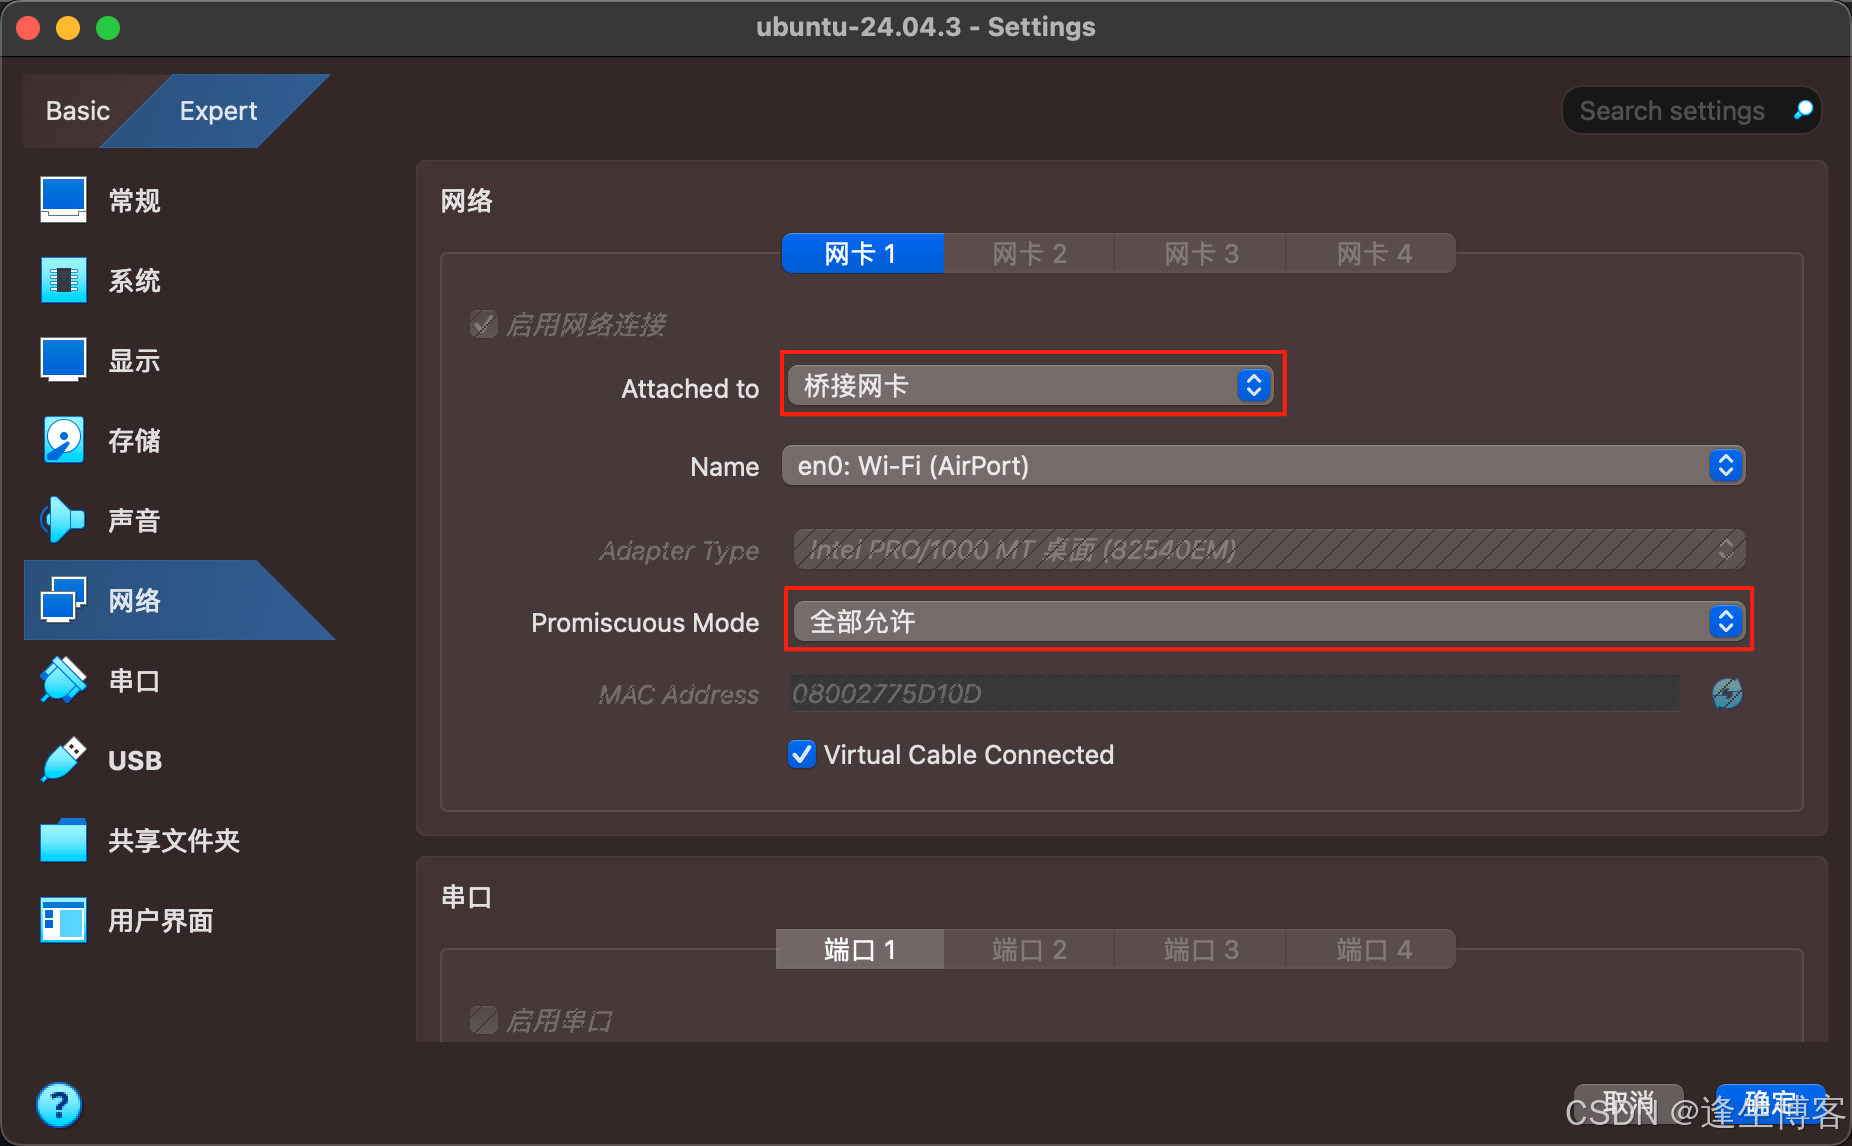
配置网络
Ubuntu 系统配置
安装常用工具
sudo apt update && sudo apt upgrade -y
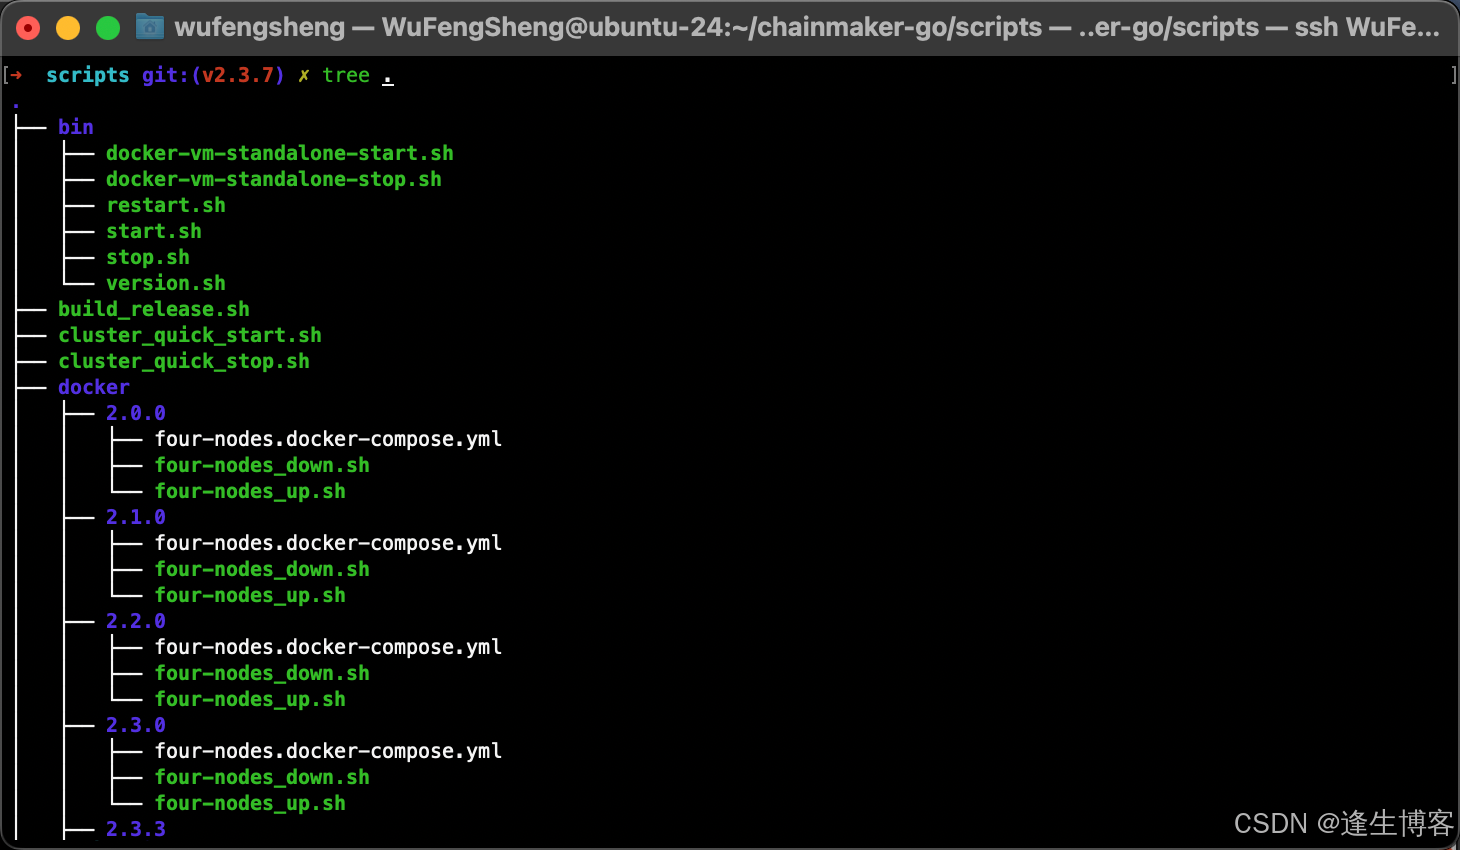
sudo apt install -y tree
sudo apt install -y net-tools
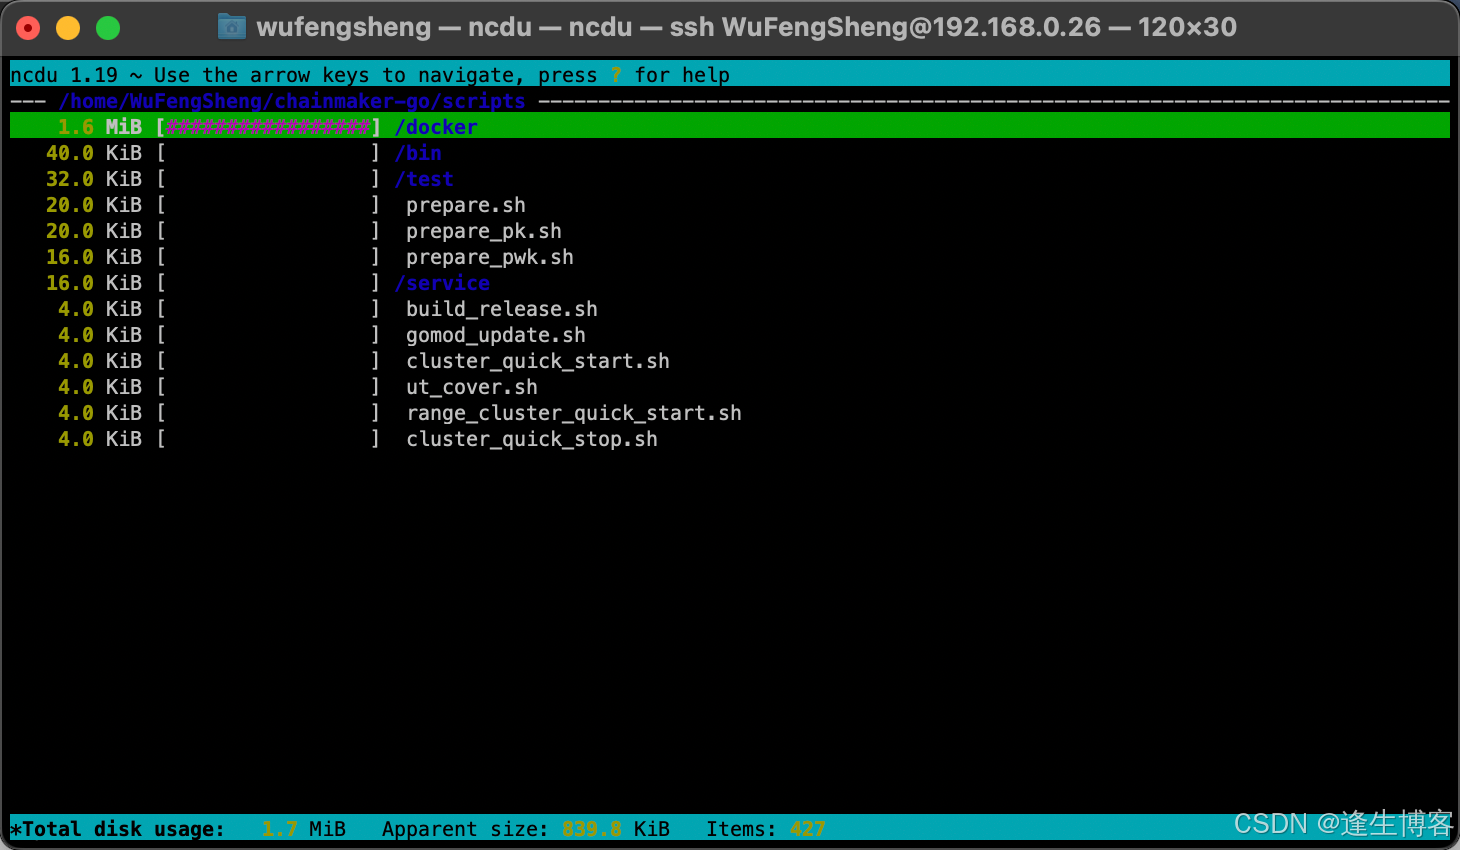
sudo apt install -y ncdu
- tree 命令
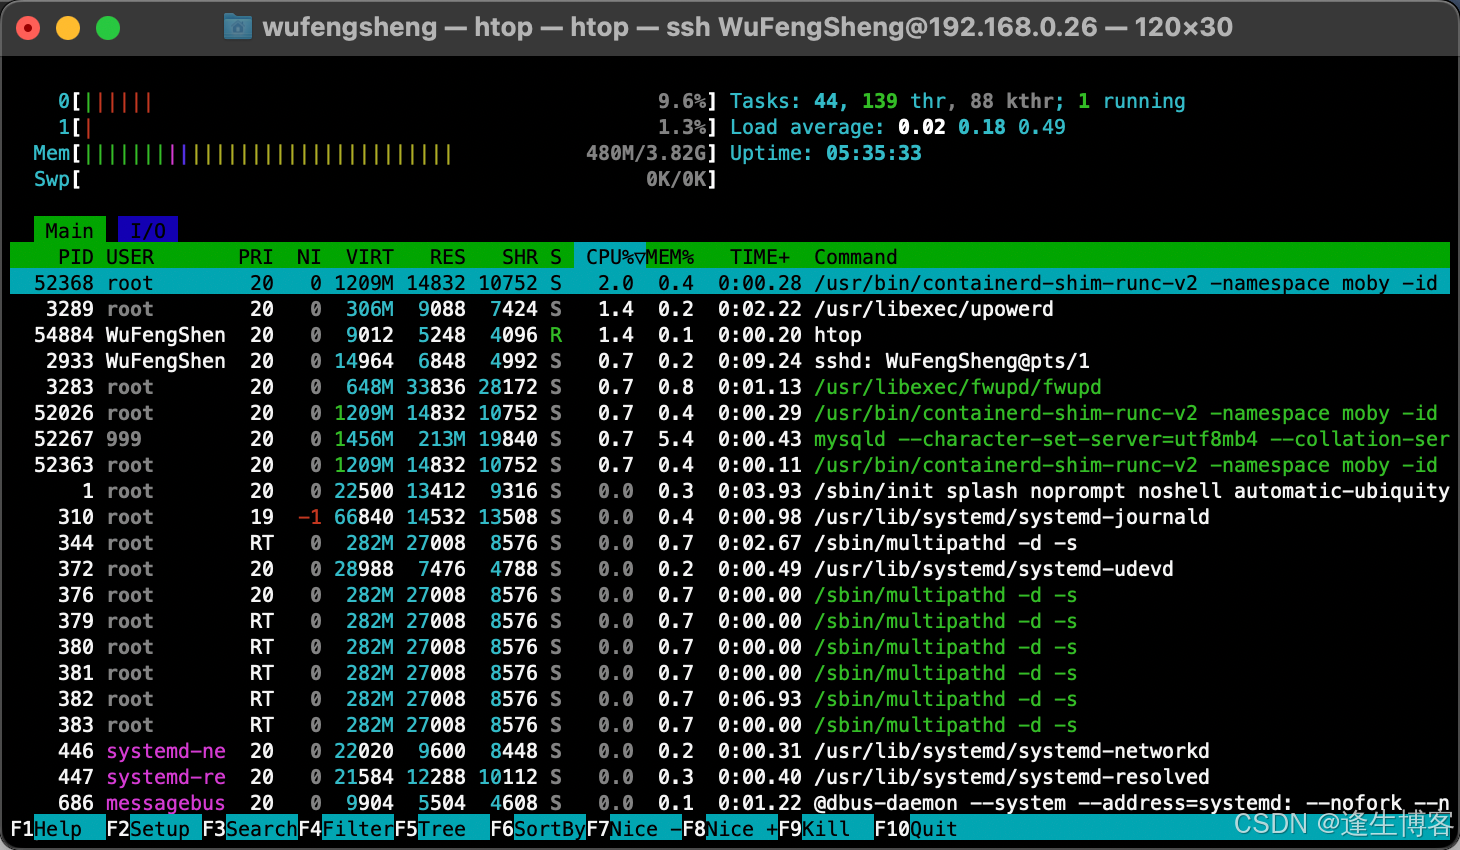
- htop 命令
- ncdu 命令
安装 SSH
sudo apt update && sudo apt upgrade -y
- 安装 ssh 服务
sudo systemctl status ssh
sudo apt update
sudo apt install -y openssh-server
sudo systemctl enable ssh
sudo systemctl start ssh
- 查看 IP 地址
ip addr
# 或
ip addr show

- 缩主机(Mac)上通过 ssh 连接
ssh WuFengSheng@192.168.0.26

设置 root 密码
sudo passwd root

- 切换到 root
su -

配置 IP 地址(推荐自动分配IP)
注: 网关不固定情况下推荐按默认 自动分配IP;在虚拟机 桥接网卡 方式下如果配置静态IP,当网关发生变化可能会导致系统无法启动。只能通修改虚拟机为 非桥接网卡 方式才能恢复正常启动。
- 安装 vim
sudo apt install -y vim
- 修改 IP 地址(静态 IP)
sudo vim /etc/netplan/50-cloud-init.yaml
- IP 地址要与缩主机同网段
network:version: 2ethernets:enp0s3:dhcp4: falseaddresses:- 192.168.0.26/24gateway4: 192.168.0.1nameservers:addresses: [8.8.8.8, 8.8.4.4, 114.114.114.114, 114.114.115.115]
- 应用修改
sudo netplan apply
共享文件夹

注: 不要勾 只读 选项,否则虚拟机内的文件无法复制到缩主机 vbox_share 共享目录。
- 挂载共享文件夹
mkdir -p ~/share
sudo mount -t vboxsf vbox_share ~/share
注: vbox_share 是缩主机的共享目录。
- 挂载成功后访问缩主机的共享目录
ls ~/share
# 或
ll ~/share

- 复制缩主机文件到虚拟机里
sudo cp ~/share/demo.sh ./
- 取消挂载
sudo umount ~/share
安装 Oh My Zsh
sudo apt install -y zsh
# 查看版本
zsh --version
# 切换到 zsh
chsh -s $(which zsh)
- 安装 Oh My Zsh
sh -c "$(curl -fsSL https://raw.githubusercontent.com/ohmyzsh/ohmyzsh/master/tools/install.sh)"

# 高亮插件
git clone https://gitee.com/Annihilater/zsh-syntax-highlighting.git ~/.oh-my-zsh/custom/plugins/zsh-syntax-highlighting
# 命令自动补全插件
git clone https://github.com/zsh-users/zsh-autosuggestions ~/.oh-my-zsh/custom/plugins/zsh-autosuggestions
vim ~/.zshrc
plugins=(git zsh-autosuggestions zsh-syntax-highlighting)

source ~/.zshrc
同步系统时间
- 设置时区
# 查看可用时区
timedatectl list-timezones
# 设置时区
sudo timedatectl set-timezone Asia/Shanghai
# 检查服务状态
timedatectl status
# 启用自动同步
sudo timedatectl set-ntp true

- 使用 chrony(高级,可精确同步)
sudo apt update
sudo apt install -y chrony
sudo systemctl enable chrony
sudo systemctl start chrony
chronyc tracking      # 查看同步状态

防火墙
- 查看防火墙状态
sudo ufw status
inactive → 防火墙关闭,active → 防火墙开启
- 启用防火墙
sudo ufw enable
- 允许指定端口或服务
sudo ufw allow 22
sudo ufw allow 80
sudo ufw allow 443
sudo ufw allow 3306
sudo ufw allow 8080/tcp
- 禁用防火墙
sudo ufw disable
- 删除规则
sudo ufw delete allow 22
- 查看详细状态
sudo ufw status verbose
- 高级:使用 iptables
ufw 实际上是对 iptables 的封装,如果需要精细控制
sudo iptables -L
sudo iptables -A INPUT -p tcp --dport 22 -j ACCEPT
sudo iptables -A INPUT -p tcp --dport 80 -j ACCEPT
sudo iptables -P INPUT DROP
重启系统
sudo reboot
sudo shutdown now
Ubuntu Server 系统安装 Docker
- Ubuntu Server 系统安装 Docker

)


和移动网络(蜂窝数据)的环境下,使用安卓平板,通过USB数据线(而不是Wi-Fi)来控制电脑(版本2))


)


get报错注入 过滤select和union ‘闭合)
