Android集成OpenCV4分以下几步骤:
使用Android Studio Giraffe | 2022.3.1创建一个Empty Views Activity空项目,包名为:com.example.andopencvdemo00 ,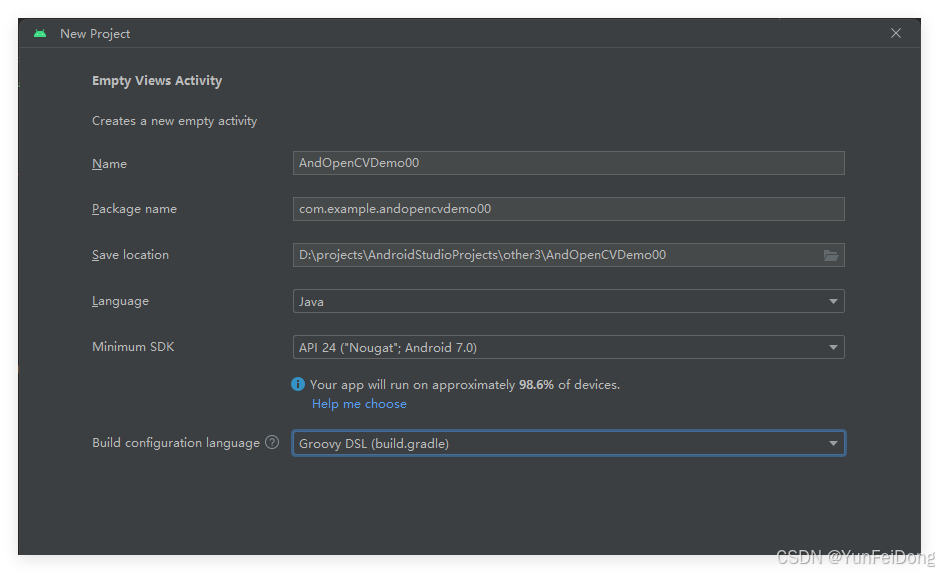
创建成功后,进行以下相关设置:
第一步:在项目settings.gradle里,添加国内阿里云源:
        maven { url 'https://jitpack.io' }
//        maven { url 'https://oss.sonatype.org/content/repositories/snapshots' }maven { url 'https://maven.aliyun.com/repository/public' }maven { url 'https://maven.aliyun.com/nexus/content/groups/public/'}maven { url 'https://maven.aliyun.com/nexus/content/repositories/gradle-plugin'}maven { url 'https://maven.aliyun.com/nexus/content/repositories/apache-snapshots'}google()mavenCentral()gradlePluginPortal()
settings.gradle整体示例:
pluginManagement {repositories {maven { url 'https://jitpack.io' }
//        maven { url 'https://oss.sonatype.org/content/repositories/snapshots' }maven { url 'https://maven.aliyun.com/repository/public' }maven { url 'https://maven.aliyun.com/nexus/content/groups/public/'}maven { url 'https://maven.aliyun.com/nexus/content/repositories/gradle-plugin'}maven { url 'https://maven.aliyun.com/nexus/content/repositories/apache-snapshots'}google()mavenCentral()gradlePluginPortal()}
}
dependencyResolutionManagement {repositoriesMode.set(RepositoriesMode.FAIL_ON_PROJECT_REPOS)repositories {maven { url 'https://jitpack.io' }
//        maven { url 'https://oss.sonatype.org/content/repositories/snapshots' }maven { url 'https://maven.aliyun.com/repository/public' }maven { url 'https://maven.aliyun.com/nexus/content/groups/public/'}maven { url 'https://maven.aliyun.com/nexus/content/repositories/gradle-plugin'}maven { url 'https://maven.aliyun.com/nexus/content/repositories/apache-snapshots'}google()mavenCentral()gradlePluginPortal()}
}rootProject.name = "AndOpenCVDemo00"
include ':app'
第二步:在app下build.gradle添加OpenCV和ndk:
在dependencies里添加OpenCV
implementation 'org.opencv:opencv:4.12.0' //集成OpenCV 4.12.0版本
在defaultConfig 里添加ndk架构
ndk {abiFilters "arm64-v8a", "armeabi-v7a" // 主流架构,可按需添加x86_64}
build.gradle整体示例:
plugins {id 'com.android.application'
}android {namespace 'com.example.andopencvdemo00'compileSdk 33defaultConfig {applicationId "com.example.andopencvdemo00"minSdk 24targetSdk 33versionCode 1versionName "1.0"ndk {abiFilters "arm64-v8a", "armeabi-v7a" // 主流架构,可按需添加x86_64}testInstrumentationRunner "androidx.test.runner.AndroidJUnitRunner"}buildTypes {release {minifyEnabled falseproguardFiles getDefaultProguardFile('proguard-android-optimize.txt'), 'proguard-rules.pro'}}compileOptions {sourceCompatibility JavaVersion.VERSION_1_8targetCompatibility JavaVersion.VERSION_1_8}}dependencies {implementation fileTree(dir: 'libs', include: ['*.jar', '*.aar'])implementation 'androidx.appcompat:appcompat:1.6.1'implementation 'com.google.android.material:material:1.8.0'implementation 'androidx.constraintlayout:constraintlayout:2.1.4'testImplementation 'junit:junit:4.13.2'androidTestImplementation 'androidx.test.ext:junit:1.1.5'androidTestImplementation 'androidx.test.espresso:espresso-core:3.5.1'//implementation 'org.opencv:opencv:4.9.0' //集成OpenCV 4.9.0版本//implementation 'org.opencv:opencv:4.11.0' //集成OpenCV 4.11.0版本implementation 'org.opencv:opencv:4.12.0'  //集成OpenCV 4.12.0版本
}
第三步:编写测试程序
MainActivity文件代码:
package com.example.andopencvdemo00;import androidx.appcompat.app.AppCompatActivity;import android.os.Bundle;
import android.util.Log;
import android.view.SurfaceView;
import android.view.WindowManager;
import android.widget.Toast;import org.opencv.android.CameraActivity;
import org.opencv.android.CameraBridgeViewBase;
import org.opencv.android.OpenCVLoader;
import org.opencv.core.Mat;
import org.opencv.android.CameraBridgeViewBase.CvCameraViewFrame;import java.util.Collections;
import java.util.List;/*** Android OpenCV(>= 4.9.0) 示例代码:* 参考网址:https://docs.opencv.org/4.x/d5/df8/tutorial_dev_with_OCV_on_Android.html* 注:开发板必须接上摄像头*/public class MainActivity extends CameraActivity implements CameraBridgeViewBase.CvCameraViewListener2 {private static final String TAG = "DDSD";private CameraBridgeViewBase mOpenCvCameraView;@Overrideprotected void onCreate(Bundle savedInstanceState) {super.onCreate(savedInstanceState);if (OpenCVLoader.initLocal()) {Log.i(TAG, "OpenCV loaded successfully");} else {Log.e(TAG, "OpenCV initialization failed!");(Toast.makeText(this, "OpenCV initialization failed!", Toast.LENGTH_LONG)).show();return;}getWindow().addFlags(WindowManager.LayoutParams.FLAG_KEEP_SCREEN_ON);setContentView(R.layout.activity_main);mOpenCvCameraView = (CameraBridgeViewBase) findViewById(R.id.tutorial1_activity_java_surface_view);mOpenCvCameraView.setVisibility(SurfaceView.VISIBLE);mOpenCvCameraView.setCvCameraViewListener(this);}@Overridepublic void onPause(){super.onPause();if (mOpenCvCameraView != null)mOpenCvCameraView.disableView();}@Overridepublic void onResume(){super.onResume();if (mOpenCvCameraView != null)mOpenCvCameraView.enableView();}@Overrideprotected List<? extends CameraBridgeViewBase> getCameraViewList() {return Collections.singletonList(mOpenCvCameraView);}@Overridepublic void onDestroy() {super.onDestroy();if (mOpenCvCameraView != null)mOpenCvCameraView.disableView();}@Overridepublic void onCameraViewStarted(int width, int height) {}@Overridepublic void onCameraViewStopped() {}@Overridepublic Mat onCameraFrame(CvCameraViewFrame inputFrame) {return inputFrame.rgba();}}
activity_main.xml文件内容:
<?xml version="1.0" encoding="utf-8"?>
<FrameLayout xmlns:android="http://schemas.android.com/apk/res/android"xmlns:tools="http://schemas.android.com/tools"xmlns:opencv="http://schemas.android.com/apk/res-auto"android:layout_width="match_parent"android:layout_height="match_parent" ><!-- [camera_view] --><org.opencv.android.JavaCameraViewandroid:layout_width="fill_parent"android:layout_height="fill_parent"android:visibility="gone"android:id="@+id/tutorial1_activity_java_surface_view"opencv:show_fps="true"opencv:camera_id="any" /><!-- [camera_view] --></FrameLayout>
AndroidManifest.xml文件内容:
<?xml version="1.0" encoding="utf-8"?>
<manifest xmlns:android="http://schemas.android.com/apk/res/android"xmlns:tools="http://schemas.android.com/tools"><uses-permission android:name="android.permission.CAMERA"/><uses-feature android:name="android.hardware.camera" android:required="false"/><uses-feature android:name="android.hardware.camera.autofocus" android:required="false"/><uses-feature android:name="android.hardware.camera.front" android:required="false"/><uses-feature android:name="android.hardware.camera.front.autofocus" android:required="false"/><applicationandroid:allowBackup="true"android:dataExtractionRules="@xml/data_extraction_rules"android:fullBackupContent="@xml/backup_rules"android:icon="@mipmap/ic_launcher"android:label="@string/app_name"android:roundIcon="@mipmap/ic_launcher_round"android:supportsRtl="true"android:theme="@style/Theme.AndOpenCVDemo00"tools:targetApi="31"><activityandroid:name=".MainActivity"android:exported="true"><intent-filter><action android:name="android.intent.action.MAIN" /><category android:name="android.intent.category.LAUNCHER" /></intent-filter></activity></application></manifest>
代码下载地址:https://download.csdn.net/download/weixin_43800734/91868294


)


 用户手册)


