文章目录
- 前言
- push和pop
- present和dismiss
- 基本方法
- 属性说明
- 常见的用法
- 运行演示
- push和present区别
前言
在之前的学习中,我们发现iOS有两种用于推出新界面的常用方法,分别是push和present,但是二者存在很多区别
present只能返回自己的上一级视图,而push的所有视图都是由视图栈控制,可以返回上一级,也可以返回根视图或者其他视图
在iOS13之后,我们present推出的页面不会完全覆盖之前的界面,上面会留有一条缝隙,并且我们可以通过向下拖动直接关闭当前的页面
push和pop
push和pop用于在导航控制器UINavigationController中,对视图控制器的添加与移除
原理是导航控制器会维护一个栈,在经过push后,新的view会被压到栈顶,所以在删除或者添加时要先对栈顶的进行操作
对根视图进行pop时是一个无效的操作,除非用setViewControllers: 直接替换整个栈或者把整个 UINavigationController dismiss 掉。
-
pushViewController: animated:
就是把一个新的视图控制器压入栈顶,导航控制器会显示这个新的控制器。
(相当于进栈 → 显示新页面)
-
popViewControllerAnimated:
就是把当前栈顶的控制器移除,导航控制器会显示下一个栈顶(之前的那个控制器)。
(相当于出栈 → 回到上一个页面)
与此同时,除了对单个的push和pop,你也可以用以下两个方法
- popToRootViewControllerAnimated: 一次性回到根控制器
- popToViewController:animated: 一次性回到栈中某个已存在的控制器
若你直接pop到根视图或者下面的某个指定视图控制器,会将其上面的全部释放
部分代码演示:
首先,我们要先设置一个根视图控制器
- (void)scene:(UIScene *)scene willConnectToSession:(UISceneSession *)session options:(UISceneConnectionOptions *)connectionOptions {self.window.frame = [UIScreen mainScreen].bounds;VCRoot* root = [[VCRoot alloc] init];UINavigationController* nav = [[UINavigationController alloc] initWithRootViewController: root];self.window.rootViewController = nav;[self.window makeKeyAndVisible];
}
之后我们再在根视图上添加跳转函数及对根视图的初始化
- (void)viewDidLoad {[super viewDidLoad];// Do any additional setup after loading the view.self.title = @"First";self.navigationItem.title = @"根视图";self.view.backgroundColor = [UIColor whiteColor];self.navigationController.navigationBar.barStyle = UIBarStyleDefault;UIBarButtonItem* next = [[UIBarButtonItem alloc] initWithTitle: @"下一级界面" style: UIBarButtonItemStylePlain target: self action: @selector(pressNext)];self.navigationItem.rightBarButtonItem = next;
}- (void)pressNext {VCSecond* vcsecond = [[VCSecond alloc] init];[self.navigationController pushViewController: vcsecond animated: YES];
}
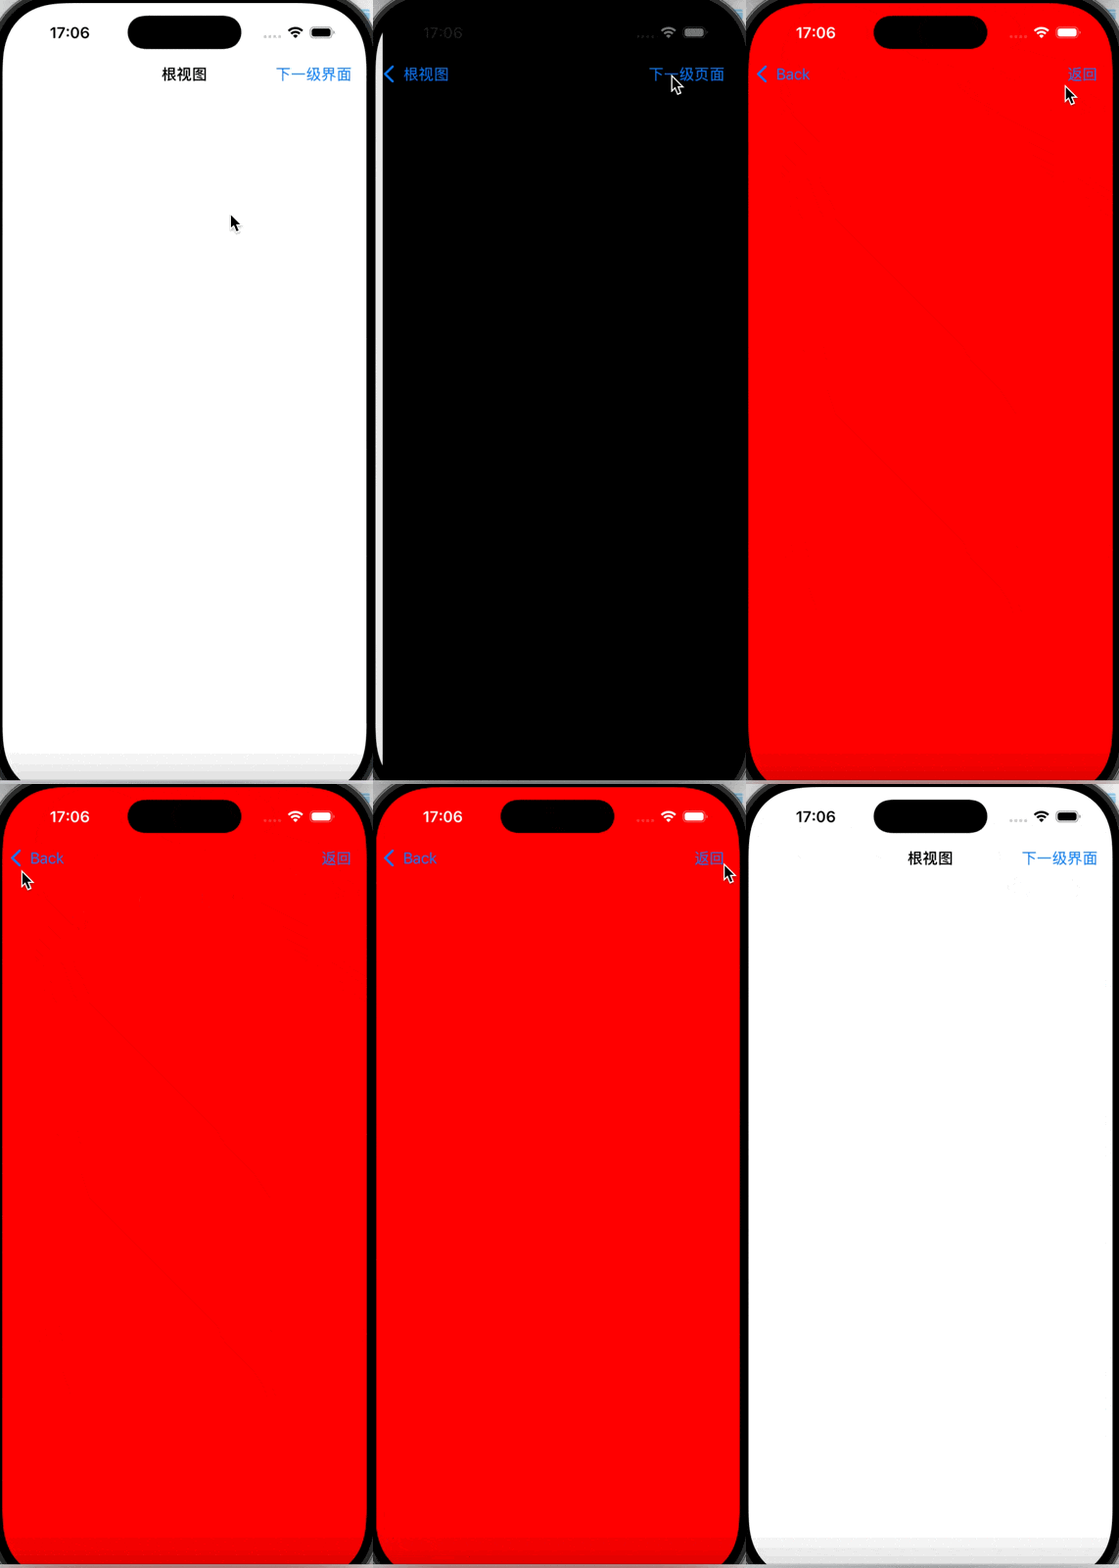
后面几个视图也如法炮制,并在最后一个视图设置跳转到根视图的方法
运行结果:

present和dismiss
present和dismiss分别用来从当前控制器模态弹出视图控制器和关闭模态视图控制器,两个方法分别为
模态弹出的意思是,一个新的页面(控制器)以覆盖的形式展示在当前页面之上,用户必须 处理完 / 关闭这个页面(通过 dismiss),才能回到之前的页面
基本方法
-
presentViewController:
使用其弹出一个视图之后,当前控制器会持有一个presentedViewController,被展示的控制器(B)会有一个 presentingViewController 指向 A。
-
dismissViewController:
默认只能 dismiss 自己或自己上层的控制器,不能直接跨级 dismiss。
属性说明
这里提到了两个之前未接触的属性,presentedViewController和presentingViewController
-
presentedViewController:
当前控制器所呈现的控制器 A.presentedViewController = B
-
presentingViewController:
当前控制器的呈现者 B.presentingViewController = A
常见的用法
- A -> B的跳转
SecondViewController *second = [[SecondViewController alloc] init];
[self presentViewController:second animated:YES completion:nil];
所产生的效果:
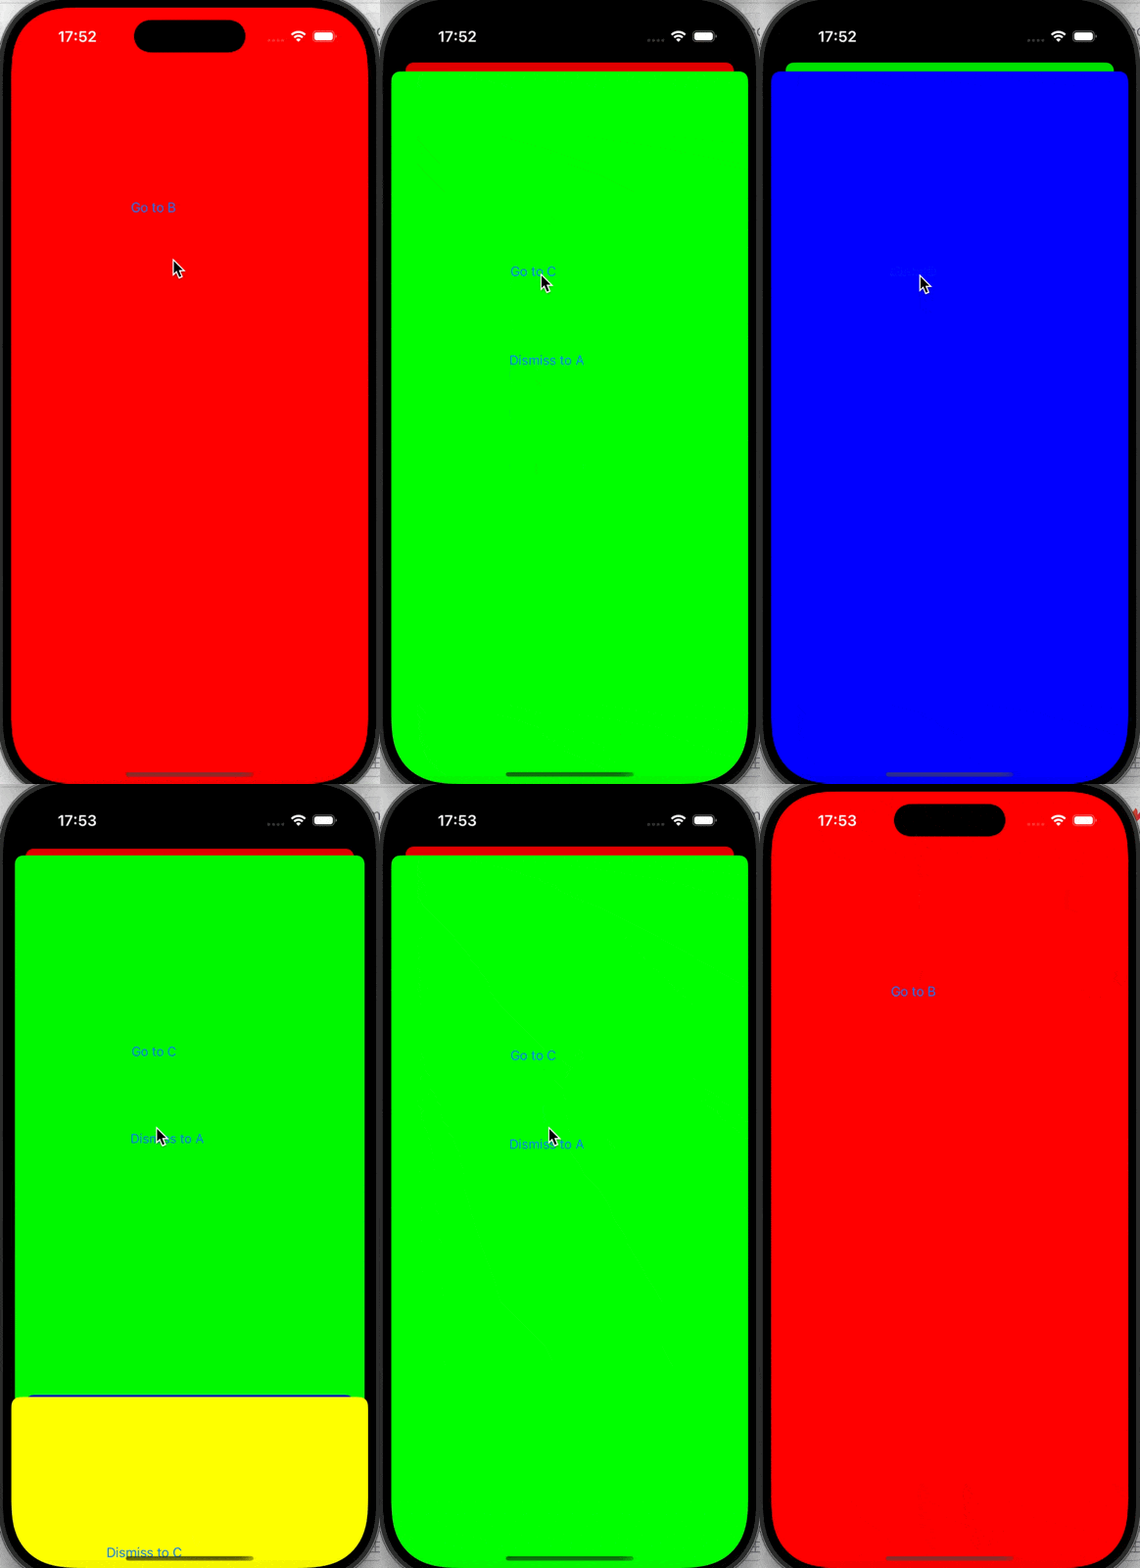
- A present出 B
- A.presentedViewController = B
- B.presentingViewController = A
- B -> A的返回
[self dismissViewControllerAnimated:YES completion:nil];
即收起b返回a
- 多级返回:D -> A
假设层级是:A -> B -> C -> D如果想直接从 D 返回到 A,可以找到最顶层的 presentingViewController:
UIViewController *rootVC = self.presentingViewController;
while (rootVC.presentingViewController) {rootVC = rootVC.presentingViewController;
}
[rootVC dismissViewControllerAnimated:YES completion:nil];
- 多级返回:D -> B
若想从D返回到B,我们可以走两次presenting,即一次一次退出:
[self.presentingViewController.presentingViewController dismissViewControllerAnimated:YES completion:nil];
亦或者我们可以先找到指定类再 dismiss
UIViewController *rootVC = self.presentingViewController;
while (![rootVC isKindOfClass:[SecondViewController class]]) {rootVC = rootVC.presentingViewController;
}
[rootVC dismissViewControllerAnimated:YES completion:nil];
这样我们可以指定返回到某个具体页面
运行演示

push和present区别
- push必须嵌套于导航控制器,且原理是把新控制器压入导航栈,主要用于一层一层的层级导航,且自动有返回按钮方便返回
- present可在任何控制器上使用,且不会完全覆盖,返回时除了下滑必须手动添加按钮进行关闭,主要适用于独立的弹出提示等放面


稳健转成 .mat:自动解析+统一换算+按 H/I/O/F-rpm-fs-load 命名》)


)


——CoderNode)
_277)

)

---- UniformBuffer 的使用)
![[光学原理与应用-461]:波动光学 - 波片实现偏振态的转换或调整](http://pic.xiahunao.cn/[光学原理与应用-461]:波动光学 - 波片实现偏振态的转换或调整)


