目录
- 一、Playbook模式
- 1.1 Playbook 的优势
- 1.2 Playbook 的组成
- 1.3 安装 httpd 服务案例
- 1.4 Playbook 命令及常用参数
- 1.5 Playbook 的语法 —— 权限相关
- 1. remote_user
- 2. become
- 3. become_method
- 1.6 Playbook 的通知与触发机制
- 1. notify
- 2. handlers
- 3. 使用示例
- 4. 使用场景
- 1.6 Playbook 中的变量
- 1.7 变量的定义方式
- 1.8 通过 vars 定义变量示例
- 1. 为什么使用 vars_files
- 1.9 变量定义阶段
- 1.10 主 Playbook 调用阶段
- 1.11 Ansible的debug模块
- 1.12 Ansible 事实变量(Facts)
- 1. 操作系统相关
- 2. 网络相关
- 3. 硬件相关
- 4. 文件系统相关
- 5. 用户和组相关
- 6. 服务相关
- 7. 其他变量
- 案例
- 二、Playbook 中的流程控制
- Ansible 条件判断(when)
- 基础
- 1. 基本语法
- 2. 条件分组(使用括号)
- 3. 多条件写法(列表形式)
- 4. 条件运算
- 5. 变量判断实例
- 2.2 循环(with_items)
- 1. 批量创建用户
- 3. 批量创建用户和用户组(循环嵌套)
- 4. 批量删除用户和用户组(循环嵌套)
一、Playbook模式
Playbook 相比直接调用单个模块操作远程服务器,更加强大和灵活。
如果把单个模块的 ad-hoc 执行类比为在 Linux 系统中输入一条命令,那么 Playbook 就类似于编写一份 Shell 脚本 —— 它能够将多个模块按顺序或逻辑组合起来,实现一整套自动化操作。
需要注意的是,Playbook 依然会用到 ad-hoc 模式中的模块和参数,只是其编写方式与 ad-hoc 命令有所不同,更偏向于结构化和可维护的 YAML 格式。
| 特性 | ad-hoc 命令(单次执行) | Playbook(批量编排) |
|---|---|---|
| 类比 | Linux 单条命令 | Shell 脚本 |
| 使用场景 | 临时性、一次性操作 | 系统化、可复用的自动化任务 |
| 写法形式 | 命令行直接输入参数与模块 | YAML 格式,结构化配置 |
| 维护性 | 不易维护,执行记录不完整 | 易维护,可读性强,适合版本管理 |
| 功能特点 | 快速执行单一任务 | 将多个模块组合,支持逻辑控制与顺序 |
| 可扩展性 | 较低,只适合简单操作 | 较高,可实现复杂的自动化工作流 |
1.1 Playbook 的优势
- 功能更全面:相比 ad-hoc,Playbook 提供更丰富的功能。
- 可控性强:能清晰定义任务的执行顺序及依赖关系。
- 语法直观:采用 YAML 格式,结构清晰,易读易写。
- 持久可用:ad-hoc 适合一次性操作,而 Playbook 可长期保存、复用,并适合版本管理。
1.2 Playbook 的组成
一个 Playbook 由一个或多个 play 组成,而每个 play 又由多个 task 任务构成。
- play:一个完整的部署单元,通常包含以下核心部分:
- hosts:指定要操作的主机或主机组;如果是多个组,可以用
:分隔,例如:123:456:789。 - tasks:定义具体要执行的任务(调用模块及参数)。
- become:是否以特权用户(通常是 root)身份执行任务,设置为
yes时表示启用。
- hosts:指定要操作的主机或主机组;如果是多个组,可以用
- playbook:
- 由一个或多个 play 组成;
- 每个 play 中可以包含多个 task;
- 通过组合实现复杂的自动化流程。
1.3 安装 httpd 服务案例
Playbook 文件说明
- 文件后缀:Playbook 文件以
**.yml**结尾。 - 用途:通过 YAML 语法组织多个任务,实现自动化部署与运维操作。
# 定义一个 play(剧本的一个执行单元)
- name: apache          # Play 的名称,用于描述该 play 的作用hosts: web            # 指定目标主机组,这里是 web,需要在 /etc/ansible/hosts 里定义become: yes           # 是否切换为特权用户(root)执行,yes 表示启用tasks:                # 定义任务列表(可以有多个)- name: Install httpd Server  # 任务名称,用于描述该任务的功能yum:                        # 调用 yum 模块(用于管理软件包)name: httpd               # 指定要安装的软件包,这里是 httpdstate: present            # 确保 httpd 处于“已安装”状态
tasks本质上就是 Ansible 模块 通过 YAML 格式写入 Playbook 中。- 在生产环境中,为了增强可读性和可维护性,通常 一个 Playbook 只包含一个 play。
- 如果不同主机需要执行多个 play,可以通过
**include**或**import_playbook**来组织多个 Playbook 文件。
1.4 Playbook 命令及常用参数
命令格式
ansible-playbook playbook.yml [选项]
** 常用选项(按使用频率排序) **
| 选项/参数 | 说明 |
|---|---|
--syntax-check | 语法检测,检查 Playbook 是否有语法错误 |
--list-tags | 列出 Playbook 中定义的所有 tag 标签 |
--list-hosts | 显示匹配当前 Playbook 的主机列表 |
--list-tasks | 列出 Playbook 中的任务列表 |
-t | 指定执行特定的标签(tags) |
-T | 设置 SSH 连接超时时间 |
-i | 指定 Inventory 文件(主机清单文件) |
-f | 并发执行的进程数,默认值为 5 |
--step | 每执行一个任务后暂停,等待用户确认 |
--skip-tags | 跳过指定标签的任务(执行除指定标签外的任务) |
-C | 检查 Playbook 对受控端是否有修改,进行模拟执行(dry run) |
1.5 Playbook 的语法 —— 权限相关
在 Ansible Playbook 中,可以通过以下选项控制任务执行的用户身份和权限:
1. remote_user
- 作用:指定 Playbook 运行时连接远程主机的用户。
- 位置:可以写在
play下的hosts同级,也可以在单个task中单独指定。 - 示例:
# 指定使用 root 用户执行整个 play
remote_user: root
2. become
- 作用:布尔值选项,控制是否以特权用户身份执行任务。
- 取值:
yes表示启用特权用户(通常是 root)执行。 - 常用组合:通常与
become_method一起使用。 - 示例:
# 使用特权用户执行任务
become: yes
3. become_method
- 作用:指定切换到特权用户时使用的方法。
- 常用值:
sudo或su(默认为 sudo)。 - 示例:
become_method: sudo
1.6 Playbook 的通知与触发机制
在 Ansible 中,notify 和 handlers 用于实现任务完成后的事件触发,常用于修改配置文件后重启服务等操作。
1. notify
- 作用:写在某个任务中,当该任务执行时,会触发对应的
handler。 - 注意:
notify指定的名称必须与handler中的name完全一致,否则无法触发。 - 位置:可以写在任务中任意位置,属于该任务的一部分。
2. handlers
- 作用:定义被触发后要执行的动作。
- 规则:
handlers和tasks同级,一般写在 Playbook 的末尾。handlers的- name必须与notify指定的名称一致。- 即便一个
handler被多次触发,它也只会执行一次。 handlers本质上是一种特殊的任务(tasks)。
3. 使用示例
- name: web # Play 名称,用于描述本 play 的作用hosts: web_group # 指定目标主机组,需要在 /etc/ansible/hosts 中定义remote_user: root # 使用 root 用户连接远程主机become: yes # 提升权限执行任务(使用 root 权限)tasks:- name: install nginx # 任务名称:安装 nginxyum: # 使用 yum 模块管理软件包name: nginx # 要安装的软件包名称state: present # 确保 nginx 已安装,如果未安装则自动安装- name: copy nginx conf # 任务名称:拷贝 nginx 配置文件copy: # 使用 copy 模块src: nginx.conf # 源文件路径(控制节点本地文件)dest: /etc/nginx/nginx.conf # 目标路径(远程主机)tags: copyfile # 给任务打标签,可使用 -t copyfile 单独执行notify: restart # 当任务执行成功后触发 handler,名称必须与 handlers 中的 name 一致handlers: # 定义被触发的特殊任务(handler)- name: restart # handler 名称,与 notify 对应systemd: # 使用 systemd 模块管理服务name: nginx # 服务名称state: restarted # 重启服务(如果服务未运行会启动)4. 使用场景
- 修改配置文件后重启服务
- 容器或服务需要重新加载配置
- 任意需要在任务完成后执行特定动作的场景
1.6 Playbook 中的变量
在 Ansible Playbook 中,变量用于管理动态值,可以极大地提高可维护性和可读性。
例如,如果需要更新多个文件中的配置路径,每次都写完整路径既麻烦又容易出错,这时使用变量可以只写简短标识,使 Playbook 更清晰,维护成本也降低。
1.7 变量的定义方式
- 命令行定义变量
使用-e或--extra-vars传入变量。 - Playbook 中定义变量
在 Play 文件中通过vars或vars_files定义变量。 - Inventory 主机信息文件定义变量
在主机或组变量中定义。
变量优先级:命令行 > Playbook 文件 > Inventory 文件
1.8 通过 vars 定义变量示例
以下示例展示如何使用变量安装 LAMP 服务(Linux, Apache, MariaDB, PHP):
---
## Playbook: 安装 LAMP 服务并配置自启和自动重启
- name: 安装 LAMP 服务hosts: web_group                 # 目标主机组,inventory 文件中定义的 web_groupremote_user: root                 # 远程执行任务的用户vars:                             # 定义变量package_name:                   # 变量 package_name,用于存放需要安装的软件包列表- httpd                       # Apache 服务- mariadb-server               # MariaDB 数据库服务- php                          # PHP 语言- php-mysqlnd                  # PHP MySQL 扩展(EulerOS 推荐)tasks:                            # 任务列表- name: 安装 LAMP 软件包yum:name: "{{ package_name }}"   # 引用变量安装所有软件包state: present[root@ansible-manager playbook]# ansible-playbook lamp_plook.yml --syntax-check
playbook: lamp_plook.yml
[root@ansible-manager playbook]# ansible-playbook lamp_plook.yml
1. 为什么使用 vars_files
- 当变量较少时,可直接在 Playbook 使用
vars定义。 - 当变量较多时,集中存放在独立文件中更清晰、易维护。
- Playbook 只需引用变量文件即可,便于多人协作和版本控制。
1.9 变量定义阶段
文件:my_vars.yml
# my_vars.yml
# 定义所有需要的变量,便于集中管理
httpd_package: httpd                     # Apache 软件包
mariadb_package: mariadb-server          # MariaDB 软件包
php_package: php                         # PHP 软件包
php_mysql_package: php-mysqlnd           # PHP MySQL 扩展(EulerOS 推荐)
my_cnf: /etc/my.cnf                       # 目标 MariaDB 配置文件路径
bendi_my: /etc/ansible/yml/mysql/conf/my.cnf  # 本地配置文件路径
说明:
- 集中管理软件包名、配置路径
- 方便在多个 Playbook 中复用
1.10 主 Playbook 调用阶段
文件:apache.yml
- name: install lamp # playbook 名称,描述这是一个安装 LAMP(Linux, Apache, MySQL/MariaDB, PHP)环境的任务hosts: web_group # 指定目标主机组,这里是 web_groupremote_user: root # 使用 root 用户执行任务vars_files:- my_vars.yml # 引入变量文件 my_vars.yml,里面定义了 httpd_package、mariadb_package 等变量tasks:- name: install apacheyum: name: "{{ httpd_package }}" # 使用变量安装 Apache 包state: present # 确保包被安装(present)- name: install mariadbyum:name: "{{ mariadb_package }}" # 安装 MariaDB 包state: present- name: install phpyum:name: "{{ php_package }}" # 安装 PHP 包state: present- name: install php_mysqlyum: name: "{{ php_mysql_package }}" # 安装 PHP 的 MySQL 扩展包state: present- name: updatecopy:src: "{{ bendi_my }}" # 本地文件路径(源文件)dest: "{{ my_cnf }}" # 远程目标路径(复制到服务器)mode: "0644" # 设置文件权限为 0644notify: - restart mariadb # 当该任务执行时触发 handler 重启 MariaDB- name: start and enable mariadbservice:name: "{{ mariadb_package }}" # 操作 MariaDB 服务state: started # 启动服务enabled: yes # 设置开机自启handlers: # handlers 与 tasks 同级,通常用于被 notify 调用- name: restart mariadbservice:name: "{{ mariadb_package }}" # 重启 MariaDB 服务state: restarted输出
[root@ansible-manager playbook]# ansible-playbook lamp_vars.yml --syntax-checkplaybook: lamp_vars.yml
[root@ansible-manager playbook]# ansible-playbook lamp_vars.yml PLAY [install lamp] *******************************************************************************************************************************************************TASK [Gathering Facts] ****************************************************************************************************************************************************
[WARNING]: Platform linux on host 10.0.0.11 is using the discovered Python interpreter at /usr/bin/python3, but future installation of another Python interpreter could
change this. See https://docs.ansible.com/ansible/2.9/reference_appendices/interpreter_discovery.html for more information.
ok: [10.0.0.11]
[WARNING]: Platform linux on host 10.0.0.12 is using the discovered Python interpreter at /usr/bin/python3, but future installation of another Python interpreter could
change this. See https://docs.ansible.com/ansible/2.9/reference_appendices/interpreter_discovery.html for more information.
ok: [10.0.0.12]
[WARNING]: Platform linux on host 10.0.0.13 is using the discovered Python interpreter at /usr/bin/python3, but future installation of another Python interpreter could
change this. See https://docs.ansible.com/ansible/2.9/reference_appendices/interpreter_discovery.html for more information.
ok: [10.0.0.13]TASK [install apache] *****************************************************************************************************************************************************
ok: [10.0.0.13]
ok: [10.0.0.11]
ok: [10.0.0.12]TASK [install mariadb] ****************************************************************************************************************************************************
ok: [10.0.0.11]
ok: [10.0.0.13]
ok: [10.0.0.12]TASK [install php] ********************************************************************************************************************************************************
ok: [10.0.0.11]
ok: [10.0.0.13]
ok: [10.0.0.12]TASK [install php_mysql] **************************************************************************************************************************************************
ok: [10.0.0.11]
ok: [10.0.0.13]
ok: [10.0.0.12]TASK [update mysql conf] **************************************************************************************************************************************************
ok: [10.0.0.13]
ok: [10.0.0.11]
ok: [10.0.0.12]TASK [start and enable mariadb] *******************************************************************************************************************************************
ok: [10.0.0.11]
ok: [10.0.0.13]
ok: [10.0.0.12]PLAY RECAP ****************************************************************************************************************************************************************
10.0.0.11                  : ok=7    changed=0    unreachable=0    failed=0    skipped=0    rescued=0    ignored=0
10.0.0.12                  : ok=7    changed=0    unreachable=0    failed=0    skipped=0    rescued=0    ignored=0
10.0.0.13                  : ok=7    changed=0    unreachable=0    failed=0    skipped=0    rescued=0    ignored=0
1.11 Ansible的debug模块
- 作用
debug 模块用于在 playbook 执行过程中输出变量值或显示自定义消息,有助于调试和验证变量是否符合预期。
- 常用参数
| 参数 | 作用 |
|---|---|
msg | 输出自定义消息,可以是字符串或包含变量的表达式 |
var | 输出变量的值,直接指定变量名即可 |
注意:
msg中引用变量时需要使用{{ }}var直接写变量名,无需{{ }}
- 示例 Playbook
- name: 示例 playbookhosts: csremote_user: roottasks:- name: 输出简单消息debug:msg: "这是一个简单的消息"- name: 输出变量的值debug:var: ansible_distribution- name: 输出多个变量的值debug:msg: "操作系统: {{ ansible_distribution }},版本: {{ ansible_distribution_version }}"- name: 查看root目录下的文件shell: ls /rootregister: root_directory_contents- name: 输出的结果debug:var: root_directory_contents.stdout_lines变量使用的注意事项:
- 在 msg 中使用变量时,需要使用双大括号{{ }}来引用变量。
- 在 var中直接指定变量名即可,不需要使用双大括号。
输出
[root@ansible-manager playbook]# ansible-playbook debug_test.yml --syntax-checkplaybook: debug_test.yml
[root@ansible-manager playbook]# ansible-playbook debug_test.ymlPLAY [案例 playbook] ********************************************************************************************************************************************************TASK [Gathering Facts] ****************************************************************************************************************************************************
[WARNING]: Platform linux on host 10.0.0.12 is using the discovered Python interpreter at /usr/bin/python3, but future installation of another Python interpreter could
change this. See https://docs.ansible.com/ansible/2.9/reference_appendices/interpreter_discovery.html for more information.
ok: [10.0.0.12]
[WARNING]: Platform linux on host 10.0.0.11 is using the discovered Python interpreter at /usr/bin/python3, but future installation of another Python interpreter could
change this. See https://docs.ansible.com/ansible/2.9/reference_appendices/interpreter_discovery.html for more information.
ok: [10.0.0.11]
[WARNING]: Platform linux on host 10.0.0.13 is using the discovered Python interpreter at /usr/bin/python3, but future installation of another Python interpreter could
change this. See https://docs.ansible.com/ansible/2.9/reference_appendices/interpreter_discovery.html for more information.
ok: [10.0.0.13]TASK [输出简单消息] *************************************************************************************************************************************************************
ok: [10.0.0.11] => {"msg": "这是一个消息"
}
ok: [10.0.0.12] => {"msg": "这是一个消息"
}
ok: [10.0.0.13] => {"msg": "这是一个消息"
}TASK [输出变量的值] *************************************************************************************************************************************************************
ok: [10.0.0.11] => {"ansible_distribution": "openEuler"
}
ok: [10.0.0.12] => {"ansible_distribution": "openEuler"
}
ok: [10.0.0.13] => {"ansible_distribution": "openEuler"
}TASK [输出多个变量的值] ***********************************************************************************************************************************************************
ok: [10.0.0.11] => {"msg": "操作系统: openEuler, 版本:22.03"
}
ok: [10.0.0.12] => {"msg": "操作系统: openEuler, 版本:22.03"
}
ok: [10.0.0.13] => {"msg": "操作系统: openEuler, 版本:22.03"
}TASK [查看root目录下的文件] *******************************************************************************************************************************************************
changed: [10.0.0.13]
changed: [10.0.0.11]
changed: [10.0.0.12]TASK [输出的结果] **************************************************************************************************************************************************************
ok: [10.0.0.11] => {"root_directory_contents.stdout_lines": ["anaconda-ks.cfg","test"]
}
ok: [10.0.0.12] => {"root_directory_contents.stdout_lines": ["anaconda-ks.cfg","test"]
}
ok: [10.0.0.13] => {"root_directory_contents.stdout_lines": ["anaconda-ks.cfg","test"]
}PLAY RECAP ****************************************************************************************************************************************************************
10.0.0.11                  : ok=6    changed=1    unreachable=0    failed=0    skipped=0    rescued=0    ignored=0
10.0.0.12                  : ok=6    changed=1    unreachable=0    failed=0    skipped=0    rescued=0    ignored=0
10.0.0.13                  : ok=6    changed=1    unreachable=0    failed=0    skipped=0    rescued=0    ignored=0
1.12 Ansible 事实变量(Facts)
Ansible 通过事实变量(facts)收集目标主机的系统信息,可用于条件执行、动态配置等。
1. 操作系统相关
| 变量 | 说明 |
|---|---|
ansible_distribution | 操作系统名称,例如 CentOS、Ubuntu、Red Hat |
ansible_distribution_version | 完整版本号,例如 7.9.2009、20.04 |
ansible_distribution_major_version | 主版本号,例如 7、20 |
ansible_os_family | 操作系统家族,例如 RedHat、Debian |
ansible_distribution_release | 系统代号,例如 focal、buster |
2. 网络相关
| 变量 | 说明 |
|---|---|
ansible_default_ipv4 | 默认 IPv4 地址信息 |
ansible_default_ipv4.address | 默认 IPv4 地址 |
ansible_default_ipv4.netmask | 子网掩码 |
ansible_default_ipv4.gateway | 默认网关 |
ansible_default_ipv6 | 默认 IPv6 地址信息 |
ansible_default_ipv6.address | 默认 IPv6 地址 |
ansible_default_ipv6.netmask | 子网掩码 |
ansible_default_ipv6.gateway | 默认网关 |
ansible_all_ipv4_addresses | 所有 IPv4 地址列表 |
ansible_all_ipv6_addresses | 所有 IPv6 地址列表 |
ansible_hostname | 主机名 |
ansible_fqdn | 完全限定域名(FQDN) |
3. 硬件相关
| 变量 | 说明 |
|---|---|
ansible_processor | CPU 信息 |
ansible_processor_cores | 每个 CPU 的核心数 |
ansible_processor_count | CPU 数量 |
ansible_processor_threads_per_core | 每核心线程数 |
ansible_processor_vcpus | 虚拟 CPU 数量 |
ansible_memory_mb | 内存信息(MB) |
ansible_memory_mb.real | 物理内存 |
ansible_memory_mb.swap | 交换内存 |
ansible_devices | 存储设备信息 |
ansible_mounts | 挂载点信息 |
4. 文件系统相关
| 变量 | 说明 |
|---|---|
ansible_filesystems | 文件系统类型列表 |
ansible_mounts[].mount | 挂载点路径 |
ansible_mounts[].device | 设备名称 |
ansible_mounts[].fstype | 文件系统类型 |
ansible_mounts[].size_total | 总大小(字节) |
ansible_mounts[].size_available | 可用大小(字节) |
5. 用户和组相关
| 变量 | 说明 |
|---|---|
ansible_user_id | 当前用户 ID |
ansible_group_names | 当前用户所属组列表 |
ansible_user | 当前用户名 |
6. 服务相关
| 变量 | 说明 |
|---|---|
ansible_service_mgr | 服务管理器类型,例如 systemd、init |
7. 其他变量
| 变量 | 说明 |
|---|---|
ansible_date_time | 日期和时间信息 |
ansible_date_time.date | 当前日期 |
ansible_date_time.time | 当前时间 |
ansible_date_time.epoch | Unix 时间戳 |
ansible_date_time.timezone | 时区 |
ansible_env | 环境变量 |
ansible_env.PATH | PATH 环境变量 |
ansible_env.HOME | HOME 环境变量 |
案例
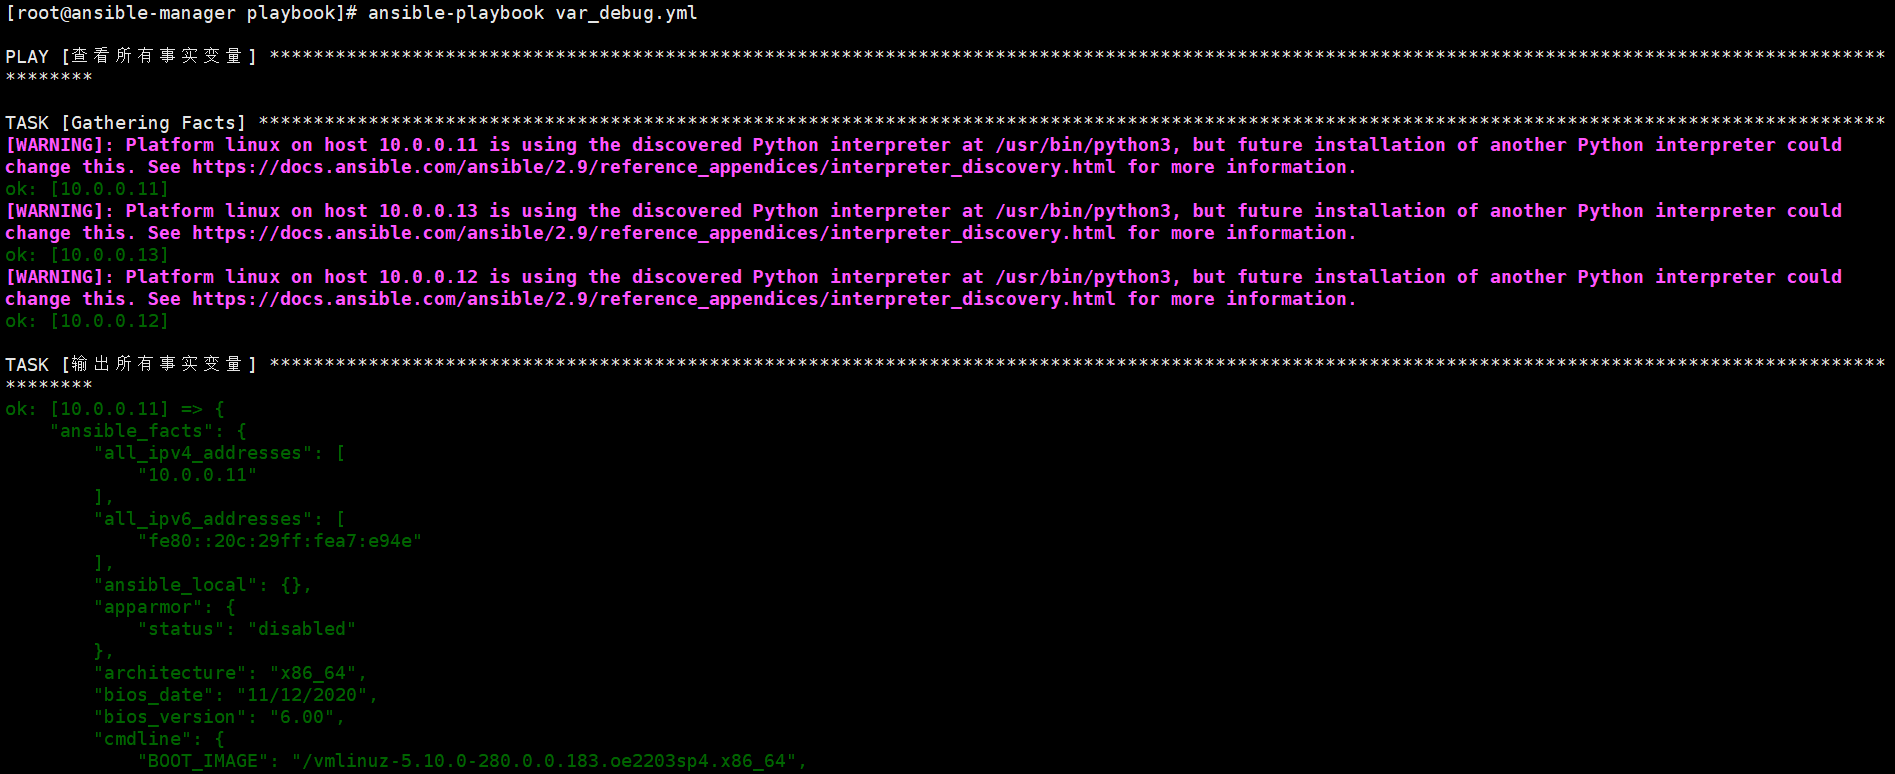
- 示例 1:查看所有事实变量
使用 ansible_facts 可以查看目标主机收集的所有事实变量:
- name: 查看所有事实变量hosts: cstasks:- name: 输出所有事实变量debug:var: ansible_facts
执行该 playbook 后,将看到目标主机的所有事实变量及其值。
- 示例 2:使用特定事实变量
可以在任务中根据操作系统或其他事实变量做条件判断:
- name: 根据操作系统版本安装软件hosts: cstasks:- name: 安装 CentOS 7 的特定软件yum:name: my-softwarestate: presentwhen: ansible_distribution == "CentOS" and ansible_distribution_major_version == "7"- name: 安装 Ubuntu 20.04 的特定软件apt:name: my-softwarestate: presentwhen: ansible_distribution == "Ubuntu" and ansible_distribution_major_version == "20"- name: 输出默认 IPv4 地址debug:msg: "默认 IPv4 地址是 {{ ansible_default_ipv4.address }}"
输出:
[root@ansible-manager playbook]# ansible-playbook facts_vars.yml --syntax-checkplaybook: facts_vars.yml
[root@ansible-manager playbook]# ansible-playbook facts_vars.yml PLAY [根据操作系统本版安装软件] *******************************************************************************************************************************************************TASK [Gathering Facts] ****************************************************************************************************************************************************
[WARNING]: Platform linux on host 10.0.0.11 is using the discovered Python interpreter at /usr/bin/python3, but future installation of another Python interpreter could
change this. See https://docs.ansible.com/ansible/2.9/reference_appendices/interpreter_discovery.html for more information.
ok: [10.0.0.11]
[WARNING]: Platform linux on host 10.0.0.13 is using the discovered Python interpreter at /usr/bin/python3, but future installation of another Python interpreter could
change this. See https://docs.ansible.com/ansible/2.9/reference_appendices/interpreter_discovery.html for more information.
ok: [10.0.0.13]
[WARNING]: Platform linux on host 10.0.0.12 is using the discovered Python interpreter at /usr/bin/python3, but future installation of another Python interpreter could
change this. See https://docs.ansible.com/ansible/2.9/reference_appendices/interpreter_discovery.html for more information.
ok: [10.0.0.12]TASK [安装centos7的特定软件] *****************************************************************************************************************************************************
skipping: [10.0.0.11]
skipping: [10.0.0.12]
skipping: [10.0.0.13]TASK [安装ubuntu 20.04的特定软件] ************************************************************************************************************************************************
skipping: [10.0.0.11]
skipping: [10.0.0.12]
skipping: [10.0.0.13]TASK [输出默认的ipv4地址] ********************************************************************************************************************************************************
ok: [10.0.0.11] => {"msg": "默认的ipv4地址时 10.0.0.11"
}
ok: [10.0.0.12] => {"msg": "默认的ipv4地址时 10.0.0.12"
}
ok: [10.0.0.13] => {"msg": "默认的ipv4地址时 10.0.0.13"
}PLAY RECAP ****************************************************************************************************************************************************************
10.0.0.11                  : ok=2    changed=0    unreachable=0    failed=0    skipped=2    rescued=0    ignored=0
10.0.0.12                  : ok=2    changed=0    unreachable=0    failed=0    skipped=2    rescued=0    ignored=0
10.0.0.13                  : ok=2    changed=0    unreachable=0    failed=0    skipped=2    rescued=0    ignored=0
说明:
when条件判断可以使用事实变量来实现任务的动态执行。- 可以使用
debug输出特定变量值,帮助调试或获取信息。
二、Playbook 中的流程控制
Ansible 条件判断(when)
在 Ansible 中,条件判断(when)是 Playbook 流程控制的核心语法,用于控制某个任务是否执行。
应用场景包括:
- 根据不同的操作系统安装不同的软件。
- 只在特定版本系统上执行某些操作。
- 避免重复执行(如源码安装软件时)。
- 根据变量值决定执行不同任务。
基础
1. 基本语法
- name: cs条件判断 # play 名称hosts: cs # 目标主机组为 cstasks: # 定义任务列表- name: Install CentOS Httpd # 在 CentOS/RedHat 系统上安装 httpdyum: # 使用 yum 模块安装软件包name: httpd # 要安装的软件包是 httpdstate: present # 保证软件包已安装when: ansible_facts['os_family'] == "RedHat" # 条件判断:当 os_family 属于 "RedHat" 时才执行该任务- name: Install Ubuntu Httpd # 在 Debian/Ubuntu 系统上安装 apache2apt: # 使用 apt 模块安装软件包name: apache2 # 要安装的软件包是 apache2state: present # 保证软件包已安装when: ansible_facts['os_family'] == "Debian"# 条件判断:当 os_family 属于 "Debian" 时才执行该任务输出
[root@ansible-manager playbook]# ansible-playbook when_playbook.yml --syntax-checkplaybook: when_playbook.yml
[root@ansible-manager playbook]# ansible-playbook when_playbook.ymlPLAY [条件判断] ***************************************************************************************************************************************************************TASK [Gathering Facts] ****************************************************************************************************************************************************
[WARNING]: Platform linux on host 10.0.0.13 is using the discovered Python interpreter at /usr/bin/python3, but future installation of another Python interpreter could
change this. See https://docs.ansible.com/ansible/2.9/reference_appendices/interpreter_discovery.html for more information.
ok: [10.0.0.13]
[WARNING]: Platform linux on host 10.0.0.11 is using the discovered Python interpreter at /usr/bin/python3, but future installation of another Python interpreter could
change this. See https://docs.ansible.com/ansible/2.9/reference_appendices/interpreter_discovery.html for more information.
ok: [10.0.0.11]
[WARNING]: Platform linux on host 10.0.0.12 is using the discovered Python interpreter at /usr/bin/python3, but future installation of another Python interpreter could
change this. See https://docs.ansible.com/ansible/2.9/reference_appendices/interpreter_discovery.html for more information.
ok: [10.0.0.12]TASK [install centos httpd] ***********************************************************************************************************************************************
ok: [10.0.0.11]
ok: [10.0.0.13]
ok: [10.0.0.12]TASK [apt] ****************************************************************************************************************************************************************
skipping: [10.0.0.11]
skipping: [10.0.0.12]
skipping: [10.0.0.13]PLAY RECAP ****************************************************************************************************************************************************************
10.0.0.11                  : ok=2    changed=0    unreachable=0    failed=0    skipped=1    rescued=0    ignored=0
10.0.0.12                  : ok=2    changed=0    unreachable=0    failed=0    skipped=1    rescued=0    ignored=0
10.0.0.13                  : ok=2    changed=0    unreachable=0    failed=0    skipped=1    rescued=0    ignored=0
根据系统类型自动选择安装
httpd或apache2。
2. 条件分组(使用括号)
- name: 条件判断 # play 名称hosts: web_group # 目标主机组为 web_grouptasks: # 定义任务列表- name: install centos httpd # 在 RedHat 系列系统上安装 httpdyum: # 使用 yum 模块name: httpd # 要安装的软件包是 httpdstate: present # 确保安装when: ansible_facts['os_family'] == 'RedHat'# 条件判断:当 os_family 属于 "RedHat" 时才执行- name: install ubuntu httpd # 在 Debian 系列系统上安装 apache2apt: # 使用 apt 模块name: apache2 # 要安装的软件包是 apache2state: present # 确保安装when: ansible_facts['os_family'] == 'Debian'# 条件判断:当 os_family 属于 "Debian" 时才执行- name: "shut down centos6 and debian 7 systems" command: /sbin/shutdown -t nowwhen: (ansible_facts['distribution'] == 'CentOS' and ansible_facts['distribution_major_version'] == "6") or(ansible_facts['distribution'] == 'Debian' and ansible_facts['distribution_major_version'] == "7")# 条件判断:# - 如果系统是 CentOS 且主版本号是 6 → 执行关机命令# - 如果系统是 Debian 且主版本号是 7 → 执行关机命令输出
[root@ansible-manager playbook]# ansible-playbook when2_playbook.yml --syntax-checkplaybook: when2_playbook.yml
[root@ansible-manager playbook]# ansible-playbook when2_playbook.ymlPLAY [条件判断] ***************************************************************************************************************************************************************TASK [Gathering Facts] ****************************************************************************************************************************************************
[WARNING]: Platform linux on host 10.0.0.11 is using the discovered Python interpreter at /usr/bin/python3, but future installation of another Python interpreter could
change this. See https://docs.ansible.com/ansible/2.9/reference_appendices/interpreter_discovery.html for more information.
ok: [10.0.0.11]
[WARNING]: Platform linux on host 10.0.0.13 is using the discovered Python interpreter at /usr/bin/python3, but future installation of another Python interpreter could
change this. See https://docs.ansible.com/ansible/2.9/reference_appendices/interpreter_discovery.html for more information.
ok: [10.0.0.13]
[WARNING]: Platform linux on host 10.0.0.12 is using the discovered Python interpreter at /usr/bin/python3, but future installation of another Python interpreter could
change this. See https://docs.ansible.com/ansible/2.9/reference_appendices/interpreter_discovery.html for more information.
ok: [10.0.0.12]TASK [install centos httpd] ***********************************************************************************************************************************************
ok: [10.0.0.13]
ok: [10.0.0.12]
ok: [10.0.0.11]TASK [apt] ****************************************************************************************************************************************************************
skipping: [10.0.0.11]
skipping: [10.0.0.12]
skipping: [10.0.0.13]TASK [shut down centos6 and debian 7 systems] *****************************************************************************************************************************
skipping: [10.0.0.11]
skipping: [10.0.0.12]
skipping: [10.0.0.13]PLAY RECAP ****************************************************************************************************************************************************************
10.0.0.11                  : ok=2    changed=0    unreachable=0    failed=0    skipped=2    rescued=0    ignored=0
10.0.0.12                  : ok=2    changed=0    unreachable=0    failed=0    skipped=2    rescued=0    ignored=0
10.0.0.13                  : ok=2    changed=0    unreachable=0    failed=0    skipped=2    rescued=0    ignored=0
使用 括号 将多个条件分组,避免逻辑混乱。
3. 多条件写法(列表形式)
- name: 条件判断 # play 名称hosts: web_group # 目标主机组为 web_grouptasks: # 定义任务列表- name: install centos httpd # 在 RedHat 系列系统上安装 httpdyum: # 使用 yum 模块name: httpd # 要安装的软件包是 httpdstate: present # 确保 httpd 已安装when: ansible_facts['os_family'] == 'RedHat'# 条件判断:当 os_family 属于 "RedHat" 时执行该任务- name: install ubuntu httpd # 在 Debian 系列系统上安装 apache2apt: # 使用 apt 模块name: apache2 # 要安装的软件包是 apache2state: present # 确保 apache2 已安装when: ansible_facts['os_family'] == 'Debian'# 条件判断:当 os_family 属于 "Debian" 时执行该任务- name: "shut down centos6 systems" # 针对 CentOS 6 系统执行关机操作command: /sbin/shutdown -t now # 执行关机命令when: # 多条件写法(列表形式)- ansible_facts['distribution'] == "CentOS" # 系统是 CentOS- ansible_facts['distribution_major_version'] == "6" # 且主版本号_输出
[root@ansible-manager playbook]# ansible-playbook when3_playbook.yml --syntax-checkplaybook: when3_playbook.yml
[root@ansible-manager playbook]# ansible-playbook when3_playbook.yml PLAY [条件判断] ***************************************************************************************************************************************************************TASK [Gathering Facts] ****************************************************************************************************************************************************
[WARNING]: Platform linux on host 10.0.0.13 is using the discovered Python interpreter at /usr/bin/python3, but future installation of another Python interpreter could
change this. See https://docs.ansible.com/ansible/2.9/reference_appendices/interpreter_discovery.html for more information.
ok: [10.0.0.13]
[WARNING]: Platform linux on host 10.0.0.12 is using the discovered Python interpreter at /usr/bin/python3, but future installation of another Python interpreter could
change this. See https://docs.ansible.com/ansible/2.9/reference_appendices/interpreter_discovery.html for more information.
ok: [10.0.0.12]
[WARNING]: Platform linux on host 10.0.0.11 is using the discovered Python interpreter at /usr/bin/python3, but future installation of another Python interpreter could
change this. See https://docs.ansible.com/ansible/2.9/reference_appendices/interpreter_discovery.html for more information.
ok: [10.0.0.11]TASK [install centos httpd] ***********************************************************************************************************************************************
ok: [10.0.0.11]
ok: [10.0.0.13]
ok: [10.0.0.12]TASK [apt] ****************************************************************************************************************************************************************
skipping: [10.0.0.11]
skipping: [10.0.0.12]
skipping: [10.0.0.13]TASK [shut down centos6 systems] ******************************************************************************************************************************************
skipping: [10.0.0.11]
skipping: [10.0.0.12]
skipping: [10.0.0.13]PLAY RECAP ****************************************************************************************************************************************************************
10.0.0.11                  : ok=2    changed=0    unreachable=0    failed=0    skipped=2    rescued=0    ignored=0
10.0.0.12                  : ok=2    changed=0    unreachable=0    failed=0    skipped=2    rescued=0    ignored=0
10.0.0.13                  : ok=2    changed=0    unreachable=0    failed=0    skipped=2    rescued=0    ignored=0
相当于 and 逻辑,只有全部条件满足时任务才会执行。
4. 条件运算
- name: 条件判断 # play 名称hosts: web_group # 目标主机组tasks:- name: run only on RedHat 6+ # 任务名称shell: echo "only on red hat 6, derivatives, and later"when: ansible_facts['os_family'] == "RedHat" and(ansible_facts['distribution_major_version'] | int) >= 6# 条件判断:# 1. os_family 必须是 "RedHat"(如 RHEL、CentOS、Rocky 等)# 2. 系统主版本号 (distribution_major_version) 必须 >= 6# → 满足条件时才执行输出
[root@ansible-manager playbook]# ansible-playbook when4_playbook.yml --syntax-checkplaybook: when4_playbook.yml
[root@ansible-manager playbook]# ansible-playbook when4_playbook.yml PLAY [条件判断] ***************************************************************************************************************************************************************TASK [Gathering Facts] ****************************************************************************************************************************************************
[WARNING]: Platform linux on host 10.0.0.12 is using the discovered Python interpreter at /usr/bin/python3, but future installation of another Python interpreter could
change this. See https://docs.ansible.com/ansible/2.9/reference_appendices/interpreter_discovery.html for more information.
ok: [10.0.0.12]
[WARNING]: Platform linux on host 10.0.0.13 is using the discovered Python interpreter at /usr/bin/python3, but future installation of another Python interpreter could
change this. See https://docs.ansible.com/ansible/2.9/reference_appendices/interpreter_discovery.html for more information.
ok: [10.0.0.13]
[WARNING]: Platform linux on host 10.0.0.11 is using the discovered Python interpreter at /usr/bin/python3, but future installation of another Python interpreter could
change this. See https://docs.ansible.com/ansible/2.9/reference_appendices/interpreter_discovery.html for more information.
ok: [10.0.0.11]TASK [shell] **************************************************************************************************************************************************************
changed: [10.0.0.13]
changed: [10.0.0.11]
changed: [10.0.0.12]PLAY RECAP ****************************************************************************************************************************************************************
10.0.0.11                  : ok=2    changed=1    unreachable=0    failed=0    skipped=0    rescued=0    ignored=0
10.0.0.12                  : ok=2    changed=1    unreachable=0    failed=0    skipped=0    rescued=0    ignored=0
10.0.0.13                  : ok=2    changed=1    unreachable=0    failed=0    skipped=0    rescued=0    ignored=0
使用 Jinja2 过滤器(如
**|int**) 做数值比较。
5. 变量判断实例
- name: 条件判断 # play 名称hosts: web_group # 目标主机组 web_groupvars: # 定义变量区域a: "3" # 定义变量 a,值为 "3"tasks: # 任务列表- name: createfile # 第一个任务copy: # 使用 copy 模块content: "test3" # 文件内容写入 "test3"dest: /home/an/a.txt # 文件路径when: a == "3" # 条件判断:当 a 的值等于 "3" 时才执行该任务- name: createfile # 第二个任务copy: # 使用 copy 模块content: "test4" # 文件内容写入 "test4"dest: /home/an/a.txt # 文件路径when: a == "4" # 条件判断:当 a 的值等于 "4" 时才执行该任务输出
[root@ansible-manager playbook]# ansible-playbook when5_playbook.yml --syntax-checkplaybook: when5_playbook.yml
[root@ansible-manager playbook]# ansible-playbook when5_playbook.yml PLAY [条件判断] ***************************************************************************************************************************************************************TASK [Gathering Facts] ****************************************************************************************************************************************************
[WARNING]: Platform linux on host 10.0.0.11 is using the discovered Python interpreter at /usr/bin/python3, but future installation of another Python interpreter could
change this. See https://docs.ansible.com/ansible/2.9/reference_appendices/interpreter_discovery.html for more information.
ok: [10.0.0.11]
[WARNING]: Platform linux on host 10.0.0.13 is using the discovered Python interpreter at /usr/bin/python3, but future installation of another Python interpreter could
change this. See https://docs.ansible.com/ansible/2.9/reference_appendices/interpreter_discovery.html for more information.
ok: [10.0.0.13]
[WARNING]: Platform linux on host 10.0.0.12 is using the discovered Python interpreter at /usr/bin/python3, but future installation of another Python interpreter could
change this. See https://docs.ansible.com/ansible/2.9/reference_appendices/interpreter_discovery.html for more information.
ok: [10.0.0.12]TASK [createfile] *********************************************************************************************************************************************************
changed: [10.0.0.11]
changed: [10.0.0.13]
changed: [10.0.0.12]TASK [createfile] *********************************************************************************************************************************************************
skipping: [10.0.0.11]
skipping: [10.0.0.12]
skipping: [10.0.0.13]PLAY RECAP ****************************************************************************************************************************************************************
10.0.0.11                  : ok=2    changed=1    unreachable=0    failed=0    skipped=1    rescued=0    ignored=0
10.0.0.12                  : ok=2    changed=1    unreachable=0    failed=0    skipped=1    rescued=0    ignored=0
10.0.0.13                  : ok=2    changed=1    unreachable=0    failed=0    skipped=1    rescued=0    ignored=0
如果变量
a="3",则写入test3;如果a="4",则写入test4。
2.2 循环(with_items)
在 Ansible 中,循环是非常常见的操作场景,用于 批量执行相同类型的任务,比如批量安装软件、创建用户、复制文件等。
早期常用 with_items,新版 Ansible 推荐使用 loop,但 with_items 依然很常见。
1. 批量创建用户
- name: 批量创建用户 # play 名称hosts: web_group # 目标主机组remote_user: root # 使用 root 用户执行任务tasks: # 任务列表- name: 配置创建用户操作 # 任务名称user: # 使用 user 模块name: "{{ item }}" # 循环变量 item,对应用户名state: present # 确保用户存在(如果不存在则创建)with_items: # 循环列表- an1 # 用户名 1- an2 # 用户名 2- an3 # 用户名 3输出
[root@ansible-manager playbook]# ansible-playbook for2_playbook.yml --syntax-checkplaybook: for2_playbook.yml
[root@ansible-manager playbook]# ansible-playbook for2_playbook.yml PLAY [批量创建用户] *************************************************************************************************************************************************************TASK [Gathering Facts] ****************************************************************************************************************************************************
[WARNING]: Platform linux on host 10.0.0.13 is using the discovered Python interpreter at /usr/bin/python3, but future installation of another Python interpreter could
change this. See https://docs.ansible.com/ansible/2.9/reference_appendices/interpreter_discovery.html for more information.
ok: [10.0.0.13]
[WARNING]: Platform linux on host 10.0.0.11 is using the discovered Python interpreter at /usr/bin/python3, but future installation of another Python interpreter could
change this. See https://docs.ansible.com/ansible/2.9/reference_appendices/interpreter_discovery.html for more information.
ok: [10.0.0.11]
[WARNING]: Platform linux on host 10.0.0.12 is using the discovered Python interpreter at /usr/bin/python3, but future installation of another Python interpreter could
change this. See https://docs.ansible.com/ansible/2.9/reference_appendices/interpreter_discovery.html for more information.
ok: [10.0.0.12]TASK [配置创建用户操作] ***********************************************************************************************************************************************************
changed: [10.0.0.13] => (item=an1)
changed: [10.0.0.12] => (item=an1)
changed: [10.0.0.11] => (item=an1)
changed: [10.0.0.13] => (item=an2)
changed: [10.0.0.12] => (item=an2)
changed: [10.0.0.11] => (item=an2)
changed: [10.0.0.13] => (item=an3)
changed: [10.0.0.11] => (item=an3)
changed: [10.0.0.12] => (item=an3)PLAY RECAP ****************************************************************************************************************************************************************
10.0.0.11                  : ok=2    changed=1    unreachable=0    failed=0    skipped=0    rescued=0    ignored=0
10.0.0.12                  : ok=2    changed=1    unreachable=0    failed=0    skipped=0    rescued=0    ignored=0
10.0.0.13                  : ok=2    changed=1    unreachable=0    failed=0    skipped=0    rescued=0    ignored=0
执行逻辑:依次创建用户
cs1、cs2、cs3。
3. 批量创建用户和用户组(循环嵌套)
- name: 批量创建用户和用户组 # play 名称hosts: all # 目标主机组remote_user: root # 使用 root 用户执行任务tasks: # 任务列表- name: create group # 任务名称:创建用户组group: # 使用 group 模块name: "{{ item }}" # 循环变量 item,对应用户组名称state: present # 确保用户组存在with_items: # 循环列表- group1- group2- group3- name: create user # 任务名称:创建用户user: # 使用 user 模块name: "{{ item.name }}" # 用户名group: "{{ item.group }}" # 用户所属组state: present # 确保用户存在with_items: # 循环列表(字典)- {name: a1, group: group1} # 用户 a1 加入 group1- {name: a2, group: group2} # 用户 a2 加入 group2- {name: a3, group: group3} # 用户 a3 加入 group3输出
[root@ansible-manager playbook]# ansible-playbook for3_users.yml --syntax-checkplaybook: for3_users.yml
[root@ansible-manager playbook]# ansible-playbook for3_users.ymlPLAY [批量创建用户和用户组] *********************************************************************************************************************************************************TASK [Gathering Facts] ****************************************************************************************************************************************************
[WARNING]: Platform linux on host 10.0.0.12 is using the discovered Python interpreter at /usr/bin/python3, but future installation of another Python interpreter could
change this. See https://docs.ansible.com/ansible/2.9/reference_appendices/interpreter_discovery.html for more information.
ok: [10.0.0.12]
[WARNING]: Platform linux on host 10.0.0.13 is using the discovered Python interpreter at /usr/bin/python3, but future installation of another Python interpreter could
change this. See https://docs.ansible.com/ansible/2.9/reference_appendices/interpreter_discovery.html for more information.
ok: [10.0.0.13]
[WARNING]: Platform linux on host 10.0.0.11 is using the discovered Python interpreter at /usr/bin/python3, but future installation of another Python interpreter could
change this. See https://docs.ansible.com/ansible/2.9/reference_appendices/interpreter_discovery.html for more information.
ok: [10.0.0.11]TASK [create group] *******************************************************************************************************************************************************
changed: [10.0.0.11] => (item=group1)
changed: [10.0.0.13] => (item=group1)
changed: [10.0.0.12] => (item=group1)
changed: [10.0.0.13] => (item=group2)
changed: [10.0.0.11] => (item=group2)
changed: [10.0.0.12] => (item=group2)
changed: [10.0.0.13] => (item=group3)
changed: [10.0.0.11] => (item=group3)
changed: [10.0.0.12] => (item=group3)TASK [create user] ********************************************************************************************************************************************************
changed: [10.0.0.13] => (item={'name': 'a1', 'group': 'group1'})
changed: [10.0.0.11] => (item={'name': 'a1', 'group': 'group1'})
changed: [10.0.0.12] => (item={'name': 'a1', 'group': 'group1'})
changed: [10.0.0.13] => (item={'name': 'a2', 'group': 'group2'})
changed: [10.0.0.11] => (item={'name': 'a2', 'group': 'group2'})
changed: [10.0.0.12] => (item={'name': 'a2', 'group': 'group2'})
changed: [10.0.0.13] => (item={'name': 'a3', 'group': 'group3'})
changed: [10.0.0.12] => (item={'name': 'a3', 'group': 'group3'})
changed: [10.0.0.11] => (item={'name': 'a3', 'group': 'group3'})PLAY RECAP ****************************************************************************************************************************************************************
10.0.0.11                  : ok=3    changed=2    unreachable=0    failed=0    skipped=0    rescued=0    ignored=0
10.0.0.12                  : ok=3    changed=2    unreachable=0    failed=0    skipped=0    rescued=0    ignored=0
10.0.0.13                  : ok=3    changed=2    unreachable=0    failed=0    skipped=0    rescued=0    ignored=0  [root@ansible-node02 ~]# cat /etc/passwd
an1:x:1000:1001::/home/an1:/bin/bash
an2:x:1001:1002::/home/an2:/bin/bash
an3:x:1002:1003::/home/an3:/bin/bash
a1:x:1003:1004::/home/a1:/bin/bash
a2:x:1004:1005::/home/a2:/bin/bash
a3:x:1005:1006::/home/a3:/bin/bash
执行逻辑:
- 先创建 3 个用户组:
group1/group2/group3。- 再创建用户,并将用户加入对应用户组。
4. 批量删除用户和用户组(循环嵌套)
- name: 批量删除用户和用户组 # play 名称hosts: all # 目标主机组remote_user: root # 使用 root 用户执行任务tasks: # 任务列表- name: drop user # 任务名称:删除用户user: # 使用 user 模块name: "{{ item.name }}" # 用户名group: "{{ item.group }}" # 用户所属组remove: yes # 同时删除用户家目录和邮件池等文件state: absent # 确保用户不存在(删除用户)with_items: # 循环列表(字典)- {name: a1, group: group1} # 删除用户 a1,所属 group1- {name: a2, group: group2} # 删除用户 a2,所属 group2- {name: a3, group: group3} # 删除用户 a3,所属 group3- name: drop group # 任务名称:删除用户组group: # 使用 group 模块name: "{{ item }}" # 用户组名state: absent # 确保组不存在(删除组)with_items: # 循环列表- group1 # 删除 group1- group2 # 删除 group2- group3 # 删除 group3输出
[root@ansible-manager playbook]# ansible-playbook for4_users.yml --syntax-checkplaybook: for4_users.yml
[root@ansible-manager playbook]# ansible-playbook for4_users.ymlPLAY [批量删除用户和用户组] *********************************************************************************************************************************************************TASK [Gathering Facts] ****************************************************************************************************************************************************
[WARNING]: Platform linux on host 10.0.0.11 is using the discovered Python interpreter at /usr/bin/python3, but future installation of another Python interpreter could
change this. See https://docs.ansible.com/ansible/2.9/reference_appendices/interpreter_discovery.html for more information.
ok: [10.0.0.11]
[WARNING]: Platform linux on host 10.0.0.13 is using the discovered Python interpreter at /usr/bin/python3, but future installation of another Python interpreter could
change this. See https://docs.ansible.com/ansible/2.9/reference_appendices/interpreter_discovery.html for more information.
ok: [10.0.0.13]
[WARNING]: Platform linux on host 10.0.0.12 is using the discovered Python interpreter at /usr/bin/python3, but future installation of another Python interpreter could
change this. See https://docs.ansible.com/ansible/2.9/reference_appendices/interpreter_discovery.html for more information.
ok: [10.0.0.12]TASK [drop user] **********************************************************************************************************************************************************
changed: [10.0.0.11] => (item={'name': 'a1', 'group': 'group1'})
changed: [10.0.0.12] => (item={'name': 'a1', 'group': 'group1'})
changed: [10.0.0.13] => (item={'name': 'a1', 'group': 'group1'})
changed: [10.0.0.11] => (item={'name': 'a2', 'group': 'group2'})
changed: [10.0.0.13] => (item={'name': 'a2', 'group': 'group2'})
changed: [10.0.0.12] => (item={'name': 'a2', 'group': 'group2'})
changed: [10.0.0.11] => (item={'name': 'a3', 'group': 'group3'})
changed: [10.0.0.13] => (item={'name': 'a3', 'group': 'group3'})
changed: [10.0.0.12] => (item={'name': 'a3', 'group': 'group3'})TASK [drop group] *********************************************************************************************************************************************************
changed: [10.0.0.13] => (item=group1)
changed: [10.0.0.11] => (item=group1)
changed: [10.0.0.12] => (item=group1)
changed: [10.0.0.13] => (item=group2)
changed: [10.0.0.12] => (item=group2)
changed: [10.0.0.11] => (item=group2)
changed: [10.0.0.13] => (item=group3)
changed: [10.0.0.12] => (item=group3)
changed: [10.0.0.11] => (item=group3)PLAY RECAP ****************************************************************************************************************************************************************
10.0.0.11                  : ok=3    changed=2    unreachable=0    failed=0    skipped=0    rescued=0    ignored=0
10.0.0.12                  : ok=3    changed=2    unreachable=0    failed=0    skipped=0    rescued=0    ignored=0
10.0.0.13                  : ok=3    changed=2    unreachable=0    failed=0    skipped=0    rescued=0    ignored=0
执行逻辑:
- 删除用户(并移除其家目录)。
- 再删除对应用户组。

)
打开工程文件的几种方法)
:2.点灯与ubuntu安装)


》)


