分布式训练
所有代码可以见我github 仓库:https://github.com/xiejialong/ddp_learning.git
数据并行(Data Parallelism,DP)
跨多个gpu训练模型的最简单方法是使用 torch.nn.DataParallel. 在这种方法中,模型被复制到所有可用的GPU上,并且所有进程都由第一个GPU(也称为主进程)管理。该方法将输入拆分到gpu上,并行计算梯度,并在主进程上更新模型参数之前对它们进行平均。更新后,主进程将更新后的参数广播给所有其他gpu。
DataParallel并不推荐,有以下原因:
- 额外开支较大:虽然它很容易使用,但它有一些通信开销,因为要等待所有gpu完成反向传播、收集梯度并广播更新的参数。为了获得更好的性能,特别是在扩展到多个节点时,请使用分布式数据并行
DistributedDataParallel(DDP)。 - 显存占用大:主GPU的内存使用率比其他GPU高,因为它收集了其他GPU的所有梯度。因此,如果您在单个GPU上已经存在内存问题,那么dataparlil将使其变得更糟。
注意,dataparllel在反向传播后平均gpu之间的梯度。确保相应地缩放学习率(乘以gpu的数量)以保持相同的有效学习率。这同样适用于批处理大小,提供给数据加载器的批处理大小在gpu上进行划分<
例子:
import torch
import torch.nn as nn
import torch.optim as optim
from torch.utils.data import DataLoader, Dataset
import osclass MyModel(nn.Module): # 模型定义def __init__(self):super().__init__()self.net = nn.Sequential(nn.Linear(10, 10000), nn.Linear(10000, 5000),nn.Linear(5000, 2))def forward(self, x):return self.net(x)class MyData(Dataset): # 数据集定义def __init__(self):super().__init__()self.data_x = torch.concat([torch.rand(size=(10000, 10)) + torch.zeros(size=(10000, 10)), torch.rand(size=(10000, 10)) + torch.ones(size=(10000, 10))], dim=0)self.data_y = torch.concat([torch.zeros(size=(10000, ), dtype=torch.long), torch.ones(size=(10000, ), dtype=torch.long)], dim=0)def __getitem__(self, index):x = self.data_x[index]y = self.data_y[index]return x, ydef __len__(self):return len(self.data_x)train_data = MyData()  # 实例化数据集
train_loader = DataLoader(dataset=train_data, batch_size=64, shuffle=True)
model = MyModel() # 实例化模型
if torch.cuda.device_count() > 1:model = nn.DataParallel(model)
model = model.cuda()optimizer = optim.Adam(model.parameters(), lr=0.0001) # 定义优化器
criterion = nn.CrossEntropyLoss() # 定义评价器
print(len(train_loader))
for data, target in train_loader:data, target = data.cuda(), target.cuda() # 数据放入显卡optimizer.zero_grad() # 梯度归零output = model(data) # 模型推理loss = criterion(output, target) # 计算lossloss.backward() # 反向传播梯度optimizer.step() # 模型参数更新print(loss.item())
分布式数据并行(Distributed Data Parallelism, DDP)
为了获得更好的性能,PyTorch提供了torch.nn.parallel.distributedDataParallel(DDP),它对于多gpu训练更有效,特别是对于多节点设置。事实上,当使用DDP时,训练代码分别在每个GPU上执行,每个GPU直接与其他GPU通信,并且仅在必要时进行通信,从而减少了通信开销。在DDP方法中,主进程的作用大大减少,每个GPU负责自己的向前和向后传递,以及参数更新。向前传递后,开始向后传递,每个GPU开始将自己的梯度发送给所有其他GPU,每个GPU接收所有其他GPU的梯度之和。这个过程被称为all-reduce操作。之后,每个GPU都有完全相同的梯度,并更新其自己的模型副本的参数。Reduce:分布式计算中的一种常见操作,其中计算结果跨多个进程聚合。All -reduce意味着所有进程都调用Reduce操作来接收来自所有其他进程的结果。
基于torch.multiprocessing的启动方式
启动程序时不需要在命令行输入额外的参数,写起来也比较容易,但是调试较麻烦
import os
import torch
import torch.distributed as dist  # 分布式库
import torch.multiprocessing as mp  # 多线程
from torch.utils.data import Dataset, DataLoader, DistributedSampler  # 数据集库
import torch.nn as nn  # 网络结构库
import torch.optim as optim  # 优化器库
from torch.amp import autocast, GradScaler  # 混合精度库os.environ["CUDA_VISIBLE_DEVICES"]='2,3'scaler = GradScaler() # 自动缩放梯度class MyModel(nn.Module): # 模型定义def __init__(self):super().__init__()self.net = nn.Sequential(nn.Linear(10, 10000), nn.Linear(10000, 5000),nn.Linear(5000, 2))def forward(self, x):return self.net(x)class MyData(Dataset): # 数据集定义def __init__(self):super().__init__()self.data_x = torch.concat([torch.rand(size=(10000, 10)) + torch.zeros(size=(10000, 10)), torch.rand(size=(10000, 10)) + torch.ones(size=(10000, 10))], dim=0)self.data_y = torch.concat([torch.zeros(size=(10000, ), dtype=torch.long), torch.ones(size=(10000, ), dtype=torch.long)], dim=0)def __getitem__(self, index):x = self.data_x[index]y = self.data_y[index]return x, ydef __len__(self):return len(self.data_x)def worker(rank, world_size):dist.init_process_group("nccl", rank=rank, world_size=world_size) # 定义通信方式torch.cuda.set_device(rank) # 设置当前线程控制的GPUprint("init model")model = MyModel().cuda()print(f"init ddp rank {rank}")ddp_model = torch.nn.parallel.DistributedDataParallel(model, device_ids=[rank]) traindata = MyData()train_sampler = DistributedSampler(dataset=traindata, shuffle=True) # 定义分布式数据采集器train_loader = DataLoader(traindata, batch_size=64,sampler=train_sampler, num_workers=4, pin_memory=True) # 定义数据加载器optimizer = optim.Adam(ddp_model.parameters(), lr=0.0001) # 定义优化器criterion = nn.CrossEntropyLoss() # 定义评价函数print("train")accumulation_steps = 4 # 设置梯度累计次数optimizer.zero_grad(set_to_none=True) # 重设梯度for batch_idx, (inp, target) in enumerate(train_loader):inp, target = inp.cuda(), target.cuda()with autocast(device_type="cuda"): # 开启混合精度训练output = ddp_model(inp)loss = criterion(output, target)loss = loss / accumulation_steps  # 归一化损失scaler.scale(loss).backward() # 混合精度训练下进行损失缩放并执行后向传播if (batch_idx + 1) % accumulation_steps == 0:# optimizer.step()  # 更新权重scaler.step(optimizer) # 混合精度下的权重更新scaler.update()optimizer.zero_grad(set_to_none=True)  # 每次更新完进行梯度清零print(loss)dist.barrier()dist.destroy_process_group()if __name__ == "__main__":world_size = torch.cuda.device_count()mp.spawn(worker, nprocs=world_size, args=(world_size,))
启动多GPU训练的命令(高版本被移除rank):
python -m torch.distributed.launch --nproc_per_node=4 train.py
或使用torchrun
torchrun --nproc_per_node=4 train.py
基于torch.distributed的启动方式
一个完整的训练架构
参考:
https://blog.csdn.net/wxc971231/article/details/132827787
import os
import torch
import torch.nn as nn
import torch.optim as optim
import torch.distributed as dist
from torch.utils.data import Dataset, DataLoader, DistributedSampler
import argparse
import numpy as np
from tqdm import tqdm
os.environ["CUDA_VISIBLE_DEVICES"]="2,3"class MyModel(nn.Module): # 模型定义def __init__(self):super().__init__()self.net = nn.Sequential(nn.Linear(10, 10000), nn.Linear(10000, 5000),nn.Linear(5000, 2))def forward(self, x):return self.net(x)class MyData(Dataset): # 数据集定义def __init__(self):super().__init__()self.data_x = torch.concat([torch.rand(size=(10000, 10)) + torch.zeros(size=(10000, 10)), torch.rand(size=(10000, 10)) + torch.ones(size=(10000, 10))], dim=0)self.data_y = torch.concat([torch.zeros(size=(10000, ), dtype=torch.long), torch.ones(size=(10000, ), dtype=torch.long)], dim=0)def __getitem__(self, index):x = self.data_x[index]y = self.data_y[index]return x, ydef __len__(self):return len(self.data_x)def load_train_objs(ags):train_dataset = MyData() # 定义数据集train_sampler = DistributedSampler(train_dataset, num_replicas=ags.world_size, rank=ags.rank, shuffle=True)  # 将数据集进行均分train_loader = DataLoader(train_dataset, batch_size=args.batch_size, sampler=train_sampler, pin_memory=True) # 定义数据加载器model = MyModel() # 定义模型model = torch.nn.SyncBatchNorm.convert_sync_batchnorm(model)model.to(ags.device)ddp_model = torch.nn.parallel.DistributedDataParallel(model, device_ids=[ags.local_rank]) # 把模型放入不同的gpureturn train_loader, ddp_modeldef init_ddp_env(args):# 分布式同行环境初始化dist.init_process_group(backend='nccl', init_method="env://")# 获取全局/本地 rank、world_sizeargs.rank = int(os.environ.get("RANK", -1))args.local_rank = int(os.environ.get("LOCAL_RANK", -1))args.world_size = int(os.environ.get("WORLD_SIZE", -1))# 设置GPU显卡绑定torch.cuda.set_device(args.local_rank)args.device = torch.device("cuda")# 打印绑定信息print(f"[RANK {args.rank} | LOCAL_RANK {args.local_rank}] Using CUDA device {torch.cuda.current_device()}: {torch.cuda.get_device_name(torch.cuda.current_device())} | World size: {args.world_size}")dist.barrier() # 等待所有进程都初始化完毕,即所有GPU都要运行到这一步以后再继续class Trainer:def __init__(self, args, model: torch.nn.Module, train_loader: DataLoader, optimizer: torch.optim.Optimizer, criterion):self.model = modelself.train_loader = train_loaderself.optimizer = optimizerself.criterion = criterionself.device = args.deviceself.snapshot_path = args.snapshot_pathself.gpu_id = args.local_rankself.max_epochs = args.max_epochsself.save_every = args.save_everyself.epochs_run = 0if os.path.exists(args.resume_path):print('loading snapshot')self._load_snapshot(args.resume_path)def _load_snapshot(self, resume_path):''' 加载 snapshot 并重启训练 '''loc = f"cuda:{self.gpu_id}"snapshot = torch.load(resume_path, map_location=loc)self.model.load_state_dict(snapshot["MODEL_STATE"])self.epochs_run = snapshot["EPOCHS_RUN"]print(f"Resuming training from snapshot at Epoch {self.epochs_run}")def _run_batch(self, inp, targets):self.optimizer.zero_grad()output = self.model(inp)loss = self.criterion(output, targets)loss.backward()self.optimizer.step()return loss.item()def _run_epoch(self, epoch):epoch_losses = []self.train_loader.sampler.set_epoch(epoch)            # 设置 epoch 保证多 GPU 上数据不重叠for inp, targets in self.train_loader:inp = inp.to(self.device)targets = targets.to(self.device)loss = self._run_batch(inp, targets)epoch_losses.append(loss)return np.mean(epoch_losses)def _save_snapshot(self, epoch):# 在 snapshot 中保存恢复训练所必须的参数snapshot = {"MODEL_STATE": self.model.state_dict(),  # 由于多了一层 DDP 包装,通过 .module 获取原始参数 "EPOCHS_RUN": epoch,}save_path = os.path.join(self.snapshot_path, f"epoch_{epoch}.pt")torch.save(snapshot, save_path)# print(f"Epoch {epoch} | Training snapshot saved at {save_path}")def train(self):# 现在从 self.epochs_run 开始训练,统一重启的情况with tqdm(total=self.max_epochs, desc=f"[GPU{self.gpu_id}] Training", position=self.gpu_id, initial=self.epochs_run) as pbar:for epoch in range(self.epochs_run, self.max_epochs + self.epochs_run):epoch_loss = self._run_epoch(epoch)                         # 各个 GPU 上都在跑一样的训练进程,这里指定 rank0 进程保存 snapshot 以免重复保存if self.gpu_id == 0 and epoch % self.save_every == 0:self._save_snapshot(epoch)pbar.set_postfix({'epoch': epoch, 'loss':'{:.2f}'.format(epoch_loss)})pbar.update()def worker(args):init_ddp_env(args)  # 初始化分布式环境train_loader, ddp_model = load_train_objs(args)  # 导入分布式数据导入器和模型optimizer = optim.Adam(ddp_model.parameters(), lr=args.lr)criterion = nn.CrossEntropyLoss()trainer = Trainer(args, ddp_model, train_loader, optimizer, criterion)trainer.train()if __name__=="__main__":import argparseparser = argparse.ArgumentParser(description='simple distributed training job')parser.add_argument('--rank', default=-1, type=int, help='Rank (default: -1)')parser.add_argument('--world_size', default=1, type=int, help='world_size (default: -1)')parser.add_argument('--local_rank', default=-1, type=int, help='local_rank (default: 1)')parser.add_argument('--device', default="cuda", type=str, help='local_rank (default: 1)')parser.add_argument('--batch_size', default=32, type=int, help='Input batch size on each device (default: 32)')parser.add_argument('--lr', default=0.001, type=float, help='Learing rate (default: 0.001)')parser.add_argument('--snapshot_path', default="checkpoints/", type=str, help='Path of checkpoints (default: checkpoints/)')parser.add_argument('--save_every', default=1, type=int, help='Frequence of checkpoint save')parser.add_argument('--max_epochs', default=5, type=int, help='Total epoch')parser.add_argument('--resume_path', default="checkpoints/epoch_2.pt", type=str, help='Path of resume file')args = parser.parse_args()worker(args)#  torchrun --nnodes=2 --nproc_per_node=2 --node_rank=0 --master_addr=xxx --master_port=xx xxx.py
# --nnodes: 表示参与训练的总机器数
# --nproc_per_node:表示每台机器上要启动几个训练进程,一个进程对应一个 GPU,因通常设置为你机器上要用到的GPU数。整个分布式环境下,总训练进程数 = nnodes * nproc_per_node
# --node_rank:表示当前机器是第几台机器,从 0 开始编号,必须每台机器都不同
# --master_addr 和 --master_port:指定主节点的 IP 和端口,用于 rendezvous(进程对齐)和通信初始化,所有机器必须填写相同的值!
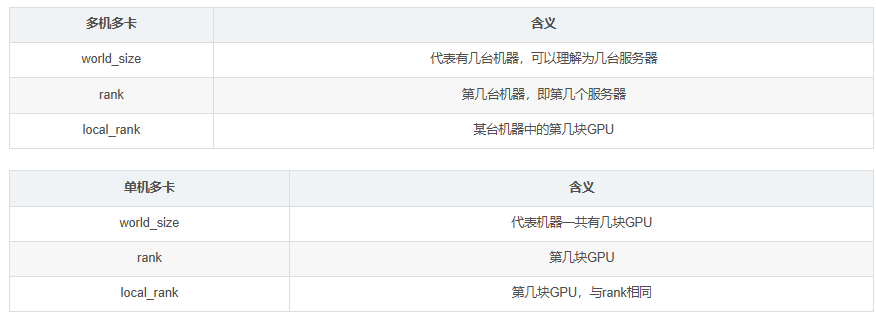
多机多卡的启动和bash
参考:https://cloud.tencent.com/developer/article/2514642
下面是一个简单的分布式训练代码
import os
from time import sleep
import torch
import torch.distributed as dist
import torch.nn as nn
import torch.optim as optim
import datetimefrom torch.nn.parallel import DistributedDataParallel as DDPclass ToyModel(nn.Module):def __init__(self):super(ToyModel, self).__init__()self.net1 = nn.Linear(10, 10)self.relu = nn.ReLU()self.net2 = nn.Linear(10, 5)def forward(self, x):return self.net2(self.relu(self.net1(x)))def train():local_rank = int(os.environ["LOCAL_RANK"])rank = int(os.environ["RANK"])while True:print(f"[{os.getpid()}] (rank = {rank}, local_rank = {local_rank}) training...")model = ToyModel().cuda(local_rank)ddp_model = DDP(model, [local_rank])loss_fn = nn.MSELoss()optimizer = optim.SGD(ddp_model.parameters(), lr=0.001)optimizer.zero_grad()outputs = ddp_model(torch.randn(20, 10).to(local_rank))labels = torch.randn(20, 5).to(local_rank)loss = loss_fn(outputs, labels)loss.backward()print(f"[{os.getpid()}] (rank = {rank}, local_rank = {local_rank}) loss = {loss.item()}\n")optimizer.step()sleep(1)def run():env_dict = {key: os.environ[key]for key in ("MASTER_ADDR", "MASTER_PORT", "WORLD_SIZE", "LOCAL_WORLD_SIZE")}print(f"[{os.getpid()}] Initializing process group with: {env_dict}")dist.init_process_group(backend="nccl", timeout=datetime.timedelta(seconds=30))train()dist.destroy_process_group()if __name__ == "__main__":run()
在多个主机上执行
torchrun --nproc_per_node=M --nnode=N --node_rank=0 --master_addr='xxx.xxx.xxx.xxx' --master_port=1234 ddp_multi_master.py
注意这里参数M表示你单个机器上的显卡数,N是你有几台机器,--node_rank,这里是不同机器上的区别,主机上设置0,其他机器上设置1,2,…,N-1.
也可以写bash文件执行更方便
#!/bin/bash
# 设置基本参数
MASTER_ADDR=xxx.xxx.xxx.xxx           # 主机IP
MASTER_PORT=29400                   # 主机端口
NNODES=2                            # 参与训练的总机器数
NPROC_PER_NODE=2                    # 每台机器上的进程数# 所有网卡的IP地址,用于筛选
ALL_LOCAL_IPS=$(hostname -I)
# 根据本机 IP 配置通信接口
if [[ "$ALL_LOCAL_IPS" == *"xxx.xxx.xxx.xxx"* ]]; thenNODE_RANK=0                       # 表示当前机器是第0台机器IFNAME=eno1   # 机器0的网卡名称mytorchrun=~/anaconda3/envs/lora/bin/torchrun  # 虚拟环境下torchrun的位置
elif [[ "$ALL_LOCAL_IPS" == *"xxx.xxx.xxx.xxx"* ]]; thenNODE_RANK=1                       # 表示当前机器是第1台机器IFNAME=enp6s0 # 机器1的网卡名称mytorchrun=/home/users1/xjl/miniconda3/envs/lora/bin/torchrun
elseexit 1
fi# 设置 RDMA 接口
export NCCL_IB_DISABLE=0            # 是否禁用InfiniBand
export NCCL_IB_HCA=mlx5_1           # 使用哪个RDMA接口进行通信
export NCCL_SOCKET_IFNAME=$IFNAME   # 使用哪个网卡进行通信
export NCCL_DEBUG=INFO              # 可选:调试用export GLOO_IB_DISABLE=0            # 是否禁用InfiniBand
export GLOO_SOCKET_IFNAME=$IFNAME   # 使用哪个网卡进行通信
export PYTHONUNBUFFERED=1           # 实时输出日志# 启动分布式任务
$mytorchrun \--nnodes=$NNODES \--nproc_per_node=$NPROC_PER_NODE \--node_rank=$NODE_RANK \--master_addr=$MASTER_ADDR \--master_port=$MASTER_PORT \ddp_multi_master.py
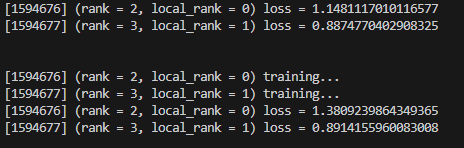
主机输出信息:
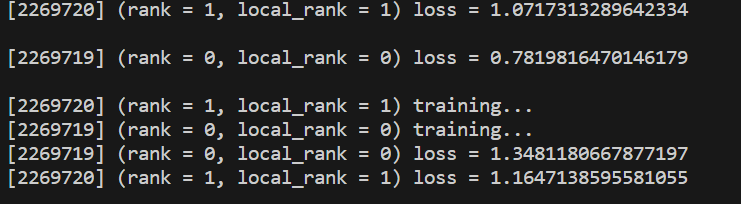
从机输出信息:


使用方法,优势,注意点)


 - 使用Cypher操作Neo4j)


