技术方案背景:根据项目需要,要实现在线查看、在线编辑文档,并且进行内容的快速回填,根据这一项目背景,最终采用WPS的API来实现,接下来我们一起来实现项目功能。
1.首先需要先准备好测试使用的文档,并且做好标签节点的标记,在要需要回填的地地方打好标记标签
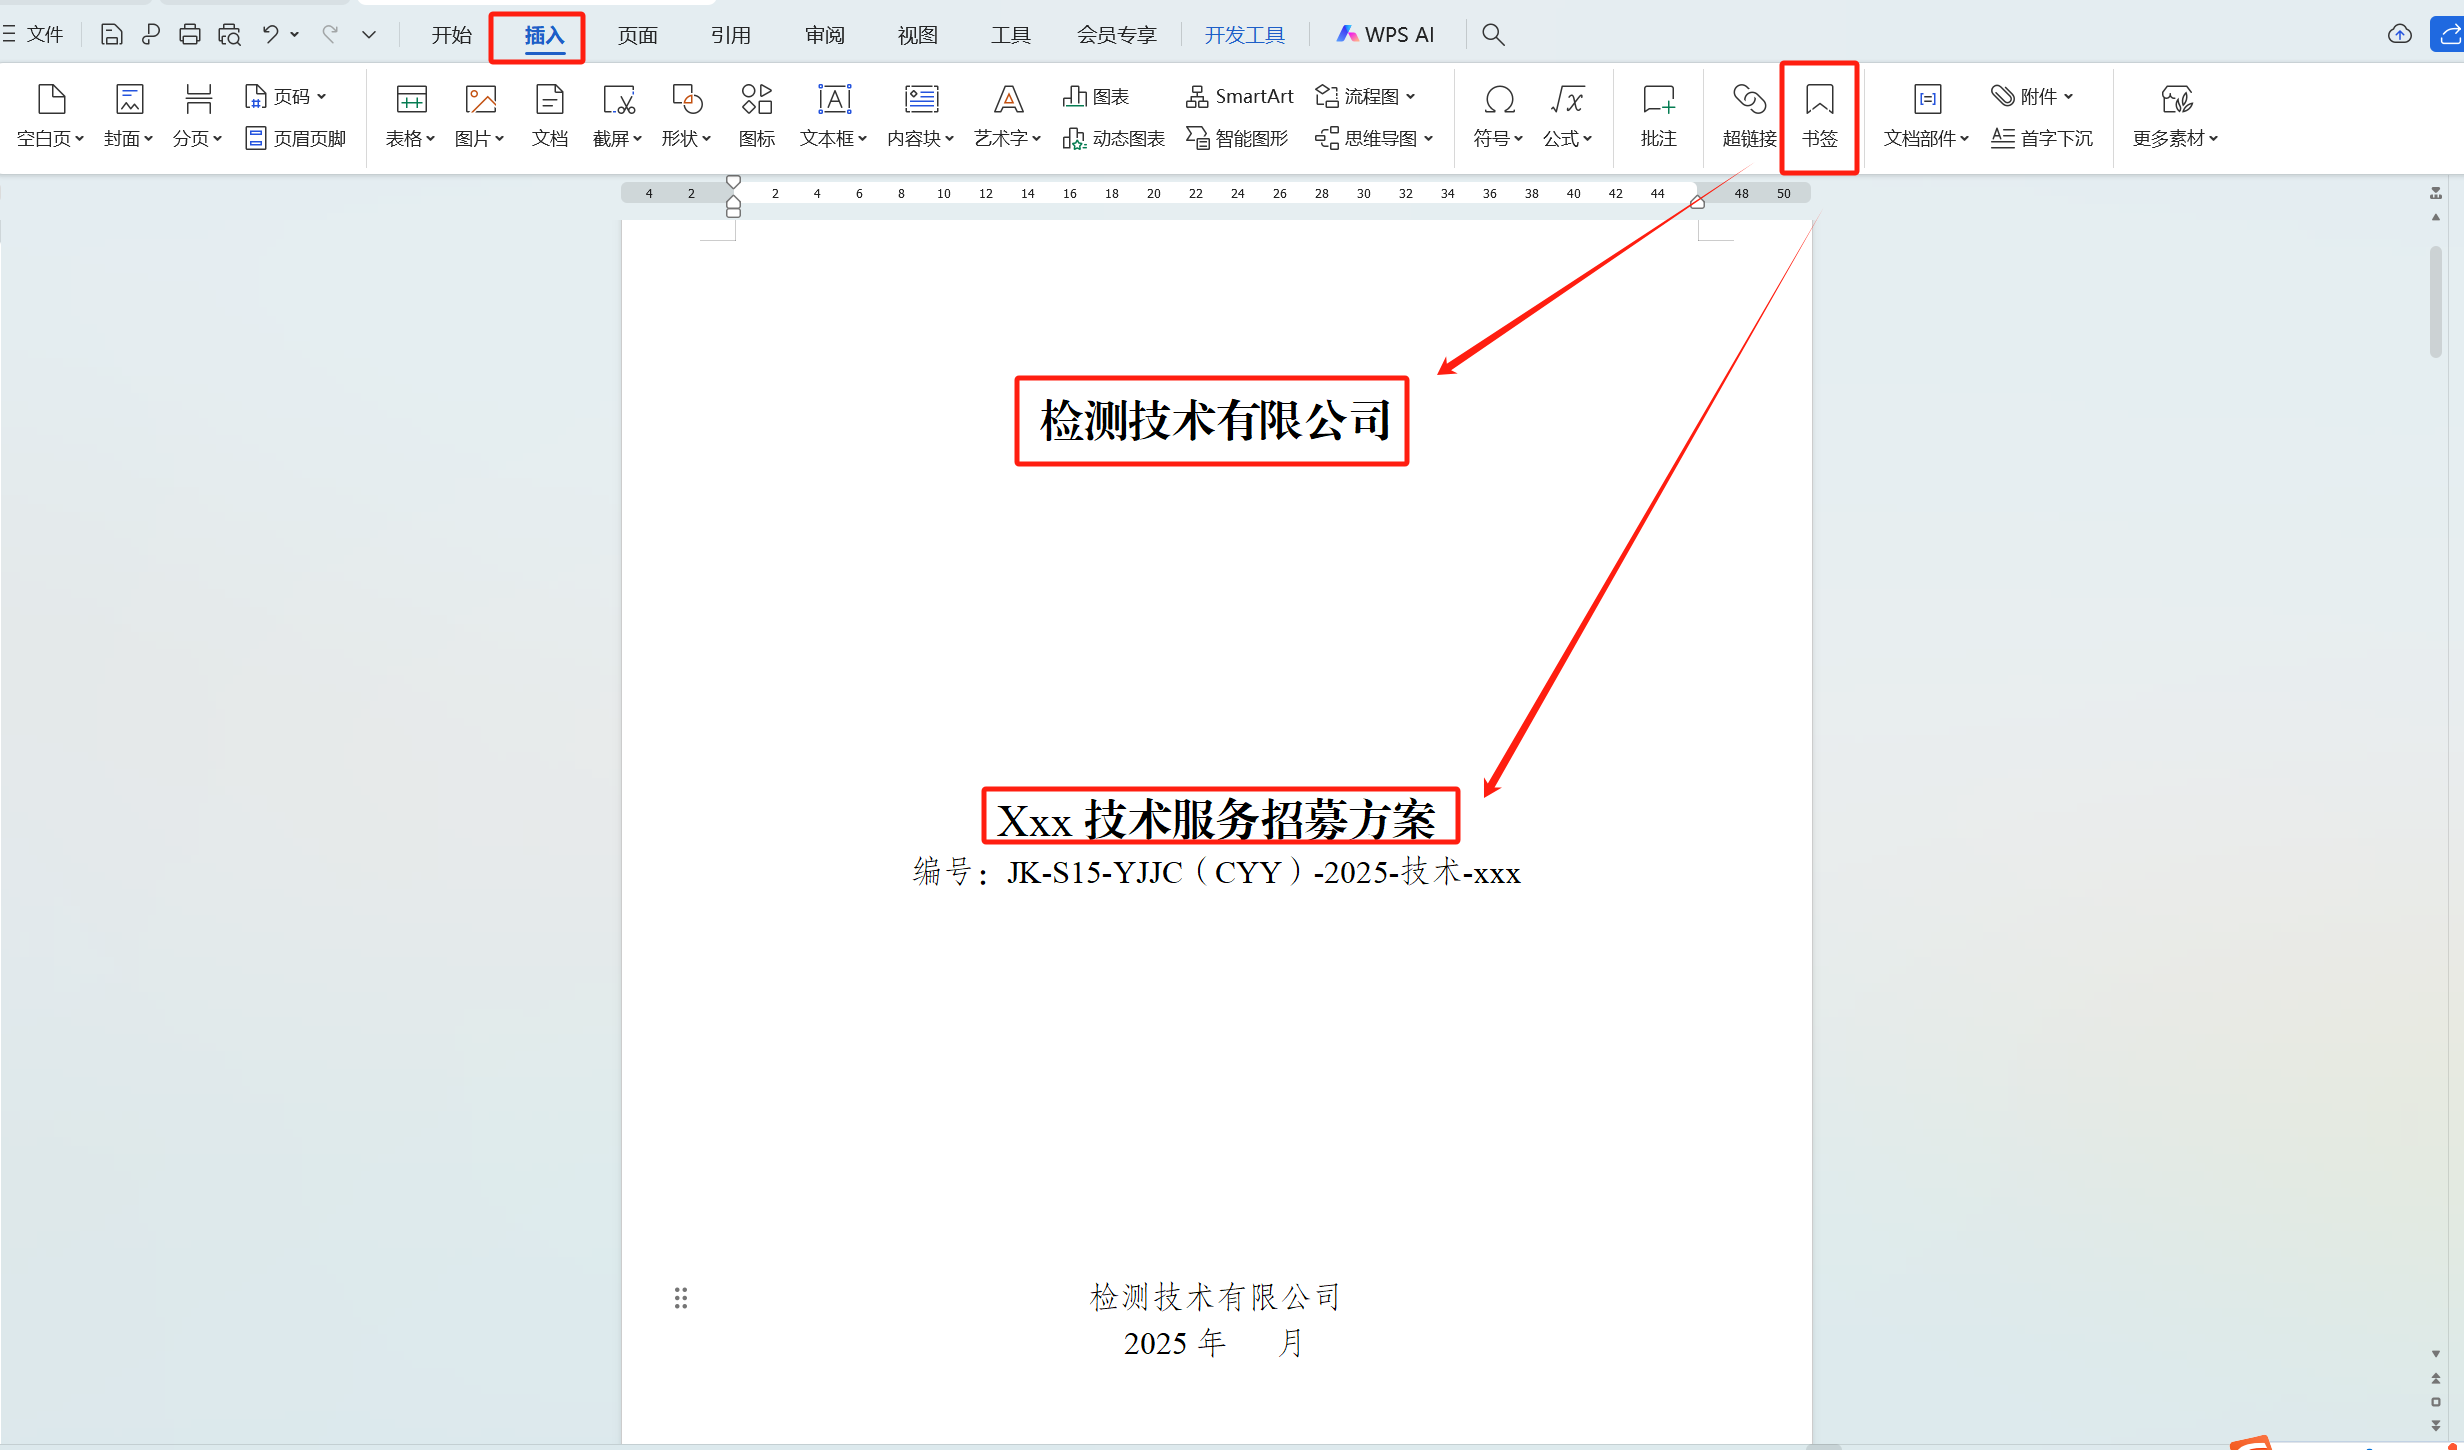
打开文档 => 点击菜单栏插入 => 找到要添加书签的地方,选择工具栏的书签按钮

输入对应的命名书签
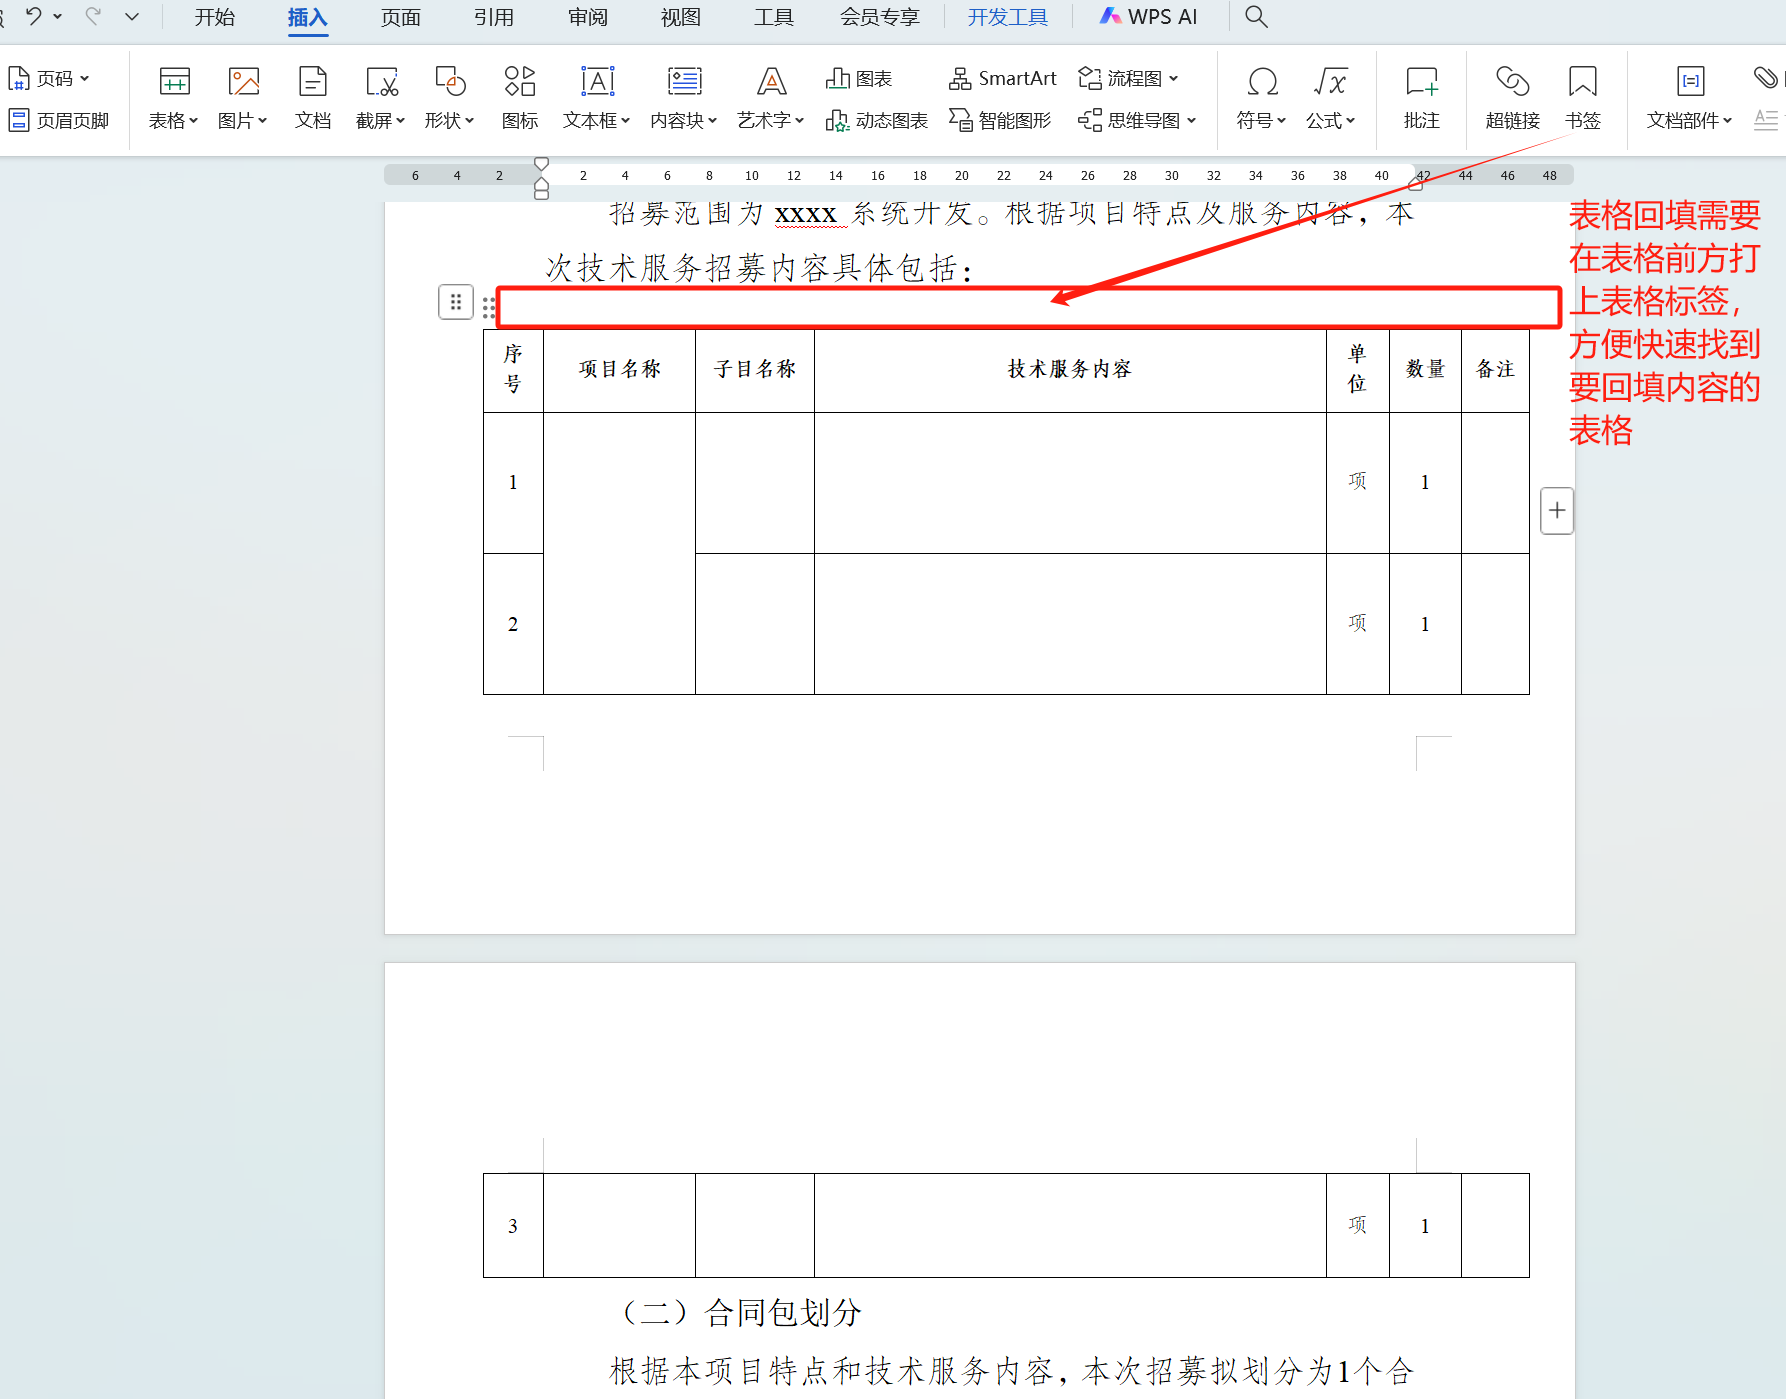
表格书签是打标记在表格内容上方,便于查找表格位置方便替换;
2. 引入WPS Web Office SDK代码示例(vue项目举例,在根目录下的index.html文件中引入)
<script src="/wps-sdk/web-office-sdk-solution-v2.0.7.umd.js"></script>
注意事项
SDK路径需要根据实际存放位置调整,若使用CDN方式可替换为完整URL
当前示例使用的是v2.0.7版本的UMD格式SDK,适用于大多数浏览器环境
建议将脚本放在<head>标签内或<body>标签末尾,避免阻塞页面渲染
初始化示例
const config = {mount: document.getElementById('office-container'),url: 'https://example.com/test.docx'
};
WebOfficeSDK.initialize(config);
版本选择建议
生产环境建议锁定具体版本号(如示例中的v2.0.7)
测试环境可使用最新版本,但需注意API兼容性
UMD格式适用于传统网页开发,若使用模块化开发可考虑ES模块版本
以上代码需配合WPS官方文档使用,确保初始化参数配置正确(WPS官方文档:快速上手 | WPS WebOffice 开放平台)
3.使用HTML代码块编写的WPS文档在线查看容器代码:
 <!-- 创建wps文档在线查看容器 -->
<div id="wps-frame" class="w-full h-[calc(100%-60px)] bg-#eee custom-mount"></div>
代码说明
该代码创建了一个具有以下特性的div容器:
- 使用
id="wps-frame"作为唯一标识 - 通过
class属性应用了多个样式:w-full:宽度100%h-[calc(100%-60px)]:高度为总高度减去60pxbg-#eee:背景色设置为浅灰色custom-mount:预留的自定义挂载类名
样式补充建议
如需更精确控制样式,可以添加CSS:
#wps-frame {border: 1px solid #ddd;margin: 0 auto;overflow: hidden;
}
4. 初始化WPS容器
const init = async () => {window.fileurlType = props.fileObj.fileurl.split('.').pop().toLowerCase();instance = WebOfficeSDK.init({//文档类型officeType: window.fileurlType === 'xlsx' || window.fileurlType === 'xls' ? WebOfficeSDK.OfficeType.Spreadsheet : window.fileurlType === 'docx' || window.fileurlType === 'doc' ? WebOfficeSDK.OfficeType.Writer : WebOfficeSDK.OfficeType.Otl,appId: "你申请的预览服务的appid",fileId: props.fileObj.fileid,token: token,mount: document.getElementById('wps-frame'),mode: props.submitType === true ? 'nomal' : 'simple',});//如果props.submitType为true,则设置为可以编辑 否则设置为只读if (props.submitType == false) {await instance.ready();const app = instance.Application;await app.ActiveDocument.SetReadOnly({Value: true});} else {await instance.ready();//根据接口返回信息对文档进行回填getInformationBackfilling();}
}
5. 容器初始化后我们拿到需要回填的数据就可以进行数据回填操作
//根据接口返回信息对文档进行回填
const getInformationBackfilling = () => {detailObj(props.fileObj?.projectid || props.projectid ).then(res => {const { data } = res//解析JSON格式的回填数据const recruitcontent = JSON.parse(data.recruitcontent)//保存预设的书签内容的回填信息,字段需要对应在文档中打的标记书签allData.value = {projectname: data.projectname,projectcode: data.projectcode,recrunit: data.recrunit,abbreviation: data.projectname,}// 执行书签回显业务setBookmarks()// 获取表格回显内容const list = recruitcontent.map((item, index) => {item.indexNumber = index + 1item.projectName = data.projectnameitem.subProjectDl = ""return item})// 执行表格回显业务addTable(list, 1)})
}
6. 书签回显业务
//书签赋值
const setBookmarks = async () => {const app = instance.Application;// 书签对象const bookmarks = await app.ActiveDocument.Bookmarks;let replaceArr = [];needSet.forEach((item) => {let { key } = getKey(item.name);replaceArr.push({name: item.name,type: 'text',value: allDataInfo.value[key]?.toString(),});});// 替换书签内容const isReplaceSuccess = await bookmarks.ReplaceBookmark(replaceArr);
}
7. 表格回显业务
//插入表格(标的物)
const addTable = async (list, type) => {if (!list && list?.length == 0) return;const app = instance.Application;let tabelHeade = [{title: '序号',key: 'indexNumber',},{title: '项目名称',key: 'projectName',},{title: '子目名称',key: 'subProjectName',},{title: '技术服务内容',key: 'techServiceContent',},{title: '单位',key: 'unit',},{title: '数量',key: 'quantity',},{title: '备注',key: 'remark',},];const tables = await app.ActiveDocument.Tables;// 等待表格创建完成await new Promise(resolve => {const interval = setInterval(async () => {const currentCount = await tables.Count;if (currentCount >= 10) {clearInterval(interval);resolve();}}, 300);});setTimeout(async () => {// 获取页面中总表格数量const count = await tables.Count;const Bookmark = await app.ActiveDocument.Bookmarks.Item('定义的表格书签名');// 插入表格await tables.Add(Bookmark.Range, // 位置信息list.length + 1, // 新增表格的行数tabelHeade.length, // 新增表格的列数1,2,);const tableOne = await tables.Item(Bookmark);for (let i = 0; i < list.length + 1; i++) {for (let j = 0; j < tabelHeade.length; j++) {const curCell = await tableOne.Rows.Item(i + 1).Cells.Item(j + 1);const rowText = await curCell.Range;// 设置单元格内容的字号const font = await rowText.Font;font.Size = 12; // 设置字号为 12rowText.Text = i == 0 ? tabelHeade[j].title : list[i - 1][tabelHeade[j].key] ? list[i - 1][tabelHeade[j].key].toString() : "";}}}, 1000 * 1.5);};
8. 扩展内容合并单元格
// 合并行表格单元格 instance:WebOfficeSDK初始化的文档容器,tableIndex:表格编号, rowIndex:开始行,startColIndex:结束行  , value: 替换值)
async function mergeTableCells(instance, tableIndex, rowIndex, startColIndex, endColIndex, value) {const app = instance.Application;const doc = app.ActiveDocument;const tables = await doc.Tables;// 获取指定表格const table = await tables.Item(tableIndex);// 获取指定行const row = await table.Rows.Item(rowIndex);// 获取起始单元格和结束单元格const startCell = await row.Cells.Item(startColIndex);const endCell = await row.Cells.Item(endColIndex);// 合并单元格await startCell.Merge(endCell);// 设置合并后单元格的值const mergedCell = await row.Cells.Item(startColIndex);const mergedCellRange = await mergedCell.Range;mergedCellRange.Text = value;
}// 合并列表格单元格(instance:WebOfficeSDK初始化的文档容器,tableIndex:表格编号, startRowIndex:开始列,endRowIndex:结束列, value: 替换值 )
async function mergeFirstColumnRows(instance, tableIndex, startRowIndex, endRowIndex, value) {const app = instance.Application;const doc = app.ActiveDocument;const tables = await doc.Tables;// 获取指定表格const table = await tables.Item(tableIndex);// 获取起始行和结束行const startRow = await table.Rows.Item(startRowIndex);const endRow = await table.Rows.Item(endRowIndex);// 获取第一列的起始单元格和结束单元格const startCell = await startRow.Cells.Item(1);const endCell = await endRow.Cells.Item(1);// 合并单元格await startCell.Merge(endCell);// 设置合并后单元格的值const mergedCell = await table.Rows.Item(startRowIndex).Cells.Item(1);const mergedCellRange = await mergedCell.Range;mergedCellRange.Text = value;
}
小结:
1. 根据业务需求,首先初始化时,实现了文档在线查看的功能,根据是否需要编辑的状态设置文档只读模式或者编辑模式;
2. 实现回填功能中,根据拿到的需要回填的数据做处理对应给需要回填的书签内容区域
3. 回填表格功能,根据表头配置好对应回显字段,进行业务回填,增加扩展功能对表格中部分地方单元格合并的方法;
功能代码是已实现的业务逻辑,中间也踩坑不少,最终实现文档在线查看,在线编辑以及文本和表格回填功能,欢迎大家多多交流沟通,提出建议,指出错误,我们一起成长,最后希望大家在踩坑路上继续成长。
——DoxBox中debug的使用)


----button)


对冲基金模拟系统:模范巴菲特、凯西·伍德的投资策略)


![[Java恶补day13] 53. 最大子数组和](http://pic.xiahunao.cn/[Java恶补day13] 53. 最大子数组和)


你好,三角形(Hello Triangle))
