
目录
- 1. 引言:为何选择Spring Security?
- 2. 核心概念:认证 (Authentication) 与 授权 (Authorization)
- 2.1 什么是认证 (Authentication)?
- 2.2 什么是授权 (Authorization)?
- 2.3 安全性上下文 (SecurityContext)
- 3. Spring Boot与Spring Security的“魔法”:自动配置
- 3.1 引入依赖
- 3.2 默认行为分析
- 4. Spring Security 6.x+ 核心配置:SecurityFilterChain
- 4.1 告别 WebSecurityConfigurerAdapter
- 4.2 定义 SecurityFilterChain Bean
- 5. 用户管理初窥:UserDetailsService 与 PasswordEncoder
- 5.1 UserDetailsService:加载用户详情
- 5.2 PasswordEncoder:密码加密的守护者
- 6. 实战演练:配置内存用户与基础访问控制
- 6.1 创建Spring Boot项目
- 6.2 默认行为体验
- 6.3 配置内存用户
- 6.4 定制URL访问权限
- 7. 进一步定制:禁用默认登录页与基础CSRF防护
- 8. 常见陷阱与注意事项
- 9. 阶段总结与进阶展望
1. 引言:为何选择Spring Security?
在当今互联网应用中,安全性是任何系统都必须优先考虑的要素。无论是用户数据、业务逻辑还是系统资源,都需要得到严密的保护。Spring Security作为Spring生态体系中功能强大且高度可定制的安全框架,为Java EE应用程序提供了全面的安全解决方案。它不仅仅是一个认证授权框架,更是一个完整的安全生态,涵盖了从数据保护、跨站请求伪造(CSRF)防护到会话管理等方方面面。
作为一名资深Java开发工程师,我深知在企业级应用开发中,Spring Security的重要性不言而喻。它能帮助我们:
- 简化开发: 提供大量的开箱即用功能和Spring Boot Starter,大大减少安全模块的开发量。
- 高度可定制: 允许我们根据具体业务需求,灵活定制认证源、授权策略、过滤器链等。
- 安全性高: 默认遵循最佳实践,提供多种攻击防护机制。
- 生态融合: 无缝集成Spring Framework、Spring Boot、Spring Cloud,是现代化微服务架构的理想选择。
本阶段,你的目标是理解Spring Security如何“魔幻般”地工作,从最基础的默认行为开始,逐步揭开它的面纱。
2. 核心概念:认证 (Authentication) 与 授权 (Authorization)
理解这两个核心概念是学习Spring Security的敲门砖。它们虽密切相关,但职责泾渭分明。
2.1 什么是认证 (Authentication)?
认证,简单来说就是 “你是谁?”。它是验证用户身份的过程,确认用户是否是其声称的本人。常见的认证方式包括:
- 用户名密码登录: 最常见的方式,用户提供用户名和密码,系统验证其是否匹配。
- 指纹/面部识别: 生物识别认证。
- 短信/邮件验证码: 双因素认证的一部分。
- 数字证书: 用于客户端或服务器身份验证。
- Token认证: 如JWT,通过验证Token的有效性来确认用户身份。
在Spring Security中,认证的核心接口是Authentication,它代表着用户身份信息。当一个用户成功登录后,其身份信息就会被封装成一个Authentication对象。
2.2 什么是授权 (Authorization)?
授权,在用户身份被确认之后发生,它关注的是 “你能做什么?”。它是判断已认证用户是否有权限访问某个资源(如某个页面、某个API接口、某个数据记录)或执行某个操作的过程。
- 角色 (Roles): 粗粒度的权限管理,如
ADMIN(管理员)、USER(普通用户)。 - 权限 (Authorities): 细粒度的权限管理,如
PRODUCT_VIEW(查看商品)、PRODUCT_EDIT(编辑商品)。
例如,一个ADMIN角色可能拥有PRODUCT_VIEW和PRODUCT_EDIT权限,而一个USER角色只有PRODUCT_VIEW权限。
在Spring Security中,授权通常通过表达式(如hasRole('ADMIN'))或投票器(AccessDecisionVoter)来完成。
2.3 安全性上下文 (SecurityContext)
理解了认证和授权,那么这些认证信息和授权结果保存在哪里呢?答案就是SecurityContext。
SecurityContext 是Spring Security存储当前用户认证信息的核心容器。
- 它通常与当前线程绑定,确保在一次请求链中,无论代码在何处执行,都能方便地获取到当前用户的认证详情。
SecurityContext默认存储在ThreadLocal中,因此在同一个请求线程的任何地方,都可以通过SecurityContextHolder获取到SecurityContext。- 大部分情况下,
SecurityContext在用户会话(如HTTP Session)中进行存储和管理,这样用户在多个请求之间就不需要重复认证。
如何获取当前认证信息?
在你的代码中,可以通过以下方式获取:
import org.springframework.security.core.Authentication;
import org.springframework.security.core.context.SecurityContextHolder;
import org.springframework.security.core.userdetails.UserDetails;public class CurrentUserUtil {public static String getCurrentUsername() {Authentication authentication = SecurityContextHolder.getContext().getAuthentication();if (authentication == null || !authentication.isAuthenticated()) {return "anonymousUser"; // 或者抛出未认证异常}// authentication.getPrincipal() 返回的通常是 UserDetails 对象或字符串Object principal = authentication.getPrincipal();if (principal instanceof UserDetails) {return ((UserDetails) principal).getUsername();} else {return principal.toString();}}
}
3. Spring Boot与Spring Security的“魔法”:自动配置
Spring Boot的自动配置能力大大简化了Spring Security的集成。你只需要引入一个Starter依赖,Spring Boot就会帮你完成大部分基础配置。
3.1 引入依赖
首先,在你的pom.xml中添加Spring Security Starter依赖:
<?xml version="1.0" encoding="UTF-8"?>
<project xmlns="http://maven.apache.org/POM/4.0.0" xmlns:xsi="http://www.w3.org/2001/XMLSchema-instance"xsi:schemaLocation="http://maven.apache.org/POM/4.0.0 https://maven.apache.org/xsd/maven-4.0.0.xsd"><modelVersion>4.0.0</modelVersion><parent><groupId>org.springframework.boot</groupId><artifactId>spring-boot-starter-parent</artifactId><version>3.2.5</version> <relativePath/></parent><groupId>com.example</groupId><artifactId>spring-security-stage1</artifactId><version>0.0.1-SNAPSHOT</version><name>spring-security-stage1</name><description>Demo project for Spring Security Stage 1</description><properties><java.version>17</java.version></properties><dependencies><!-- Spring Boot Web Starter --><dependency><groupId>org.springframework.boot</groupId><artifactId>spring-boot-starter-web</artifactId></dependency><!-- Spring Security Starter --><dependency><groupId>org.springframework.boot</groupId><artifactId>spring-boot-starter-security</artifactId></dependency><!-- Spring Boot Test Starter --><dependency><groupId>org.springframework.boot</groupId><artifactId>spring-boot-starter-test</artifactId><scope>test</scope></dependency><!-- Spring Security Test for testing security configurations --><dependency><groupId>org.springframework.security</groupId><artifactId>spring-security-test</artifactId><scope>test</scope></dependency></dependencies><build><plugins><plugin><groupId>org.springframework.boot</groupId><artifactId>spring-boot-maven-plugin</artifactId></plugin></plugins></build>
</project>
3.2 默认行为分析
一旦你引入了spring-boot-starter-security依赖并启动Spring Boot应用,Spring Security会自动生效,并提供以下默认行为:
- 全局拦截: 所有HTTP请求默认都会被Spring Security拦截。
- 默认登录页: 如果用户未经认证就访问受保护资源,Spring Security会自动跳转到一个默认生成的登录页面 (
/login)。 - 默认用户: 自动创建一个用户名为
user、密码随机生成的内存用户。这个密码会在应用启动时打印在控制台。 - 基本认证: 默认提供基于表单的登录功能。
- CSRF防护: 默认开启跨站请求伪造 (CSRF) 防护。
- 会话管理: 基于HTTP Session,默认提供会话固定攻击防护。
这些默认行为对于快速上手和测试非常方便,但在生产环境中,我们通常需要进行大量的定制。
4. Spring Security 6.x+ 核心配置:SecurityFilterChain
随着Spring Frameowrk 6和Spring Boot 3的发布,Spring Security也迎来了重大更新,其中一个主要变化就是 WebSecurityConfigurerAdapter 被弃用。现在,我们推荐使用配置SecurityFilterChain Bean的方式来定义安全规则。
4.1 告别 WebSecurityConfigurerAdapter
在Spring Security 5.x及更早版本中,我们通常会创建一个类继承WebSecurityConfigurerAdapter并重写configure()方法来配置Spring Security。
// Spring Security 5.x 及更早版本,现在已弃用!
@Configuration
@EnableWebSecurity
public class OldSecurityConfig extends WebSecurityConfigurerAdapter {@Overrideprotected void configure(HttpSecurity http) throws Exception {http.authorizeRequests().antMatchers("/public/**").permitAll().anyRequest().authenticated().and().formLogin();}// ... 其他配置
}
现在,这种方式已经不再推荐。 请务必使用新的配置方式。
4.2 定义 SecurityFilterChain Bean
在Spring Security 6.x+ 中,你需要在配置类中定义一个或多个SecurityFilterChain类型的@Bean。
import org.springframework.context.annotation.Bean;
import org.springframework.context.annotation.Configuration;
import org.springframework.security.config.annotation.web.builders.HttpSecurity;
import org.springframework.security.config.annotation.web.configuration.EnableWebSecurity;
import org.springframework.security.web.SecurityFilterChain;@Configuration
@EnableWebSecurity // 启用Spring Security的Web安全功能
public class CustomSecurityConfig {@Beanpublic SecurityFilterChain securityFilterChain(HttpSecurity http) throws Exception {http.authorizeHttpRequests(authorize -> authorize.anyRequest().authenticated() // 默认所有请求都需要认证).formLogin(form -> form // 开启表单登录.permitAll() // 允许所有用户访问登录页).httpBasic(org.springframework.security.config.Customizer.withDefaults()); // 开启HTTP Basic认证return http.build();}
}
@Configuration标识这是一个Spring配置类。@EnableWebSecurity启用Spring Security的Web安全功能。securityFilterChain(HttpSecurity http)方法返回一个SecurityFilterChain对象,Spring Security将使用这个Bean来构建安全过滤器链。HttpSecurity对象提供了链式API,用于配置各种安全特性,例如:authorizeHttpRequests():配置授权规则。formLogin():配置表单登录。httpBasic():配置HTTP Basic认证。csrf():配置CSRF防护。logout():配置登出功能。
5. 用户管理初窥:UserDetailsService 与 PasswordEncoder
即使是默认行为,Spring Security也离不开用户详情服务和密码编码器。
5.1 UserDetailsService:加载用户详情
UserDetailsService 是一个核心接口,负责根据用户名获取用户的详细信息(如用户名、密码、角色/权限等)。它返回一个UserDetails对象。
UserDetails接口: 代表一个已认证用户的主要信息,包括用户名 (username)、密码 (password)、权限列表 (authorities),以及账户是否过期、是否被锁定、凭证是否过期、是否启用等状态。
// UserDetails 接口的主要方法
public interface UserDetails extends Serializable {Collection<? extends GrantedAuthority> getAuthorities(); // 获取用户的权限列表String getPassword(); // 获取用户密码String getUsername(); // 获取用户名boolean isAccountNonExpired(); // 账户是否未过期boolean isAccountNonLocked(); // 账户是否未锁定boolean isCredentialsNonExpired(); // 凭证是否未过期boolean isEnabled(); // 账户是否启用
}
在默认情况下,Spring Security提供了一个内存实现,如果你不配置任何UserDetailsService,它会自动创建一个内存用户。
5.2 PasswordEncoder:密码加密的守护者
密码加密是认证环节中至关重要的一环! 永远不要以明文形式存储或比较密码。PasswordEncoder接口定义了密码的编码和匹配方法。
encode(charSequence rawPassword): 对原始密码进行编码。matches(charSequence rawPassword, String encodedPassword): 比较原始密码与编码后的密码是否匹配。
Spring Security 推荐使用BCryptPasswordEncoder。它使用BCrypt强哈希函数,对密码进行单向加密,并且每次加密的结果都会不同(因为加入了随机盐值),大大增加了破解难度。
重要提示:
- 不要使用
NoOpPasswordEncoder(不进行任何加密),它仅为测试目的而存在,并且Spring Security 6.x+ 已经强制要求必须配置一个PasswordEncoder。 - Spring Security 5.x 及更早版本如果使用内存用户并且不配置
PasswordEncoder,可以通过User.withDefaultPasswordEncoder()来快速创建用户,但那仅仅是为了快速演示,生产环境严禁使用!
import org.springframework.context.annotation.Bean;
import org.springframework.context.annotation.Configuration;
import org.springframework.security.crypto.bcrypt.BCryptPasswordEncoder; // 导入BCryptPasswordEncoder
import org.springframework.security.crypto.password.PasswordEncoder;@Configuration
public class PasswordEncoderConfig {@Beanpublic PasswordEncoder passwordEncoder() {return new BCryptPasswordEncoder(); // 推荐使用BCryptPasswordEncoder}
}
6. 实战演练:配置内存用户与基础访问控制
现在,让我们亲手实践,创建一个Spring Boot Web项目,并逐步配置Spring Security。
6.1 创建Spring Boot项目
使用Spring Initializr (https://start.spring.io/) 创建一个新项目,选择以下依赖:
- Spring Boot Version: 3.2.5 (或最新稳定版)
- Dependencies: Spring Web, Spring Security
6.2 默认行为体验
- 创建项目后,不添加任何安全配置类,直接运行
main方法。 - 观察控制台输出,你会看到类似如下的信息,其中包含一个随机生成的密码:

- 打开浏览器访问
http://localhost:8080/,Spring Security会重定向到默认的登录页http://localhost:8080/login。
- 使用默认用户名
user和控制台打印的密码进行登录。登录成功后,你会回到之前尝试访问的页面。
6.3 配置内存用户
接下来,我们将在内存中配置一个自定义用户,并移除默认生成的随机密码。
CustomSecurityConfig.java (替换掉之前简单的SecurityFilterChain配置)
package com.example.springsecuritystage1.config;import org.springframework.context.annotation.Bean;
import org.springframework.context.annotation.Configuration;
import org.springframework.security.config.Customizer;
import org.springframework.security.config.annotation.web.builders.HttpSecurity;
import org.springframework.security.config.annotation.web.configuration.EnableWebSecurity;
import org.springframework.security.core.userdetails.User;
import org.springframework.security.core.userdetails.UserDetails;
import org.springframework.security.core.userdetails.UserDetailsService;
import org.springframework.security.crypto.bcrypt.BCryptPasswordEncoder;
import org.springframework.security.crypto.password.PasswordEncoder;
import org.springframework.security.provisioning.InMemoryUserDetailsManager;
import org.springframework.security.web.SecurityFilterChain;@Configuration
@EnableWebSecurity
public class CustomSecurityConfig {// 配置密码编码器,让Spring Security知道如何加密和验证密码@Beanpublic PasswordEncoder passwordEncoder() {// BCryptPasswordEncoder是Spring Security推荐的密码编码器return new BCryptPasswordEncoder();}// 配置内存用户@Beanpublic UserDetailsService userDetailsService(PasswordEncoder passwordEncoder) {// 创建一个普通用户UserDetails user = User.builder().username("user").password(passwordEncoder.encode("password")) // 使用编码器对密码进行加密.roles("USER") // 分配USER角色.build();// 创建一个管理员用户UserDetails admin = User.builder().username("admin").password(passwordEncoder.encode("adminpass")).roles("ADMIN", "USER") // 分配ADMIN和USER角色.build();// 将这些用户配置到内存中return new InMemoryUserDetailsManager(user, admin);}// 配置安全过滤器链@Beanpublic SecurityFilterChain securityFilterChain(HttpSecurity http) throws Exception {http.authorizeHttpRequests(authorize -> authorize.requestMatchers("/public/**").permitAll() // 允许/public/**路径下的所有请求.requestMatchers("/admin/**").hasRole("ADMIN") // 只有ADMIN角色可以访问/admin/**.anyRequest().authenticated() // 其他所有请求都需要认证).formLogin(Customizer.withDefaults()) // 开启表单登录,使用默认配置.httpBasic(Customizer.withDefaults()); // 开启HTTP Basic认证,使用默认配置return http.build();}
}
为了测试,我们还需要一些Controller:
HelloController.java
package com.example.springsecuritystage1.controller;import org.springframework.security.core.Authentication;
import org.springframework.security.core.context.SecurityContextHolder;
import org.springframework.web.bind.annotation.GetMapping;
import org.springframework.web.bind.annotation.RestController;@RestController
public class HelloController {@GetMapping("/")public String home() {return "Welcome to the home page!";}@GetMapping("/public")public String publicPage() {return "This is a public page, accessible to everyone.";}@GetMapping("/user/profile")public String userProfile() {Authentication authentication = SecurityContextHolder.getContext().getAuthentication();String username = authentication != null ? authentication.getName() : "Anonymous";return "Hello, " + username + "! This is your user profile.";}@GetMapping("/admin/dashboard")public String adminDashboard() {return "Welcome to the admin dashboard! Only administrators can see this.";}
}
6.4 定制URL访问权限
根据SecurityFilterChain中的配置:
GET /:需要认证。GET /public:permitAll(),所有人都可以访问,不需要认证。GET /user/profile:需要认证(因为未被明确指定permitAll(),所以符合anyRequest().authenticated())。user和admin都可以访问。GET /admin/dashboard:hasRole("ADMIN"),只有拥有ADMIN角色的用户才能访问。user用户无权访问,admin用户可以访问。
测试步骤:
- 启动应用。
- 访问
http://localhost:8080/public:直接显示“This is a public page, accessible to everyone.”,无需登录。 - 访问
http://localhost:8080/或http://localhost:8080/user/profile:会重定向到登录页。- 使用
user/password登录,可以成功访问/user/profile,但访问/admin/dashboard会显示403 Forbidden。 - 使用
admin/adminpass登录,可以成功访问/user/profile和/admin/dashboard。
- 使用
- 访问
/admin/dashboard时,如果你以user身份登录,你会得到一个403 Forbidden响应,表明授权失败。
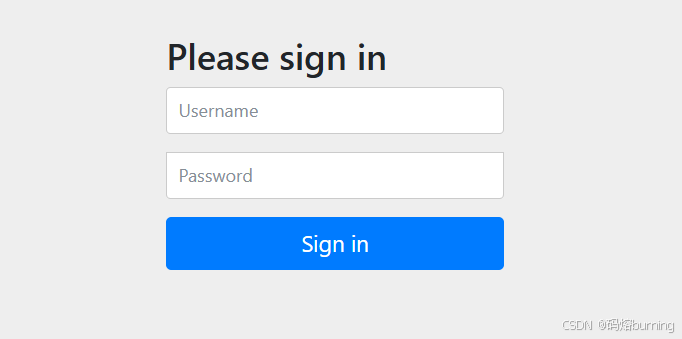
7. 进一步定制:禁用默认登录页与基础CSRF防护
有些场景下,我们可能不希望使用Spring Security提供的默认登录页,而是希望提供自己的自定义登录页(例如使用React、Vue等前端框架,或者自定义Thymeleaf页面)。
同时,对CSRF防护的默认开启也要有所了解。
package com.example.springsecuritystage1.config;import org.springframework.context.annotation.Bean;
import org.springframework.context.annotation.Configuration;
import org.springframework.security.config.Customizer;
import org.springframework.security.config.annotation.web.builders.HttpSecurity;
import org.springframework.security.config.annotation.web.configuration.EnableWebSecurity;
import org.springframework.security.core.userdetails.User;
import org.springframework.security.core.userdetails.UserDetails;
import org.springframework.security.core.userdetails.UserDetailsService;
import org.springframework.security.crypto.bcrypt.BCryptPasswordEncoder;
import org.springframework.security.crypto.password.PasswordEncoder;
import org.springframework.security.provisioning.InMemoryUserDetailsManager;
import org.springframework.security.web.SecurityFilterChain;@Configuration
@EnableWebSecurity
public class CustomSecurityConfig {@Beanpublic PasswordEncoder passwordEncoder() {return new BCryptPasswordEncoder();}@Beanpublic UserDetailsService userDetailsService(PasswordEncoder passwordEncoder) {UserDetails user = User.builder().username("user").password(passwordEncoder.encode("password")).roles("USER").build();UserDetails admin = User.builder().username("admin").password(passwordEncoder.encode("adminpass")).roles("ADMIN", "USER").build();return new InMemoryUserDetailsManager(user, admin);}@Beanpublic SecurityFilterChain securityFilterChain(HttpSecurity http) throws Exception {http.authorizeHttpRequests(authorize -> authorize.requestMatchers("/public/**", "/login").permitAll() // 允许/public/** 和 /login 所有请求.requestMatchers("/admin/**").hasRole("ADMIN").anyRequest().authenticated()).formLogin(form -> form // 开启表单登录.loginPage("/login")        // 指定自定义登录页的URL.defaultSuccessUrl("/user/profile", true) // 登录成功后默认跳转的URL.permitAll() // 允许所有用户访问自定义登录页)// CSRF防护默认是开启的,如果你的前端是传统的表单提交,需要注意在表单中包含CSRF令牌。// 例如:<input type="hidden" name="${_csrf.parameterName}" value="${_csrf.token}" />// 如果是纯API项目,考虑禁用CSRF,但这通常在JWT或OAuth2阶段进行// .csrf(csrf -> csrf.disable()) // 禁用CSRF,非必要不要禁用,生产环境需谨慎.httpBasic(Customizer.withDefaults()); // 开启HTTP Basic认证return http.build();}
}
再添加一个Controller来渲染自定义的登录页(如果你是前后端分离,此部分可能由前端框架完成):
LoginController.java
package com.example.springsecuritystage1.controller;import org.springframework.stereotype.Controller;
import org.springframework.web.bind.annotation.GetMapping;@Controller
public class LoginController {@GetMapping("/login")public String login() {return "login"; // 返回名为 "login" 的视图(例如login.html),确保你在resources/templates目录下有此文件}
}
并在 src/main/resources/templates 目录下创建一个 login.html (使用Thymeleaf为例):
<!DOCTYPE html>
<html lang="en" xmlns:th="http://www.thymeleaf.org">
<head><meta charset="UTF-8"><title>Custom Login</title><style>body { font-family: Arial, sans-serif; display: flex; justify-content: center; align-items: center; height: 100vh; background-color: #f4f4f4; }.login-container { background-color: #fff; padding: 20px; border-radius: 8px; box-shadow: 0 0 10px rgba(0, 0, 0, 0.1); }h2 { text-align: center; color: #333; }label { display: block; margin-bottom: 8px; color: #555; }input[type="text"], input[type="password"] { width: calc(100% - 20px); padding: 10px; margin-bottom: 15px; border: 1px solid #ddd; border-radius: 4px; }input[type="submit"] { width: 100%; padding: 10px; background-color: #007bff; color: white; border: none; border-radius: 4px; cursor: pointer; font-size: 16px; }input[type="submit"]:hover { background-color: #0056b3; }.error-message { color: red; text-align: center; margin-bottom: 15px; }</style>
</head>
<body><div class="login-container"><h2>Custom Login Page</h2><!-- 登录失败信息 --><div th:if="${param.error}" class="error-message">Invalid username or password.</div><!-- 登出成功信息 (可选) --><div th:if="${param.logout}" class="error-message" style="color: green;">You have been logged out.</div><form th:action="@{/login}" method="post"><div><label for="username">Username:</label><input type="text" id="username" name="username" required/></div><div><label for="password">Password:</label><input type="password" id="password" name="password" required/></div><!-- CSRF token 默认开启时非常重要,保护你的FORM表单 --><input type="hidden" th:name="${_csrf.parameterName}" th:value="${_csrf.token}" /><div><input type="submit" value="Log In"/></div></form></div>
</body>
</html>
loginPage("/login"):告诉Spring Security,登录页的URL是/login。defaultSuccessUrl("/user/profile", true):登录成功后,强制跳转到/user/profile。如果不加true,则会跳转到用户登录前访问的页面。requestMatchers("/login").permitAll():确保自定义的登录页(/login)可以被所有人访问,否则会陷入重定向循环。th:if="${param.error}"和th:if="${param.logout}"用于显示Spring Security在登录失败或成功登出后在URL中添加的参数信息。- CSRF Token:
th:name="${_csrf.parameterName}" th:value="${_csrf.token}"这行代码至关重要。当CSRF防护默认开启时,Spring Security要求所有POST请求(包括登录表单提交)必须携带一个有效的CSRF Token。Thymeleaf会从SecurityContext中自动获取并填充这个Token。如果你在生产环境中禁用了CSRF,则应移除此行,但生产环境禁用CSRF需极其谨慎,通常只在无状态的REST API中使用。
8. 常见陷阱与注意事项
- Spring Security 6.x+ 配置迁移: 务必适应新的
SecurityFilterChain配置方式,避免使用已弃用的WebSecurityConfigurerAdapter。 - 密码编码器 (
PasswordEncoder): 生产环境必须使用安全的密码编码器,如BCryptPasswordEncoder。永远不要使用NoOpPasswordEncoder。 permitAll()的滥用: 只有确实不需要认证的资源才使用permitAll()。例如,静态资源、登录页、注册页等。对其他资源,应保持authenticated()或更严格的权限控制。- 默认密码: 默认生成的密码只用于快速启动体验,请勿在生产环境中使用。通过
UserDetailsService配置自定义用户。 - CSRF防护: 默认开启且强烈建议保持开启,尤其对于传统的Web应用。对于RESTful API,如果采用JWT等无状态认证机制,通常会禁用CSRF,但需确保理解其安全影响。
- 依赖冲突: 确保
spring-boot-starter-security版本与你的Spring Boot版本兼容。
9. 阶段总结与进阶展望
恭喜你完成了Spring Security深度学习的第一阶段!通过本阶段的学习,你已经掌握了:
- 认证与授权的核心概念,以及
SecurityContext的作用。 - 如何在Spring Boot项目中快速集成Spring Security。
- 分析Spring Security的默认行为,包括登录页、默认用户和访问控制。
- 使用Spring Security 6.x+ 的
SecurityFilterChain配置方式。 - 配置内存用户并使用
BCryptPasswordEncoder进行密码加密。 - 定制URL级别的访问权限,并初步了解CSRF防护。
你现在应该能够搭建一个基础的Spring Security保护的Web应用。然而,这仅仅是开始。在接下来的阶段,我们将深入探索更复杂的认证机制(如数据库用户认证)、更细粒度的授权管理、会话管理、JWT以及微服务安全等高级主题。

?)


)


:数据库技术的发展、数据模型、数据库管理系统、数据库三级模式)
