nginx和ffmpeg 的安装请参考我的另一篇文章
Nginx+rtmp+ffmpeg搭建视频转码服务_nginx-rtmp-module-master-CSDN博客
目录
1、整体方案设计如图
2、nginx下目录创建和配置文件创建
3、创建视频流生成脚本
4、修改nginx配置
5、管理界面 (video.html)
6、ffmpeg后台启动
方案1:使用nohup和后台运行
6.1启动脚本编写
6.2停止脚本编写
方案2:使用systemd服务(推荐生产环境使用)
1、整体方案设计如图

其中config下是视频配置文件,live存放视频实时流,archive存放视频历史流
2、nginx下目录创建和配置文件创建
cd /usr/local/nginx/html
mkdir streams
cd streams
mkdir config
vi cameras.json在json文件中填充如下内容{"cameras": [{"id": "zl","rtsp": "rtsp://admin:123456@172.168.2.11:554/Streaming/Channels/101","name": "走廊监控"},{"id": "blm","rtsp": "rtsp://admin:123456@172.168.2.11:554/Streaming/Channels/201","name": "玻璃门监控"},{"id": "cg","rtsp": "rtsp://admin:123456@172.168.2.11:554/Streaming/Channels/301","name": "采购监控"},{"id": "yf","rtsp": "rtsp://admin:123456@172.168.2.11:554/Streaming/Channels/401","name": "研发监控"},{"id": "qt","rtsp": "rtsp://admin:123456@172.168.2.11:554/Streaming/Channels/501","name": "前台监控"}],"hls_time": 2,"max_archive_hours": 24,"live_segments": 2
}
1:"hls_time": 2,#每个切片时长 2s
2:"max_archive_hours": 24,#历史数据保留24小时
3:live_segments 指定播放列表(m3u8文件)中保留的最新TS视频分片数量
3.1:当设置为5时:
-
播放列表始终保留最新的5个TS分片
-
当第6个分片生成时,最旧的分片会被移除
-
例如:segment_001.ts 到 segment_005.ts → 新分片产生 → segment_002.ts 到 segment_006.ts
3.2:计算公式
-
实时流延迟 ≈
live_segments×hls_time -
上面示例:5 × 2秒 = 约10秒延迟
3、创建视频流生成脚本
创建start_streams.sh脚本vi start_streams.sh在脚本中填充如下内容#!/bin/bashCONFIG_FILE="/usr/local/nginx/html/streams/config/cameras.json"
STREAMS_DIR="/home/streams"  #流媒体存储目录
#STREAMS_DIR="/usr/local/nginx/html/streams"
NGINX_USER="nginx"                   # Nginx运行用户# 创建目录并设置权限
mkdir -p $STREAMS_DIR/{live,archive}
chown -R $NGINX_USER:$NGINX_USER $STREAMS_DIR
chmod -R 755 $STREAMS_DIR# 读取配置
CAMERAS=$(jq -r '.cameras[] | .id' $CONFIG_FILE)
HLS_TIME=$(jq -r '.hls_time' $CONFIG_FILE)
MAX_HOURS=$(jq -r '.max_archive_hours' $CONFIG_FILE)
LIVE_SEGMENTS=$(jq -r '.live_segments' $CONFIG_FILE)# 为每个摄像头启动FFmpeg进程
for CAMERA in $CAMERAS; doRTSP_URL=$(jq -r --arg id "$CAMERA" '.cameras[] | select(.id==$id) | .rtsp' $CONFIG_FILE)# 创建目录mkdir -p $STREAMS_DIR/live/$CAMERAmkdir -p $STREAMS_DIR/archive/$CAMERA# 启动实时流ffmpeg -i "$RTSP_URL" \-c copy \-f hls \-hls_time $HLS_TIME \-hls_list_size $LIVE_SEGMENTS \-hls_flags delete_segments \-hls_segment_filename "$STREAMS_DIR/live/$CAMERA/segment_%03d.ts" \"$STREAMS_DIR/live/$CAMERA/live.m3u8" &# 启动历史流ffmpeg -i "$RTSP_URL" \-c copy \-f hls \-hls_time $HLS_TIME \-hls_list_size 0 \-hls_flags append_list \-hls_segment_filename "$STREAMS_DIR/archive/$CAMERA/%Y%m%d_%H%M%S.ts" \-strftime 1 \"$STREAMS_DIR/archive/$CAMERA/archive.m3u8" &
done# 定时清理旧历史文件
while true; dofor CAMERA in $CAMERAS; dofind "$STREAMS_DIR/archive/$CAMERA" -name "*.ts" -mmin +$(($MAX_HOURS*60)) -deletedonesleep 3600  # 每小时清理一次
done
该脚本启动时如果系统没有安装 jq,启动脚本提示提示 jq: 未找到命令
需要安装一下jq
wget https://github.com/stedolan/jq/releases/download/jq-1.6/jq-linux64
mv jq-1.6 jq
chmod +x jq          # 添加可执行权限
sudo mv jq /usr/local/bin/  # 移动到系统路径查看jq是否安装成功
jq --version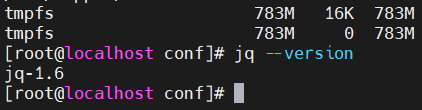
脚本如果继续执行报错 这行报错parse error: Invalid numeric literal
把json配置文件中的#注释去掉
启动脚本
4、修改nginx配置
nginx全局配置如下
#user  nobody;
worker_processes  1;#error_log  logs/error.log;
#error_log  logs/error.log  notice;
#error_log  logs/error.log  info;#pid        logs/nginx.pid;events {worker_connections  1024;
}rtmp {  server {  listen 1935;      #监听的端口号application myapp {     #自定义的名字live on;  }  application hls {  live on;  hls on;  hls_path /tmp/hls;   hls_fragment 1s;hls_playlist_length 3s;  }  }
}http {include       mime.types;default_type  application/octet-stream;#log_format  main  '$remote_addr - $remote_user [$time_local] "$request" '#                  '$status $body_bytes_sent "$http_referer" '#                  '"$http_user_agent" "$http_x_forwarded_for"';#access_log  logs/access.log  main;sendfile        on;#tcp_nopush     on;#keepalive_timeout  0;keepalive_timeout  65;#gzip  on;server {listen       80;server_name  localhost;#charset koi8-r;#access_log  logs/host.access.log  main;location / {root   html;index  index.html index.htm;}# 实时流访问location /live {#alias /usr/local/nginx/html/streams/live;#根据自己文视频流生成的位置配置,我这边因为要存历史视频,占用空间大,所以把视频流放到/home/streams 目录下去了alias /home/streams/live;types {application/vnd.apple.mpegurl m3u8;video/mp2t ts;}add_header Cache-Control no-cache;}# 历史流访问location /archive {#alias /usr/local/nginx/html/streams/archive;alias /home/streams/archive;types {application/vnd.apple.mpegurl m3u8;video/mp2t ts;}add_header Cache-Control no-cache;}# 配置API  访问json配置文件location /api/cameras {alias /usr/local/nginx/html/streams/config/cameras.json;default_type application/json;}#error_page  404              /404.html;# redirect server error pages to the static page /50x.html#error_page   500 502 503 504  /50x.html;location = /50x.html {root   html;}# proxy the PHP scripts to Apache listening on 127.0.0.1:80##location ~ \.php$ {#    proxy_pass   http://127.0.0.1;#}# pass the PHP scripts to FastCGI server listening on 127.0.0.1:9000##location ~ \.php$ {#    root           html;#    fastcgi_pass   127.0.0.1:9000;#    fastcgi_index  index.php;#    fastcgi_param  SCRIPT_FILENAME  /scripts$fastcgi_script_name;#    include        fastcgi_params;#}# deny access to .htaccess files, if Apache's document root# concurs with nginx's one##location ~ /\.ht {#    deny  all;#}}# another virtual host using mix of IP-, name-, and port-based configuration##server {#    listen       8000;#    listen       somename:8080;#    server_name  somename  alias  another.alias;#    location / {#        root   html;#        index  index.html index.htm;#    }#}# HTTPS server##server {#    listen       443 ssl;#    server_name  localhost;#    ssl_certificate      cert.pem;#    ssl_certificate_key  cert.key;#    ssl_session_cache    shared:SSL:1m;#    ssl_session_timeout  5m;#    ssl_ciphers  HIGH:!aNULL:!MD5;#    ssl_prefer_server_ciphers  on;#    location / {#        root   html;#        index  index.html index.htm;#    }#}}
配置完成后,启动nginx
5、管理界面 (video.html)
自己通过一个html页面查看视频是否正常播放,或者通过流媒体播放软件查看
video.html页面内容如下
<!DOCTYPE html>
<html>
<head><title>多路视频监控</title><!-- 替换为国内CDN -->
<script src="https://cdn.bootcdn.net/ajax/libs/hls.js/1.1.5/hls.min.js"></script>
<script src="https://cdn.bootcdn.net/ajax/libs/jquery/3.6.0/jquery.min.js"></script><style>.video-container {display: inline-block;margin: 10px;vertical-align: top;}.video-title {text-align: center;font-weight: bold;}</style>
</head>
<body><h1>视频监控系统</h1><div id="cameras-container"></div><script>$(document).ready(function() {// 获取摄像头列表$.getJSON("http://192.168.3.35/api/cameras", function(data) {const cameras = data.cameras;cameras.forEach(camera => {// 创建视频容器const container = $(`<div class="video-container"><div class="video-title">${camera.name}</div><div><button onclick="playLive('${camera.id}')">实时</button><input type="datetime-local" id="${camera.id}-start"><input type="datetime-local" id="${camera.id}-end"><button onclick="playArchive('${camera.id}')">回放</button></div><video id="${camera.id}-video" controls width="640" height="360"></video></div>`);$("#cameras-container").append(container);// 默认播放实时视频playLive(camera.id);});});});function playLive(cameraId) {const video = document.getElementById(`${cameraId}-video`);if(Hls.isSupported()) {const hls = new Hls();hls.loadSource(`/live/${cameraId}/live.m3u8`);hls.attachMedia(video);video.play();} else if (video.canPlayType('application/vnd.apple.mpegurl')) {video.src = `/live/${cameraId}/live.m3u8`;video.play();}}function playArchive(cameraId) {const start = document.getElementById(`${cameraId}-start`).value;const end = document.getElementById(`${cameraId}-end`).value;const video = document.getElementById(`${cameraId}-video`);// 简单实现 - 实际项目中应该调用后端API筛选时间范围if(Hls.isSupported()) {const hls = new Hls();hls.loadSource(`/archive/${cameraId}/archive.m3u8`);hls.attachMedia(video);video.play();}}</script>
</body>
</html>
在nginx html下面创建video文件夹,把video.html放进去,启动nginx,访问页面内容如下


6、ffmpeg后台启动
上面的启动脚本不是后台启动,关闭ssh连接后,服务会中断,
方案1:使用nohup和后台运行
6.1启动脚本编写
注意:脚本启动后,不要通过ctrl+c 方式退出启动命令,程序会终止,直接通过叉掉ssh页面即可
#!/bin/bashCONFIG_FILE="/usr/local/nginx/html/streams/config/cameras.json"
STREAMS_DIR="/home/streams"  #流媒体存储目录
#STREAMS_DIR="/usr/local/nginx/html/streams"
NGINX_USER="nginx"                   # Nginx运行用户
PID_FILE="$STREAMS_DIR/process_ids.txt"  # PID记录文件# 清空或创建PID文件
> "$PID_FILE"# 创建目录并设置权限
mkdir -p $STREAMS_DIR/{live,archive,logs}
chown -R $NGINX_USER:$NGINX_USER $STREAMS_DIR
chmod -R 755 $STREAMS_DIR# 读取配置
CAMERAS=$(jq -r '.cameras[] | .id' $CONFIG_FILE)
HLS_TIME=$(jq -r '.hls_time' $CONFIG_FILE)
MAX_HOURS=$(jq -r '.max_archive_hours' $CONFIG_FILE)
LIVE_SEGMENTS=$(jq -r '.live_segments' $CONFIG_FILE)# 为每个摄像头启动FFmpeg(使用nohup)
for CAMERA in $CAMERAS; doRTSP_URL=$(jq -r --arg id "$CAMERA" '.cameras[] | select(.id==$id) | .rtsp' $CONFIG_FILE)# 为每个摄像创建目录mkdir -p $STREAMS_DIR/live/$CAMERAmkdir -p $STREAMS_DIR/archive/$CAMERA# 实时流 - 使用nohup和后台运行nohup ffmpeg -i "$RTSP_URL" \-c copy \-f hls \-hls_time $HLS_TIME \-hls_list_size $LIVE_SEGMENTS \-hls_flags delete_segments \-hls_segment_filename "$STREAMS_DIR/live/$CAMERA/segment_%03d.ts" \"$STREAMS_DIR/live/$CAMERA/live.m3u8" > "$STREAMS_DIR/logs/$CAMERA-live.log" 2>&1 &echo "$! camera_$CAMERA live" >> "$PID_FILE"  # 记录PID# 历史流 - 使用nohup和后台运行nohup ffmpeg -i "$RTSP_URL" \-c copy \-f hls \-hls_time $HLS_TIME \-hls_list_size 0 \-hls_flags append_list \-hls_segment_filename "$STREAMS_DIR/archive/$CAMERA/%Y%m%d_%H%M%S.ts" \-strftime 1 \"$STREAMS_DIR/archive/$CAMERA/archive.m3u8" > "$STREAMS_DIR/logs/$CAMERA-archive.log" 2>&1 &echo "$! camera_$CAMERA archive" >> "$PID_FILE"  # 记录PID
done# 定时清理旧历史文件
while true; dofor CAMERA in $CAMERAS; dofind "$STREAMS_DIR/archive/$CAMERA" -name "*.ts" -mmin +$(($MAX_HOURS*60)) -deletedonesleep 3600  # 每小时清理一次
done
脚本执行如果提示 无效的用户: "nginx:nginx" 则创建nginx用户
# 创建nginx用户和组
sudo groupadd nginx
sudo useradd -g nginx -s /sbin/nologin -d /var/nginx -M nginx# 验证用户
id nginx
6.2停止脚本编写
在home目录创建停止脚本 vi stop_streams.sh
#!/bin/bash# 文件用来存储进程ID
PID_FILE="/home/streams/process_ids.txt"
LOG_FILE="/home/streams/stop.log"# 记录日志函数
log() {echo "[$(date '+%Y-%m-%d %H:%M:%S')] $1" | tee -a "$LOG_FILE"
}# 脚本结束前,关闭所有记录的进程
cleanup() {if [ ! -f "$PID_FILE" ]; thenlog "错误:PID文件 $PID_FILE 不存在"return 1filog "开始停止所有FFmpeg进程..."total=0killed=0while read -r line; do# 解析PID和描述信息pid=$(echo "$line" | awk '{print $1}')desc=$(echo "$line" | cut -d' ' -f2-)((total++))# 检查PID是否有效if kill -0 "$pid" 2>/dev/null; thenlog "正在停止进程 $pid ($desc)"if kill "$pid"; then((killed++))log "成功停止进程 $pid"elselog "警告:无法停止进程 $pid"fielselog "进程 $pid 已停止或不存在"fidone < "$PID_FILE"log "操作完成:共找到 $total 个记录,成功停止 $killed 个进程"# 清空PID文件(可选)> "$PID_FILE"
}# 确保脚本退出时调用cleanup函数
trap cleanup EXIT# 主执行
log "====== 开始执行停止脚本 ======"
cleanup
exit 0
方案2:使用systemd服务(推荐生产环境使用)
-
创建systemd服务文件
/etc/systemd/system/rtsp_to_hls.service:
[Unit]
Description=RTSP to HLS Stream Service
After=network.target[Service]
Type=forking
User=nginx
WorkingDirectory=/home/streams
ExecStart=/path/to/your/start_streams.sh
Restart=always
RestartSec=10
StandardOutput=append:/home/streams/logs/service.log
StandardError=append:/home/streams/logs/service-error.log[Install]
WantedBy=multi-user.target-
建日志目录并设置权限:
sudo mkdir -p /home/streams/logs sudo chown nginx:nginx /home/streams/logs -
启用并启动服务:
sudo systemctl daemon-reload
sudo systemctl enable rtsp_to_hls.service
sudo systemctl start rtsp_to_hls.service
验证服务是否正常运行
# 检查systemd服务状态
systemctl status rtsp_to_hls.service# 检查进程
pgrep -a ffmpeg# 检查日志
tail -f /home/streams/logs/*.log
停止服务的正确方式
sudo systemctl stop rtsp_to_hls.service
)


)

——详解标记-整理算法)


)
水垢方法)
![[分布式并行策略] 数据并行 DP/DDP/FSDP/ZeRO](http://pic.xiahunao.cn/[分布式并行策略] 数据并行 DP/DDP/FSDP/ZeRO)

-题目:わたしの友達)
)


