大家上午好,仓颉语言商城应用的开发进程已经过半,不知道大家通过这一系列的教程对仓颉开发是否有了进一步的了解。今天要分享的购物车页面:
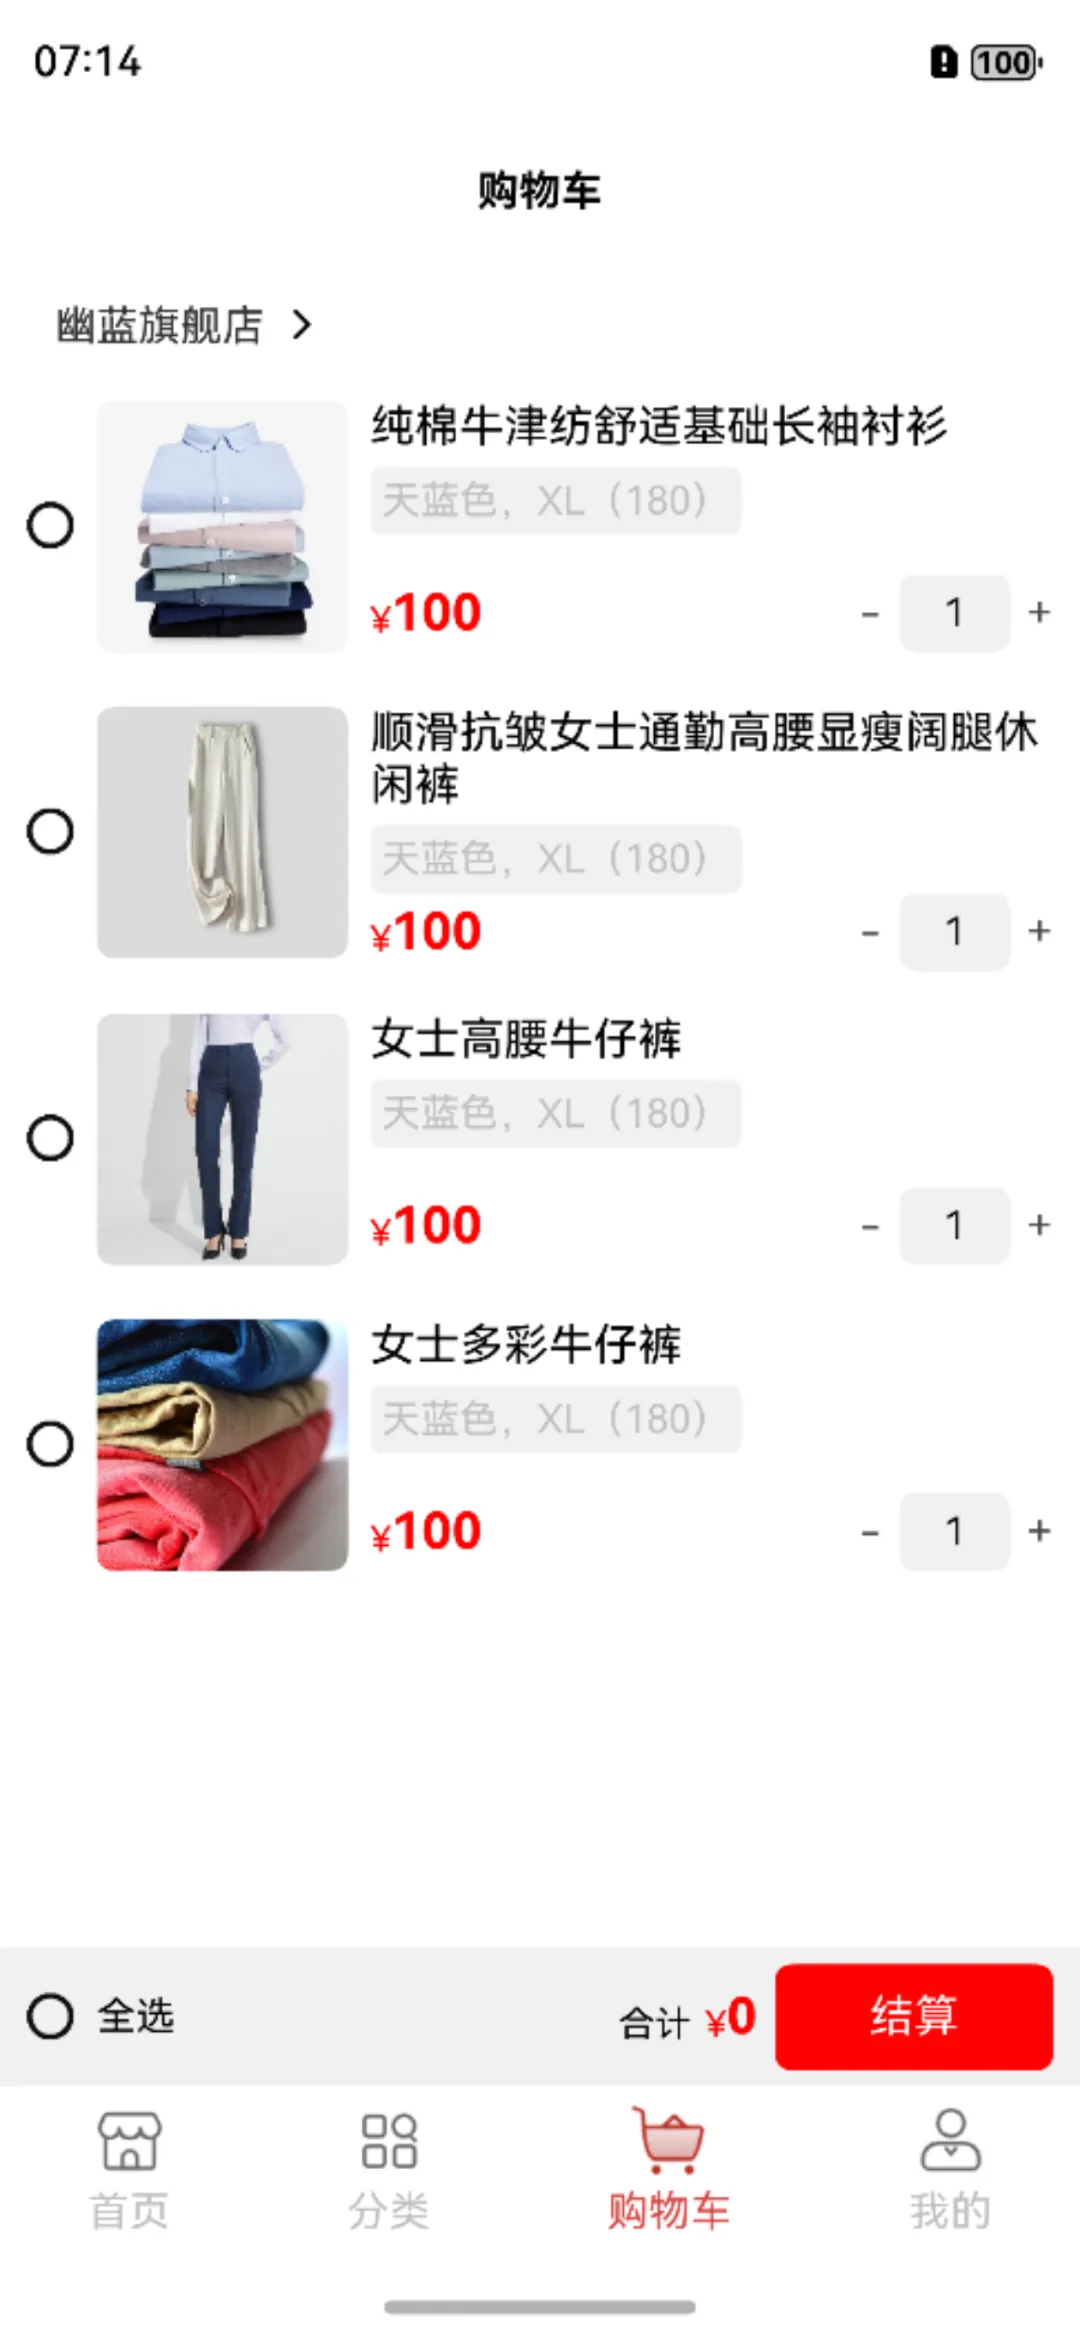
看到这个页面,我们首先要对它简单的分析一下。这个页面一共分为三部分,分别是导航栏、购物车列表和底部的结算栏。也能它们是column布局,那么怎么样让这三部分刚好撑满整个页面,有一个简单的办法:给导航栏和结算栏一个固定的高度,然后给List组件设置layoutWeight(1)属性即可。写一个简单的页面结构:
Column{Row{//导航栏}.width(100.percent).height(60)List{//购物车列表}.width(100.percent).layoutWeight(1)Row{//结算栏}.width(100.percent).height(45)
}
.width(100.percent)
.height(100.percent)
购物车列表
购物车列表毫无疑问使用List组件,今天的List组件比之前多了一些内容,就是店铺名字这部分的内容,我们使用List中的header来实现。

我首先写下header部分的内容,并自定义一个组件itemHead:
@Builder func itemHead(text:String) {Row{Text(text).fontSize(15).backgroundColor(Color.WHITE).padding(10)Image(@r(app.media.righticon)).height(18).width(18).objectFit(ImageFit.Contain).margin(left:-5)}.width(100.percent).height(35).alignItems(VerticalAlign.Center)
}
在List中使用这个组件,并传入参数,就是店铺的名字:
List(space:12) {ListItemGroup(ListItemGroupParams(header:{=>bind(this.itemHead,this)('幽蓝旗舰店')})){})
}
然后就是列表内容部分,循环列表内容我们只看其中一个就行了。
同样先把它简单的分析一下,大家可以把它分为两部分或者三部分,拆分开来就会比较简单了。
要注意的是这部分内容需要横向占满整个屏幕,我们同样可以使用layoutWeight来实现。
下面为大家贴上列表内容加上循环遍历的实现代码。仓颉Foreach写法比较不同,需要慢慢习惯:
ForEach(this.carList,itemGeneratorFunc:{item:CarItem, index: Int64 => ListItem {Row(8){Image(@r(app.media.unselect)).width(17).height(17)Image(item.getCover()).width(90).height(90).borderRadius(6)Column {Column(5){Text(item.getName()).fontSize(16).fontColor(Color.BLACK)Text('天蓝色,XL(180)').fontSize(14).fontColor(Color.GRAY).padding(4).backgroundColor(Color(241, 241, 241, alpha: 1.0)).borderRadius(4)}.alignItems(HorizontalAlign.Start)Row {Row{Text('¥').fontColor(Color.RED).fontSize(13)Text(item.getPrice()).fontSize(18).fontColor(Color.RED).fontWeight(FontWeight.Bold)}.alignItems(VerticalAlign.Bottom)Row (6){Text('-').fontColor(Color(74, 74, 74, alpha: 1.0)).fontSize(16)Text(item.getCount().toString()).fontSize(14).fontColor(Color.BLACK).padding(4).backgroundColor(Color(241, 241, 241, alpha: 1.0)).textAlign(TextAlign.Center).width(40).height(28).borderRadius(6)Text('+').fontColor(Color(74, 74, 74, alpha: 1.0)).fontSize(16)}.alignItems(VerticalAlign.Center)}.alignItems(VerticalAlign.Center).justifyContent(FlexAlign.SpaceBetween).width(100.percent)}.layoutWeight(1).alignItems(HorizontalAlign.Start).height(90).justifyContent(FlexAlign.SpaceBetween)}.width(100.percent).height(110)}})结算栏
相比购物车列表,结算栏的内容就比较简单了,使用几个Row容器就能实现:
Row(6){Row(){Text('合计').fontSize(13).fontColor(Color.BLACK)Text('¥').fontColor(Color.RED).fontSize(13).margin(left:5)Text('0').fontSize(18).fontColor(Color.RED).fontWeight(FontWeight.Bold)}.alignItems(VerticalAlign.Bottom)Text('结算').fontColor(Color.WHITE).backgroundColor(Color.RED).width(100).height(38).borderRadius(6).textAlign(TextAlign.Center)}以上就是购物车页面开发的内容分享,感谢阅读。#HarmonyOS语言##仓颉##购物#


)


--Java版)
)


)
_Vue.js循环语句用法:列表渲染)
动态监控系统监控网络状态)