目录
- 类委托
- 属性委托
- 简单的实现属性委托
- Kotlin标准库中提供的几个委托
- 延迟属性Lazy
- Lazy委托参数
- 可观察属性Observable委托
- vetoable委托
- 属性储存在Map中
- 实践方式
- 双击back退出
- Fragment/Activity传参
- ViewBinding和委托
类委托
类委托有点类似于Java中的代理模式
interface Base{fun text()
}//被委托的类(真实的类)
class BaseImpl(val x:String): Base {override fun text() {println(x)}
}//委托类
class Devices(b:Base):Base by bfun main(){var b = BaseImpl("真实的类")Devices(b).text()
}
输出

委托类(代理类)持有真实类的对象,然后委托类(代理类)调用真实类的同名方法,最终真正实现的是方法的是真实类,这其实就是代理模式
kotlin中的委托借助于by关键字,by关键字后面就是被委托类
反编译成java代码
public final class BaseImpl implements Base {@NotNullprivate final String x;public BaseImpl(@NotNull String x) {Intrinsics.checkNotNullParameter(x, "x");super();this.x = x;}@NotNullpublic final String getX() {return this.x;}public void text() {String var1 = this.x;System.out.println(var1);}
}
// Devices.java
package com.example.memoryoptimizing.delegate;import kotlin.Metadata;
import kotlin.jvm.internal.Intrinsics;
import org.jetbrains.annotations.NotNull;@Metadata(mv = {1, 9, 0},k = 1,xi = 48,d1 = {"\u0000\u0012\n\u0002\u0018\u0002\n\u0002\u0018\u0002\n\u0002\b\u0003\n\u0002\u0010\u0002\n\u0000\u0018\u00002\u00020\u0001B\r\u0012\u0006\u0010\u0002\u001a\u00020\u0001¢\u0006\u0002\u0010\u0003J\t\u0010\u0004\u001a\u00020\u0005H\u0096\u0001¨\u0006\u0006"},d2 = {"Lcom/example/memoryoptimizing/delegate/Devices;", "Lcom/example/memoryoptimizing/delegate/Base;", "b", "(Lcom/example/memoryoptimizing/delegate/Base;)V", "text", "", "app_debug"}
)
public final class Devices implements Base {// $FF: synthetic fieldprivate final Base $$delegate_0;public Devices(@NotNull Base b) {Intrinsics.checkNotNullParameter(b, "b");super();this.$$delegate_0 = b;}public void text() {this.$$delegate_0.text();}
}
// BaseImplKt.java
package com.example.memoryoptimizing.delegate;import kotlin.Metadata;@Metadata(mv = {1, 9, 0},k = 2,xi = 48,d1 = {"\u0000\b\n\u0000\n\u0002\u0010\u0002\n\u0000\u001a\u0006\u0010\u0000\u001a\u00020\u0001¨\u0006\u0002"},d2 = {"main", "", "app_debug"}
)
public final class BaseImplKt {public static final void main() {BaseImpl b = new BaseImpl("真实的类");(new Devices((Base)b)).text();}// $FF: synthetic methodpublic static void main(String[] args) {main();}
}
可以看到,Devices持有BaseImpl对象,重写text方法,text方法内部调用的是BaseImpl.text()
属性委托
属性委托和类委托一样,属性委托其实是对属性的set/get方法的委托,把set/get方法委托给setValue/getValue方法,因此被委托类(真实类)需要提供setValue/getValue方法,val属性只需要提供setValue方法
属性委托语法:
val/var <属性名>:<类型> by <表达式>
class B{//委托属性var a : String by Text()
}class Text {operator fun getValue(thisRef: Any?, property: KProperty<*>): String {return "属性拥有者 = $thisRef ,属性的名字 = ‘${property.name}’ 属性的值"}operator fun setValue(thisRef: Any?, property: KProperty<*>, value: String) {println("属性的值 = $value 属性的名字 = '${property.name}' 属性拥有者 = $thisRef")}
}fun main(){var b = B()println(b.a)b.a = "ahaha"
}
输出
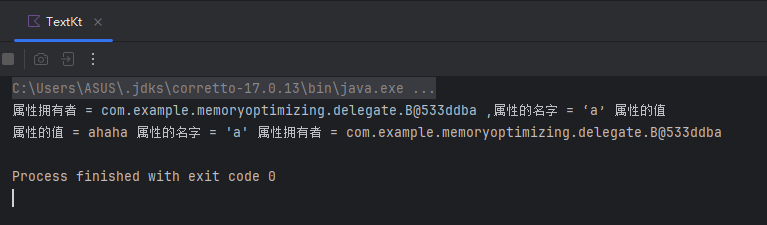
属性a委托给了Text,而且Text类中有setValue和getValue,所有当我们调用属性a的set/get方法时候,会委托到Text的setValue/getValue。
thisRef:属性的拥有者
property:对属性的描述,是KProperty<*>类型或者父类
value:属性的值
反编译成Java代码
public final class B {// $FF: synthetic fieldstatic final KProperty[] $$delegatedProperties;@NotNullprivate final Text a$delegate = new Text();@NotNullpublic final String getA() {return this.a$delegate.getValue(this, $$delegatedProperties[0]);}public final void setA(@NotNull String var1) {Intrinsics.checkNotNullParameter(var1, "<set-?>");this.a$delegate.setValue(this, $$delegatedProperties[0], var1);}static {KProperty[] var0 = new KProperty[]{Reflection.mutableProperty1((MutablePropertyReference1)(new MutablePropertyReference1Impl(B.class, "a", "getA()Ljava/lang/String;", 0)))};$$delegatedProperties = var0;}
}
// Text.java
package com.example.memoryoptimizing.delegate;import kotlin.Metadata;
import kotlin.jvm.internal.Intrinsics;
import kotlin.reflect.KProperty;
import org.jetbrains.annotations.NotNull;
import org.jetbrains.annotations.Nullable;@Metadata(mv = {1, 9, 0},k = 1,xi = 48,d1 = {"\u0000\"\n\u0002\u0018\u0002\n\u0002\u0010\u0000\n\u0002\b\u0002\n\u0002\u0010\u000e\n\u0002\b\u0002\n\u0002\u0018\u0002\n\u0000\n\u0002\u0010\u0002\n\u0002\b\u0002\u0018\u00002\u00020\u0001B\u0005¢\u0006\u0002\u0010\u0002J\u001f\u0010\u0003\u001a\u00020\u00042\b\u0010\u0005\u001a\u0004\u0018\u00010\u00012\n\u0010\u0006\u001a\u0006\u0012\u0002\b\u00030\u0007H\u0086\u0002J'\u0010\b\u001a\u00020\t2\b\u0010\u0005\u001a\u0004\u0018\u00010\u00012\n\u0010\u0006\u001a\u0006\u0012\u0002\b\u00030\u00072\u0006\u0010\n\u001a\u00020\u0004H\u0086\u0002¨\u0006\u000b"},d2 = {"Lcom/example/memoryoptimizing/delegate/Text;", "", "()V", "getValue", "", "thisRef", "property", "Lkotlin/reflect/KProperty;", "setValue", "", "value", "app_debug"}
)
public final class Text {@NotNullpublic final String getValue(@Nullable Object thisRef, @NotNull KProperty property) {Intrinsics.checkNotNullParameter(property, "property");return "属性拥有者 = " + thisRef + " ,属性的名字 = ‘" + property.getName() + "’ 属性的值";}public final void setValue(@Nullable Object thisRef, @NotNull KProperty property, @NotNull String value) {Intrinsics.checkNotNullParameter(property, "property");Intrinsics.checkNotNullParameter(value, "value");String var4 = "属性的值 = " + value + " 属性的名字 = '" + property.getName() + "' 属性拥有者 = " + thisRef;System.out.println(var4);}
}
// TextKt.java
package com.example.memoryoptimizing.delegate;import kotlin.Metadata;@Metadata(mv = {1, 9, 0},k = 2,xi = 48,d1 = {"\u0000\b\n\u0000\n\u0002\u0010\u0002\n\u0000\u001a\u0006\u0010\u0000\u001a\u00020\u0001¨\u0006\u0002"},d2 = {"main", "", "app_debug"}
)
public final class TextKt {public static final void main() {B b = new B();String var1 = b.getA();System.out.println(var1);b.setA("ahaha");}// $FF: synthetic methodpublic static void main(String[] args) {main();}
}
可以看到B类持有Text对象,当调用B.get()方法,内部调用了Text.getValue(),B中创建了KProperty来保存属性的各种参数。
简单的实现属性委托
每次实现委托都要写getValue/setValue方法,相对来说比较麻烦,Kotlin也提供了接口,方便我们重写这些方法,ReadOnlyProperty和ReadWriterProperty
public fun interface ReadOnlyProperty<in T, out V> {/*** Returns the value of the property for the given object.* @param thisRef the object for which the value is requested.* @param property the metadata for the property.* @return the property value.*/public operator fun getValue(thisRef: T, property: KProperty<*>): V
}/*** Base interface that can be used for implementing property delegates of read-write properties.** This is provided only for convenience; you don't have to extend this interface* as long as your property delegate has methods with the same signatures.** @param T the type of object which owns the delegated property.* @param V the type of the property value.*/
public interface ReadWriteProperty<in T, V> : ReadOnlyProperty<T, V> {/*** Returns the value of the property for the given object.* @param thisRef the object for which the value is requested.* @param property the metadata for the property.* @return the property value.*/public override operator fun getValue(thisRef: T, property: KProperty<*>): V/*** Sets the value of the property for the given object.* @param thisRef the object for which the value is requested.* @param property the metadata for the property.* @param value the value to set.*/public operator fun setValue(thisRef: T, property: KProperty<*>, value: V)
}
被委托类只需要实现接口重写方法就行,val继承ReadOnlyProperty
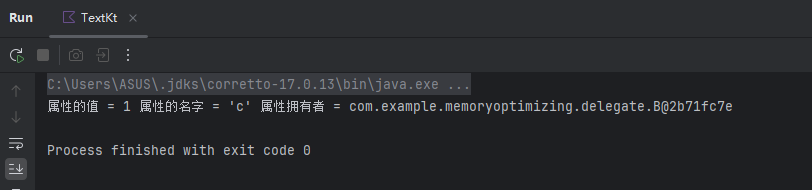
class Text1:ReadOnlyProperty<Any,String>{override fun getValue(thisRef: Any, property: KProperty<*>): String {return "属性拥有者 = $thisRef ,属性的名字 = ‘${property.name}’ 属性的值"}
}class Text2: ReadWriteProperty<Any,String>{override fun getValue(thisRef: Any, property: KProperty<*>): String {return "属性拥有者 = $thisRef ,属性的名字 = ‘${property.name}’ 属性的值"}override fun setValue(thisRef: Any, property: KProperty<*>, value: String) {println("属性的值 = $value 属性的名字 = '${property.name}' 属性拥有者 = $thisRef")}
}
class B{val b :String by Text1()var c : String by Text2()
}
fun main(){var b = B()b.c = "1"
}
Kotlin标准库中提供的几个委托
- 延迟属性(lazy properties):其值只在访问时计算
- 可观察属性(observable properties):监听器会收到此属性的变更通知
- 把多个属性映射到Map中,而不存在单个字段
延迟属性Lazy
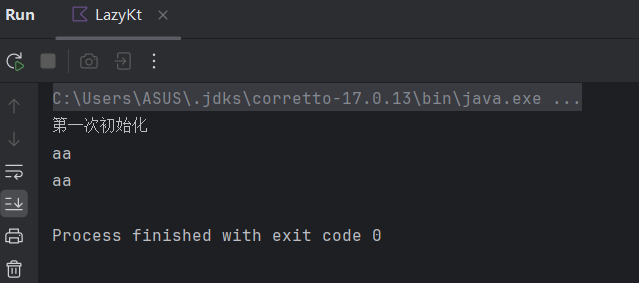
lazy()接收一个lambda,返回Lazy实例,返回的实例可以作为实现延迟属性的委托,仅在第一次调用属性进行初始化
class Lazy{val name:String by lazy(LazyThreadSafetyMode.SYNCHRONIZED){println("第一次初始化")"aa"}
}fun main(){var lazy = Lazy()println(lazy.name)println(lazy.name)
}
反编译Java代码
public final class Lazy {@NotNullprivate final kotlin.Lazy name$delegate;public Lazy() {this.name$delegate = kotlin.LazyKt.lazy( (Function0)null.INSTANCE);}@NotNullpublic final String getName() {kotlin.Lazy var1 = this.name$delegate;Object var2 = null;return (String)var1.getValue();}
}
// LazyKt.java
package com.example.memoryoptimizing.delegate;import kotlin.Metadata;@Metadata(mv = {1, 9, 0},k = 2,xi = 48,d1 = {"\u0000\b\n\u0000\n\u0002\u0010\u0002\n\u0000\u001a\u0006\u0010\u0000\u001a\u00020\u0001¨\u0006\u0002"},d2 = {"main", "", "app_debug"}
)
public final class LazyKt {public static final void main() {Lazy lazy = new Lazy();String var1 = lazy.getName();System.out.println(var1);var1 = lazy.getName();System.out.println(var1);}// $FF: synthetic methodpublic static void main(String[] args) {main();}
}
发现Lazy再初始化时生成了name $ delegate,变量是Kotlin.Lazy类型的,而getName()方法返回的其实就是name $ delegate.getValue()
name $ delegate是由kotlin.LazyKt.lazy (Function0)null.INSTANCE);生成的,可以看一下源码
public actual fun <T> lazy(initializer: () -> T): Lazy<T> = SynchronizedLazyImpl(initializer)
最终是由SynchronizedLazyImpl生成
private class SynchronizedLazyImpl<out T>(initializer: () -> T, lock: Any? = null) : Lazy<T>, Serializable {private var initializer: (() -> T)? = initializer@Volatile private var _value: Any? = UNINITIALIZED_VALUE// final field is required to enable safe publication of constructed instanceprivate val lock = lock ?: thisoverride val value: Tget() {val _v1 = _valueif (_v1 !== UNINITIALIZED_VALUE) {@Suppress("UNCHECKED_CAST")return _v1 as T}return synchronized(lock) {val _v2 = _valueif (_v2 !== UNINITIALIZED_VALUE) {@Suppress("UNCHECKED_CAST") (_v2 as T)} else {val typedValue = initializer!!()_value = typedValueinitializer = nulltypedValue}}}override fun isInitialized(): Boolean = _value !== UNINITIALIZED_VALUEoverride fun toString(): String = if (isInitialized()) value.toString() else "Lazy value not initialized yet."private fun writeReplace(): Any = InitializedLazyImpl(value)
}
可以直接看value的get方法,如果_v1 !== UNINITIALIZED_VALUE则表明已经初始化过了,就直接返回value,否则表明没有初始化过,调用initializer方法,也就是lazy的lambda表达式
Lazy委托参数
public enum class LazyThreadSafetyMode {/*** Locks are used to ensure that only a single thread can initialize the [Lazy] instance.*/SYNCHRONIZED,/*** Initializer function can be called several times on concurrent access to uninitialized [Lazy] instance value,* but only the first returned value will be used as the value of [Lazy] instance.*/PUBLICATION,/*** No locks are used to synchronize an access to the [Lazy] instance value; if the instance is accessed from multiple threads, its behavior is undefined.** This mode should not be used unless the [Lazy] instance is guaranteed never to be initialized from more than one thread.*/NONE,
}
- SYNCHRONIZED:添加同步锁,使lazy延迟初始化线程安全
- PUBLICATION:初始化的lambda表达式,可以在同一时间多次调用,但是只有第一次的返回值作为初始化值
- NONE:没有同步锁,非线程安全
使用
    val name :String by lazy(LazyThreadSafetyMode.SYNCHRONIZED) {println("第一次调用初始化")"aa" }
}
可观察属性Observable委托
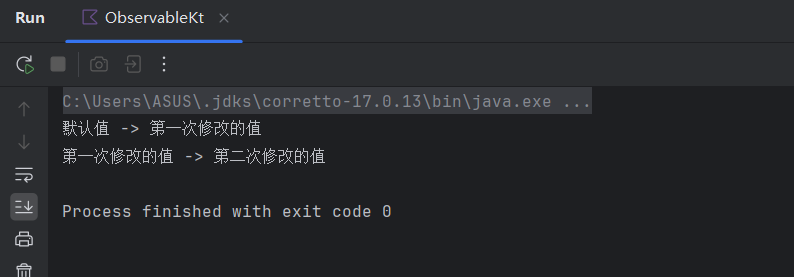
可以观察一个属性的变化过程
class Observable {var a:String by Delegates.observable("默认值"){property, oldValue, newValue ->println("${oldValue} -> ${newValue}")}}fun main(){var observable = Observable()observable.a = "第一次修改的值"observable.a = "第二次修改的值"
}
vetoable委托
vetoable和Observable一样,可以观察属性的变化,不同的是vetoable可以决定是否使用新值
class Vetoable {var age:Int by Delegates.vetoable(0){property, oldValue, newValue ->println("oldValue = $oldValue -> oldValue = $newValue" )newValue > oldValue}}fun main() {var c = Vetoable()c.age = 5println(c.age)c.age = 10println(c.age)c.age = 8println(c.age)c.age = 20println(c.age)
}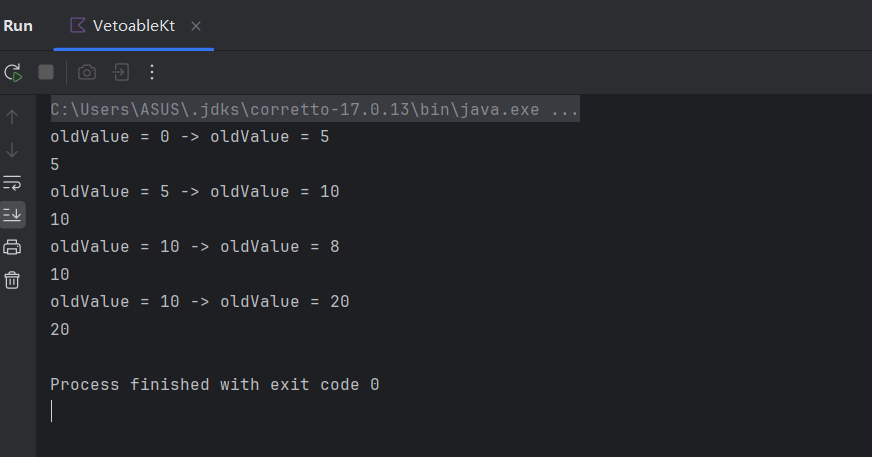
可以看到,当新值小于旧值,就会不生效
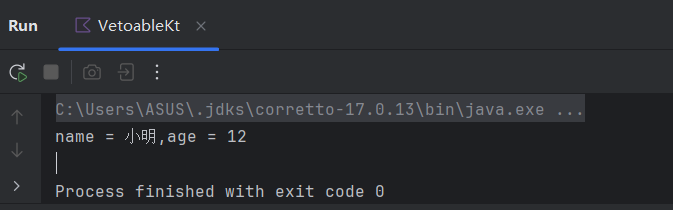
属性储存在Map中
class D(val map:Map<String,Any?>){val name:String by mapval age:Int by map
}fun main() {var d = D(mapOf("name" to "小明","age" to 12))println("name = ${d.name},age = ${d.age}")
}
实践方式
双击back退出
private var backPressedTime by Delegates.observable(0L){pre,old,new ->//2次的时间间隔小于2秒就退出了if(new - old < 2000){finish()}else{Toast.makeText(this,"再按返回键退出",Toast.LENGTH_LONG)}}override fun onBackPressed() {super.onBackPressed()backPressedTime = System.currentTimeMillis()}
Fragment/Activity传参
在项目中经常需要给Fragment/Activity传递参数
模版代码
private const val ARG_PARAM1 = "param1"
private const val ARG_PARAM2 = "param2"class DelegateFragment : Fragment() {// TODO: Rename and change types of parametersprivate var param1: String? = nullprivate var param2: String? = nulloverride fun onCreate(savedInstanceState: Bundle?) {super.onCreate(savedInstanceState)arguments?.let {param1 = it.getString(ARG_PARAM1)param2 = it.getString(ARG_PARAM2)}}override fun onCreateView(inflater: LayoutInflater, container: ViewGroup?,savedInstanceState: Bundle?): View? {// Inflate the layout for this fragmentreturn inflater.inflate(R.layout.fragment_delegate, container, false)}companion object {/*** Use this factory method to create a new instance of* this fragment using the provided parameters.** @param param1 Parameter 1.* @param param2 Parameter 2.* @return A new instance of fragment DelegateFragment.*/// TODO: Rename and change types and number of parameters@JvmStaticfun newInstance(param1: String, param2: String) =DelegateFragment().apply {arguments = Bundle().apply {putString(ARG_PARAM1, param1)putString(ARG_PARAM2, param2)}}}
}
我们可以把参数赋值和获取的代码抽取委托类,然后把param1和param2声明为委托属性
修改后的Fragment代码
class DelegateFragment : Fragment() {private var param1: String? by argumentNullable()private var param2: String by argument("1")override fun onCreate(savedInstanceState: Bundle?) {super.onCreate(savedInstanceState)Log.d("DelegateFragment","param1 ${param1} param2 ${param2}")}override fun onCreateView(inflater: LayoutInflater, container: ViewGroup?,savedInstanceState: Bundle?): View? {// Inflate the layout for this fragmentreturn inflater.inflate(R.layout.fragment_delegate, container, false)}companion object {/*** Use this factory method to create a new instance of* this fragment using the provided parameters.** @param param1 Parameter 1.* @param param2 Parameter 2.* @return A new instance of fragment DelegateFragment.*/// TODO: Rename and change types and number of parameters@JvmStaticfun newInstance(param1: String, param2: String) =DelegateFragment().apply {this.param1 = param1this.param2 = param2}}
}
委托类
import android.os.Bundle
import android.os.Parcelable
import android.util.Log
import androidx.fragment.app.Fragment
import java.io.Serializable
import kotlin.properties.ReadWriteProperty
import kotlin.reflect.KPropertyfun <T> Fragment.argumentNullable() = FragmentArgumentPropertyNullable<T>()fun <T> Fragment.argument(defaultValue:T? = null) = FragmentArgumentProperty<T>(defaultValue)class FragmentArgumentPropertyNullable<T> : ReadWriteProperty<Fragment,T?>{override fun getValue(thisRef: Fragment, property: KProperty<*>): T? {return thisRef.arguments?.getValue(property.name)}override fun setValue(thisRef: Fragment, property: KProperty<*>, value: T?) {Log.d("DelegateFragment","property.name ${property.name} thisRef.arguments ${thisRef.arguments}")val arguments = thisRef.arguments?:Bundle().also {thisRef.arguments = it}if(arguments.containsKey(property.name)){return}arguments[property.name] = value}
}class FragmentArgumentProperty<T> (private val defaultValue: T? = null): ReadWriteProperty<Fragment,T>{override fun getValue(thisRef: Fragment, property: KProperty<*>): T {return thisRef.arguments?.getValue(property.name) as? T?:defaultValue?:throw IllegalStateException("Property ${property.name} could not be read")}override fun setValue(thisRef: Fragment, property: KProperty<*>, value: T) {val arguments = thisRef.arguments?:Bundle().also {thisRef.arguments  = it}if(arguments.containsKey(property.name)){return}arguments[property.name] = value}}fun <T> Bundle.getValue(key:String):T?{return get(key) as T?
}//操作符重载a[i] = b	set()	a.set(i, b)
operator fun <T> Bundle.set(key: String, value: T?) {when (value) {is Boolean -> putBoolean(key, value)is Byte -> putByte(key, value)is Char -> putChar(key, value)is Short -> putShort(key, value)is Int -> putInt(key, value)is Long -> putLong(key, value)is Float -> putFloat(key, value)is Double -> putDouble(key, value)is String? -> putString(key, value)is CharSequence? -> putCharSequence(key, value)is Serializable? -> putSerializable(key, value) // also ArrayListis Parcelable? -> putParcelable(key, value)is Bundle? -> putBundle(key, value)is BooleanArray? -> putBooleanArray(key, value)is ByteArray? -> putByteArray(key, value)is CharArray? -> putCharArray(key, value)is ShortArray? -> putShortArray(key, value)is IntArray? -> putIntArray(key, value)is LongArray? -> putLongArray(key, value)is FloatArray? -> putFloatArray(key, value)is DoubleArray? -> putDoubleArray(key, value)is ArrayList<*>? -> throw IllegalStateException("ArrayList<*> $key is not supported")is Array<*>? -> throw IllegalStateException("Array<*> $key is not supported")else -> throw IllegalStateException("Type $key is not supported")}
}
相比于常规的写法,使用属性委托优势会相对明显,不需要定义Key字符串,而是使用变量名作为Key。不再需要编写向Argument设置参数和读取参数的代码,声明可空参数时也可以声明默认值。
ViewBinding和委托
在Fragment中使用
class DelegateFragment : Fragment(R.layout.fragment_delegate) {private var _binding: FragmentDelegateBinding? = nullprivate val binding get() = _binding!!override fun onViewCreated(view: View, savedInstanceState: Bundle?) {super.onViewCreated(view, savedInstanceState)_binding = FragmentDelegateBinding.bind(view)binding.tvName.text = "This is Hello World"}override fun onDestroyView() {super.onDestroyView()//置空,防止内存泄漏_binding = null}}
ViewBinding绑定类的源码,反编译如下:
public final class FragmentDelegateBinding implements ViewBinding {private final ConstraintLayout rootView;public final TextView tvDisplay;private FragmentDelegateBinding(ConstraintLayout paramConstraintLayout1, TextView paramTextView)this.rootView = paramConstraintLayout1;this.tvDisplay = paramTextView;}public static FragmentDelegateBindingbind(View paramView) {TextView localTextView = (TextView)paramView.findViewById(2131165363);if (localTextView != null) {return new ActivityMainBinding((ConstraintLayout)paramView, localTextView);}else {paramView = "tvDisplay";}throw new NullPointerException("Missing required view with ID: ".concat(paramView));}public static FragmentDelegateBinding inflate(LayoutInflater paramLayoutInflater) {return inflate(paramLayoutInflater, null, false);}public static FragmentDelegateBinding inflate(LayoutInflater paramLayoutInflater, ViewGroup paramViewGroup, boolean paramBoolean) {paramLayoutInflater = paramLayoutInflater.inflate(2131361821, paramViewGroup, false);if (paramBoolean) {paramViewGroup.addView(paramLayoutInflater);}return bind(paramLayoutInflater);}public ConstraintLayout getRoot() {return this.rootView;}
}
通过委托的方式进行优化
- 委托ViewBinding.bind()的调用 -> 反射
- 委托destroy时binding = null的调用 -> 监听Fragment视图生命周期
- 想要binding属性声明为非空不可变变量val -> 属性委托ReadOnlyProperty<F,V>
编写委托类,详细内容可看注释
package com.example.memoryoptimizing.delegateimport android.os.Handler
import android.os.Looper
import android.util.Log
import android.view.View
import androidx.fragment.app.Fragment
import androidx.lifecycle.Lifecycle
import androidx.lifecycle.LifecycleObserver
import androidx.lifecycle.LifecycleOwner
import androidx.viewbinding.ViewBinding
import kotlin.properties.ReadOnlyProperty
import kotlin.reflect.KProperty//为什么使用inline fun<reified V>,方便直接拿到V::class.java
/*** fun <V> printClass() {*     println(V::class.java) // ❌ 编译错误:Cannot access 'java.lang.Class' for a type parameter V* }* inline fun <reified V> printClass() {*     println(V::class.java) // ✅ 输出如:class kotlin.String* }*///在属性委托中,编译器可以通过属性声明的类型,如 FragmentDelegateBinding)来推断泛型函数中的具体类型参数;
// 而在普通函数调用中,仅凭返回值或赋值目标无法反推出泛型参数的具体类型。
/**
✅ 场景一:属性委托 + reified 泛型函数 ✅ 可以推断
private val binding: FragmentDelegateBinding by viewBindingV1()
❌ 场景二:普通函数调用 ❌ 无法推断
inline fun <reified V> getTypeName(): String {return V::class.java.name
}
val name: String = getTypeName()*/private const val TAG = "ViewBindingProperty"//使用inline fun <reified V>可以在调用泛型函数时省略参数的传递,Kotlin会自动根据泛型类型帮你找到对应的class<T>
public inline fun <reified V:ViewBinding> viewBindingV1() = viewBindingV1(V::class.java)public inline fun <reified T:ViewBinding> viewBindingV1(clazz:Class<T>):FragmentViewBindingProperttV1<Fragment,T>{val bindMethod = clazz.getMethod("bind", View::class.java)return FragmentViewBindingProperttV1{ fragment->/*** 调用静态方法bind(View view),第一个参数为null(因为是静态方法) 第二个参数是View,来自Fragment的requireView()* as T 将结果强制转换为泛型T,即具体的ViewBinding子类(如FragmentDelegateBinding)* FragmentDelegateBinding.bind(Fragment.requireView())*/bindMethod.invoke(null,fragment.requireView()) as T}
}/*** viewBinder 创建绑定类对象*/
class FragmentViewBindingProperttV1<in F:Fragment,out V: ViewBinding>(private val viewBinder:(F) ->V //给定一个 Fragment(或其子类),返回一个对应的 ViewBinding 实例
):ReadOnlyProperty<F,V>{private var viewBinding:V? = nulloverride fun getValue(thisRef: F, property: KProperty<*>): V {//viewBinding不为空说明已经绑定,直接返回viewBinding?.let {return it}//Fragment视图的生命周期val lifecycle = thisRef.viewLifecycleOwner.lifecycle//实例化绑定类对象val viewBinding = viewBinder(thisRef)if(lifecycle.currentState == Lifecycle.State.DESTROYED){Log.w(TAG, "Access to viewBinding after Lifecycle is destroyed or hasn't created yet. " +"The instance of viewBinding will be not cached.")}else{lifecycle.addObserver(ClearOnDestroyLifecycleObserver())this.viewBinding = viewBinding}return viewBinding}fun clear(){viewBinding = null}private inner class ClearOnDestroyLifecycleObserver : LifecycleObserver{private val mainHandler = Handler(Looper.getMainLooper())fun onDestroy(owner:LifecycleOwner){owner.lifecycle.removeObserver(this)mainHandler.post {clear()}}}}
使用例子:
class DelegateFragment : Fragment(R.layout.fragment_delegate) {private val binding : FragmentDelegateBinding by viewBindingV1()override fun onViewCreated(view: View, savedInstanceState: Bundle?) {super.onViewCreated(view, savedInstanceState)binding.tvName.text = "This is Hello World"}}
不使用反射的方式,反射调用bind函数的主要目的是获得一个ViewBinding绑定类对象,我们可以把创建对象的行为交给外部去定义
inline fun <F:Fragment,V:ViewBinding> viewBindingV2(crossinline viewBinder:(View) -> V,//接受一个View,返回Binding实例crossinline viewProvider:(F) -> View = {fragment -> fragment.requireView() //这里的fragment就是F} //接受一个Fragment,返回它的View
) = FragmentViewBindingPropertyV2{ fragment:F ->viewBinder(viewProvider(fragment)) //FragmentDelegateBinding.bind(Fragment.requireView())
}//fragment它是 Kotlin 属性委托机制在访问 binding 属性时自动传入的当前 Fragment 实例class FragmentViewBindingPropertyV2<in F:Fragment , out V: ViewBinding>(private val viewBinder:(F) -> V
):ReadOnlyProperty<F,V>{private var viewBinding: V? = nulloverride fun getValue(thisRef: F, property: KProperty<*>): V {//viewBinding不为空说明已经绑定,直接返回viewBinding?.let {return it}//Fragment视图的生命周期val lifecycle = thisRef.viewLifecycleOwner.lifecycle//实例化绑定类对象val viewBinding = viewBinder(thisRef)if (lifecycle.currentState == Lifecycle.State.DESTROYED) {Log.w(TAG, "Access to viewBinding after Lifecycle is destroyed or hasn't created yet. " +"The instance of viewBinding will be not cached.")} else {lifecycle.addObserver(ClearOnDestroyLifecycleObserver())this.viewBinding = viewBinding}return viewBinding}fun clear() {viewBinding = null}private inner class ClearOnDestroyLifecycleObserver : LifecycleObserver {private val mainHandler = Handler(Looper.getMainLooper())fun onDestroy(owner: LifecycleOwner) {owner.lifecycle.removeObserver(this)mainHandler.post {clear()}}}
}
使用方式
class DelegateFragment : Fragment(R.layout.fragment_delegate) {private val binding : FragmentDelegateBinding by viewBindingV2(FragmentDelegateBinding::bind)override fun onViewCreated(view: View, savedInstanceState: Bundle?) {super.onViewCreated(view, savedInstanceState)binding.tvName.text = "This is Hello World"}}

0603)


的原理推导)


因无法找到头文件导致的结构体成员不自动补全问题。)


第5章析因设计引导5.7节思考题5.7 R语言解题)
